Overview
The Production Planning application allows the user to create production tickets, assign raw materials (not for weft tape, circular weaving raw material, weft tape for webbing tickets and master batches is not required anymore), release the production tickets and schedule production tickets.
Function
When you open the application you can view all tickets available to be scheduled, already scheduled and in production in the grid.
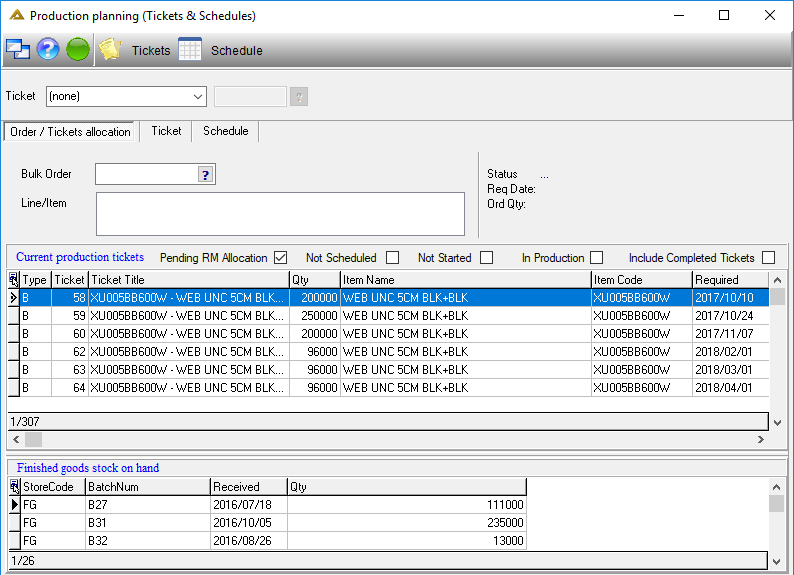
You have the option to include completed tickets by selecting the corresponding tick box - ![]()
Tickets can be created manually should this be required. Tickets are automatically generated from the Bulk Order application. An entire sequence of linked tickets are created in some instances, depending on many factors such as stock on hand. A coated product that is needed for a sales order can for instance create a weaving, extrusion and mixing ticket to generate stock for itself. These tickets will have 'Auto created ticket' in the Route card instructions column in the grid on the Orders/Ticket allocations tab:

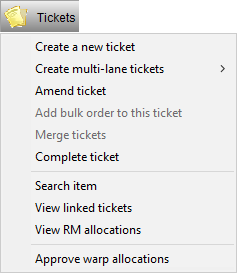
The ![]() button will show the following options:
button will show the following options:
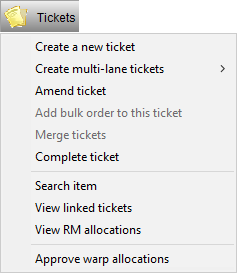
To manually create a ticket, select the 'Create a new ticket' menu item:
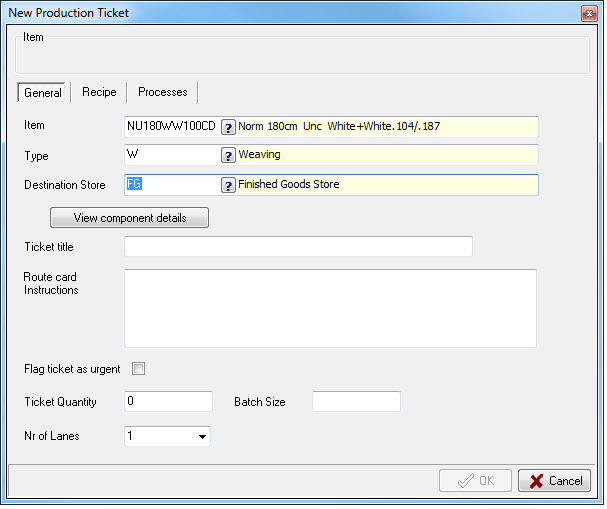
Any type of ticket can be created: Coating, Extrusion, Rewinding, Twisting, Weaving and Warping.
Fill in the detail using the pickers.
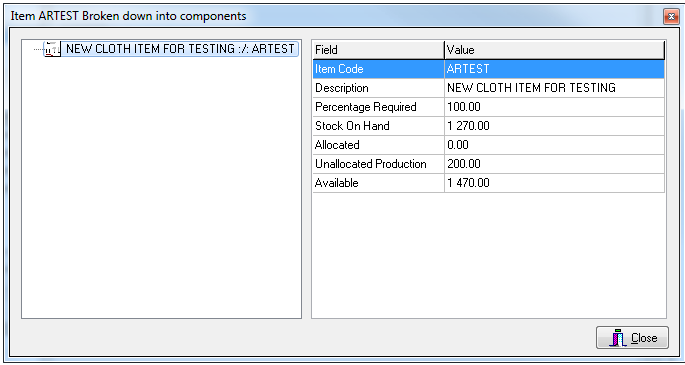
The ![]() button allows you to view the following detail:
button allows you to view the following detail:
Once you have completed the details in the 'General' tab, select the 'Recipe' tab.
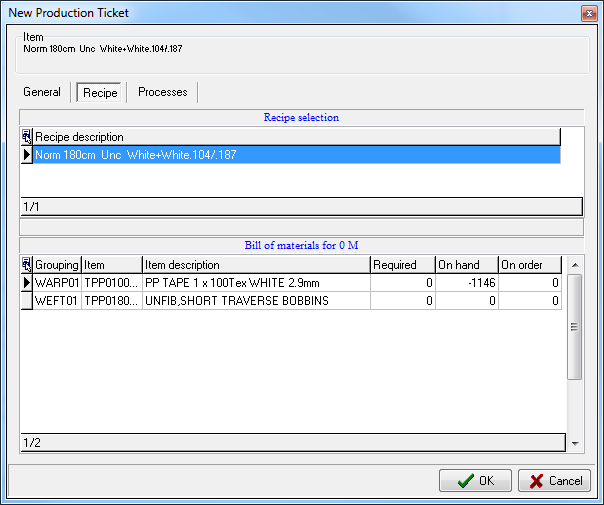
Here you can view all the available recipes for the selected item. Select one to display the Bill of Materials for that recipe in the bottom grid.
The Bill of Materials are set up and maintained in the Product Setup application under Maintenance.
Once raw materials have been issued against a ticket, the Item/Setup recipe cannot be changed.
Once you have completed the details in the 'Recipe' tab click on the 'Processes' tab.
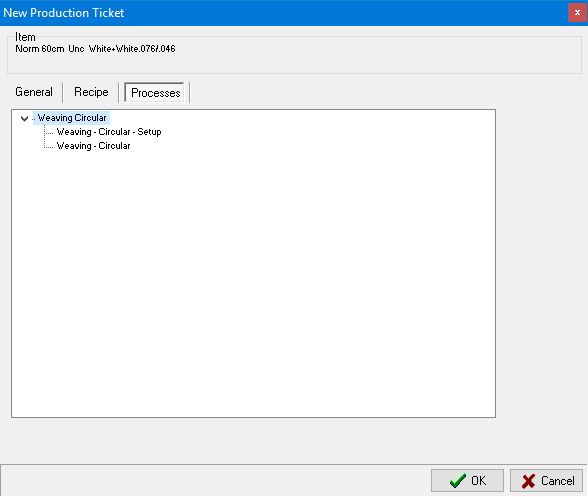
The processes viewed here are also set up and maintained in the Product Setup application.
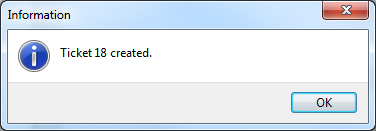
Click on the ![]() button and the ticket will be created.
button and the ticket will be created.
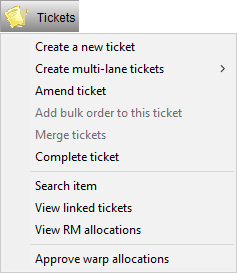
To complete a ticket, select the 'Complete ticket' option:
The following screen will be displayed:
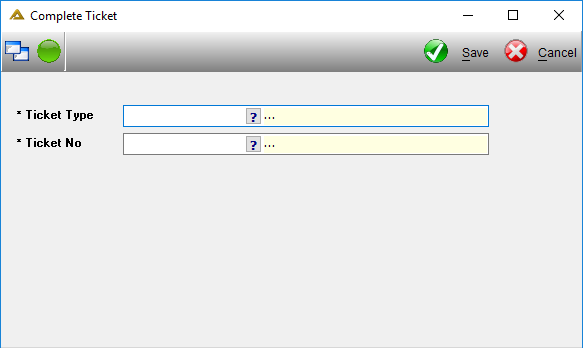
Select the Ticket Type and Ticket Number you wish to complete. After making your selection, click on the ![]() button:
button:
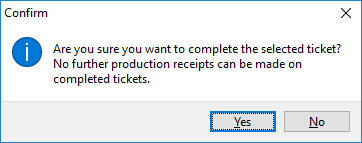
Click on the ![]() button to continue:
button to continue:

All raw materials will be unallocated (issued materials will not be automatically returned), linked purchase orders are completed (for off site processes), schedule and ticket statuses are marked as completed.
To view linked tickets by selecting the 'View linked tickets' menu item:
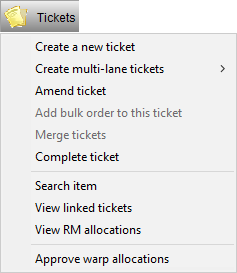
A screen will display the tickets:
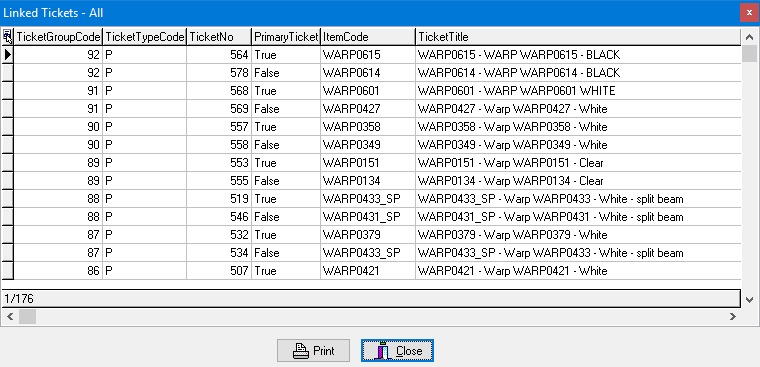
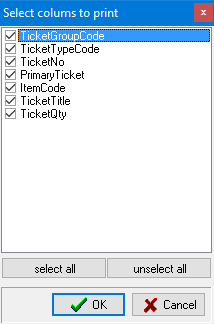
If you click on the ![]() button you will have the option to choose the columns you wish to print:
button you will have the option to choose the columns you wish to print:
A print preview will be generated:
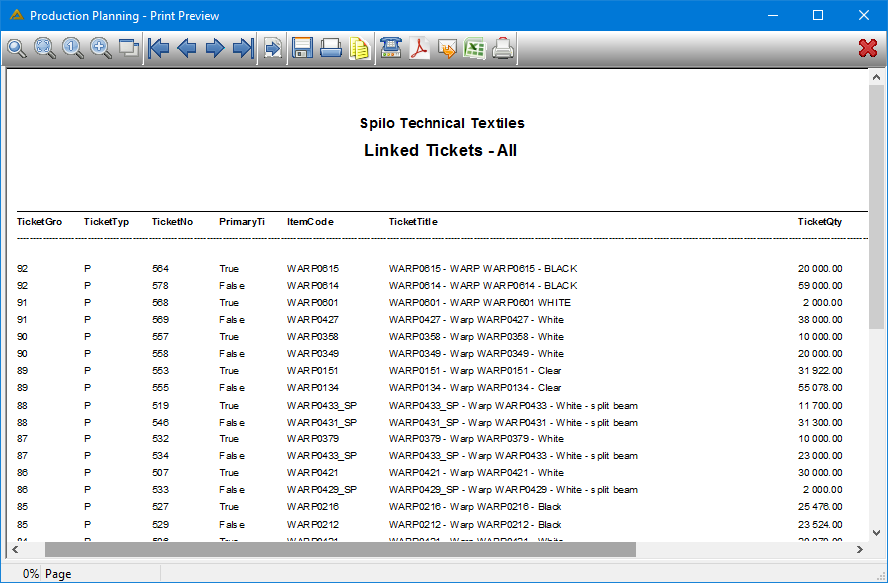
A check is applied to ensure linked tickets are scheduled consecutively.
Raw material can only be allocated to a primary ticket.
Raw material allocated to a secondary ticket cannot be unallocated by editing the secondary ticket (secondary tickets cannot be edited in any way), but only by unallocating the raw material from the primary ticket. All raw material allocations from all secondary tickets will then be unallocated. When you clear allocations all linked ticket allocations will also be removed.
A ticket will appear in the grid as 'To be Scheduled'
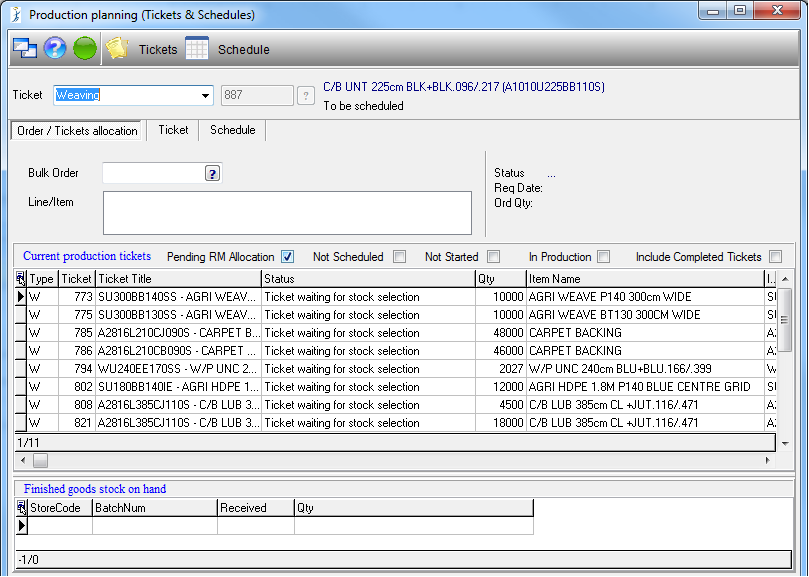
Select the ticket and click on the 'Ticket' tab. Alternatively you can double click on the ticket you wish to edit.
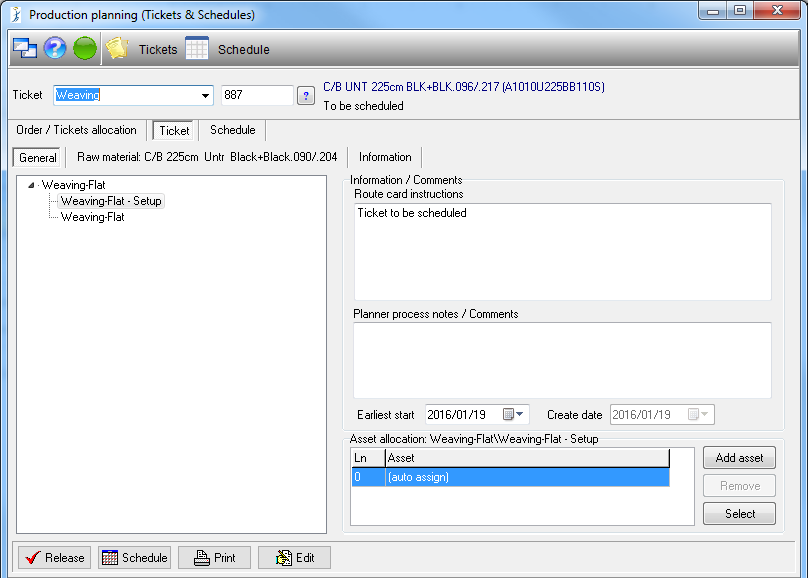
In the 'General' tab you can view the processes. Select the manufacturing sub process to assign specific assets to the ticket. Assets can only be nominated for the manufacturing sub process and not Set up. You can add one or more assets or remove previously added assets.
An asset will be automatically assigned if no asset is selected here.
The ![]() and
and ![]() buttons will update the ticket status and a confirmation message will appear to say when the ticket will be completed and the user can confirm if they want to update the completion date of all linked Stock Orders to this date. The linked tickets that produce the stock for the scheduled ticket will also be scheduled.
buttons will update the ticket status and a confirmation message will appear to say when the ticket will be completed and the user can confirm if they want to update the completion date of all linked Stock Orders to this date. The linked tickets that produce the stock for the scheduled ticket will also be scheduled.
When the ticket is viewed again in the Orders/Tickets tab, the status will be 'Production Scheduled but awaiting raw material issue'.
Select the 'Raw material' tab.
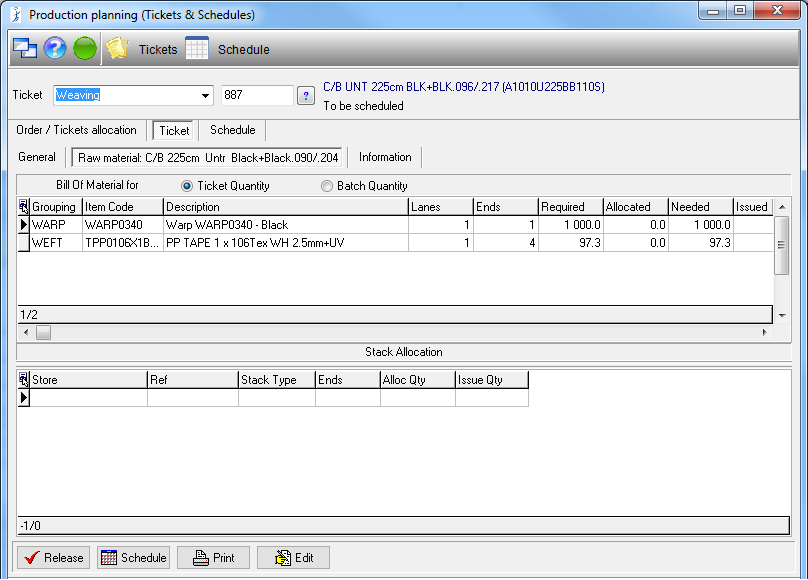
In this tab the raw material is allocated to the ticket. This will then later be issued via the scanners.
You can select the Bill of Materials line and right click or double click to open the 'Stack Allocation edit' window.
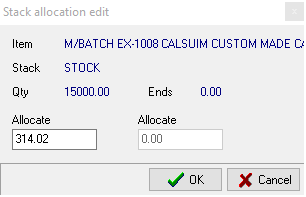
Amend the quantity if necessary and select ![]() . The needed quantity in the RM grid will move to the allocated column.
. The needed quantity in the RM grid will move to the allocated column.
Should the ![]() not activate it means that there are not RM stock for this item. Selecting
not activate it means that there are not RM stock for this item. Selecting ![]() will prompt a message asking the user if he wants to create a purchase requisition with the following forms appearing that needs to be completed.
will prompt a message asking the user if he wants to create a purchase requisition with the following forms appearing that needs to be completed.
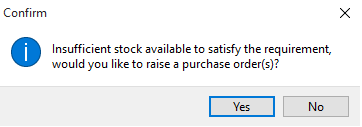
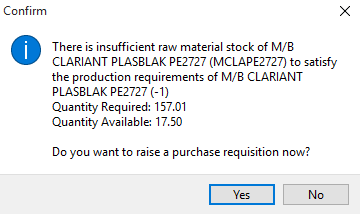
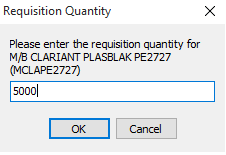
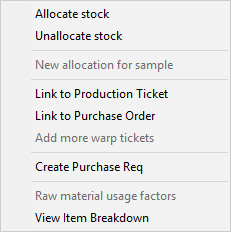
The user can access the same (and other functionality) by right clicking on the Raw material line to either link it to a production ticket for the Raw material item or to create a purchase requisition for items which can't be manufactured by the client but must be bought (example Pellets).
When RM allocation is complete, the source of the RM can be viewed in the stack allocation grid in the bottom part of the screen by clicking on individual RM BOM lines.
When dealing with warping tickets, functionality exists to calculate an estimated number of meters of tape per bobbin allocation. These checks occur when printing a picking slip and when stock is allocated to a ticket for production. This will display estimated quantities of tape that will remain on bobbins after production has been completed, therefore available for utilisation in making more warp beams.
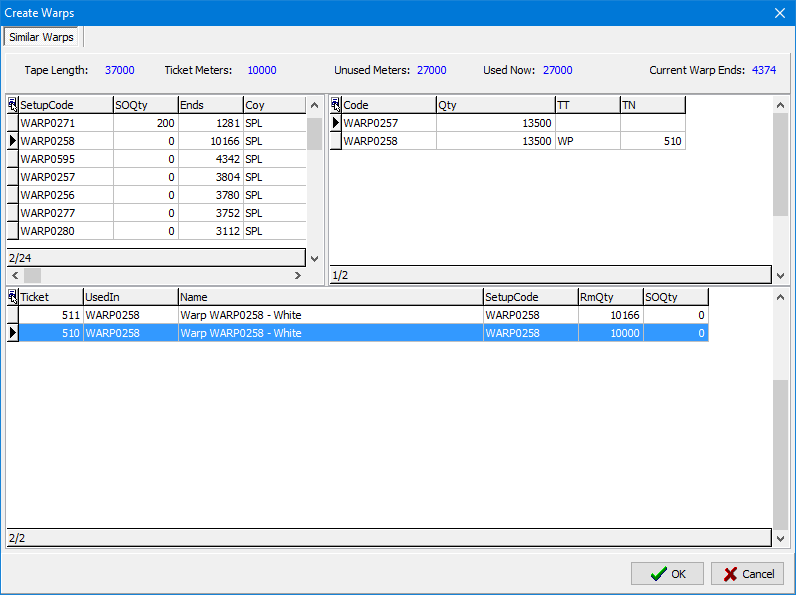
After stock has been allocated in the Production Planning application, you will be able to view the following screen:
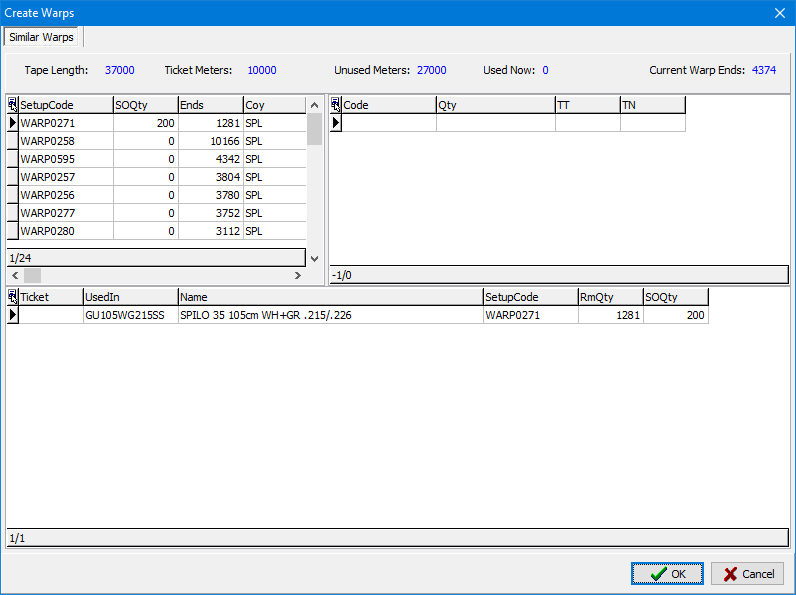
Tape Length: This is a calculation of the average mass of all allocated pallets, with the average bobbin count of those pallets, with the tex of tape in question.
Ticket Meters: This is the total of the tape which will be used by the current ticket.
Unused Meters: This is the amount of meters which still needs to be allocated to other tickets.
Used Now: This will be totalled as you allocate to other tickets.
Current Warp Ends: This is the total amount of ends the primary ticket uses on the creel. This is used as a filter to only show sales orders which will require the same amount of ends or less, for the beams they will require.
The left top grid displays all the sales orders which have outstanding quantities and uses the same warp tape for the finished product as per the bill of materials.
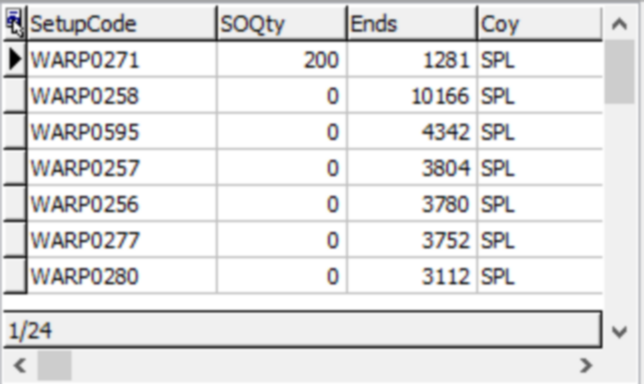
Double-click on this grid (depicted above) to create a new warping ticket for the selected warp code.
When you select a recipe from this grid, the details for the selected warp will be displayed in the bottom grid. If there are any existing warp tickets with no raw material allocated these will be shown in the first column. Select an existing ticket by right clicking on the bottom grid (as seen in the screen shot below).

Irrespective of the option selected, the allocation screen below will be displayed to enter the warp meters to be utilised. Once completed, click on the ![]() button.
button.
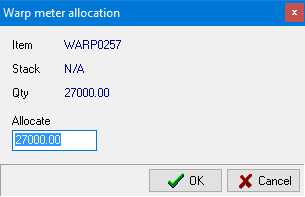
Once you have completed the allocation the tickets created will be displayed in the right top grid:
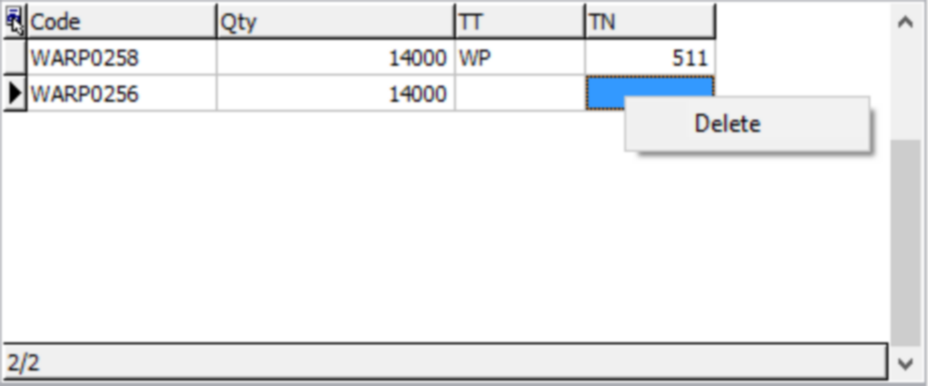
These items can also be removed by right clicking and selecting ‘Delete’:
Once completed click on the ![]() button. If the unused meters exceed 500 meters, the warping ticket(s) will be sent to a supervisor to approve creel unpacking.
button. If the unused meters exceed 500 meters, the warping ticket(s) will be sent to a supervisor to approve creel unpacking.
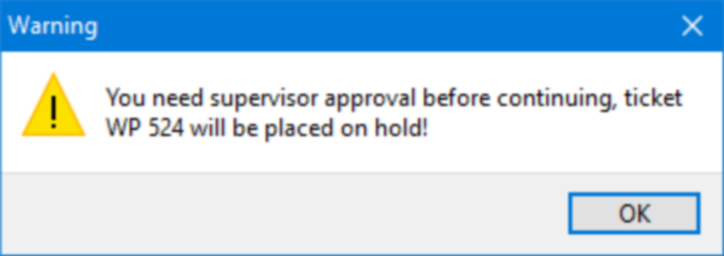
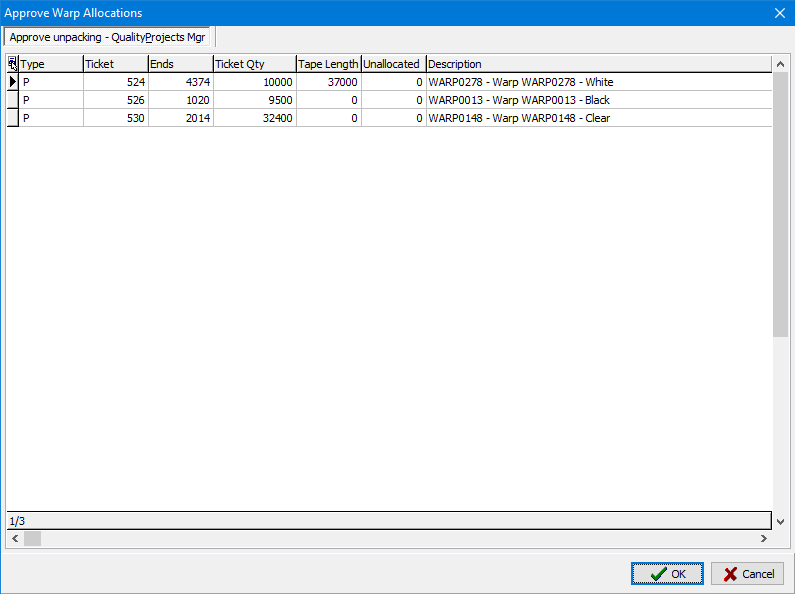
Items awaiting approval can be viewed by the originator:
A screen will be opened where approvals can be viewed. If the logged in user does not have access to approve warps, nothing can be actioned. Supervisor approval rights access are set up per responsibility code.
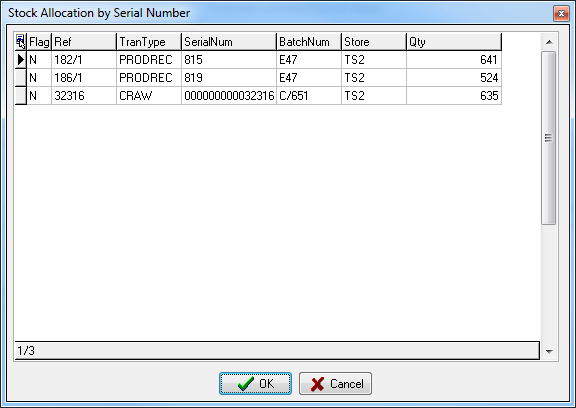
For self-manufactured raw material specific stacks can be chosen when raw material allocation is done.
Next click on the 'Schedule' tab.
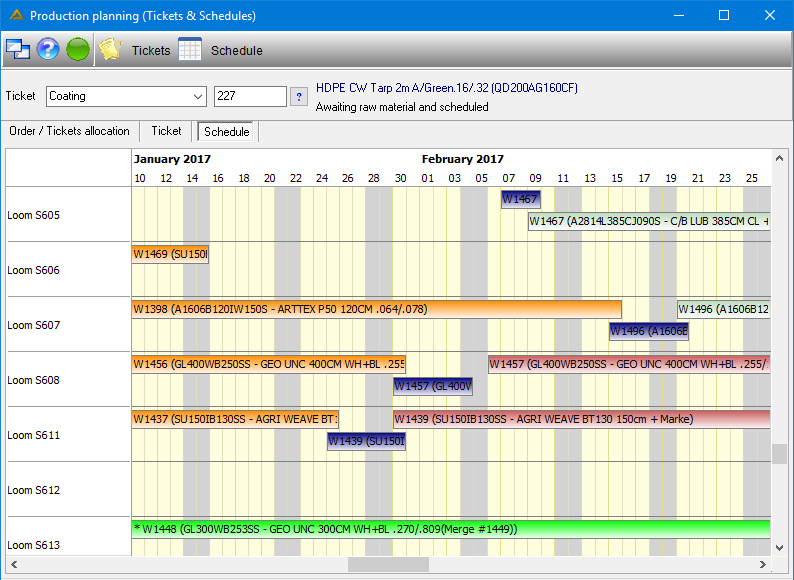
Here you can view a schematic of where in the month the ticket is scheduled as well as which asset/machine it is scheduled for.
When you edit a ticket, this schedule will be updated with the new information for the ticket or when you close a ticket subsequent tickets will be moved earlier.
Weekends are excluded when scheduling tickets unless specified otherwise.
When an asset block is applied using the Asset Capacity Maintenance application the dates blocked out will be blank and scheduled tickets will continue again after the blocked date range has been depleted.

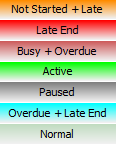
Paused tickets will be displayed in gray: ![]() .
.
Tickets that go past their promise date, even if this promise date is in the future still, will turn red.
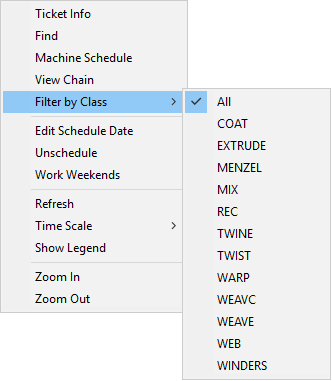
Right click on the grid for more options:
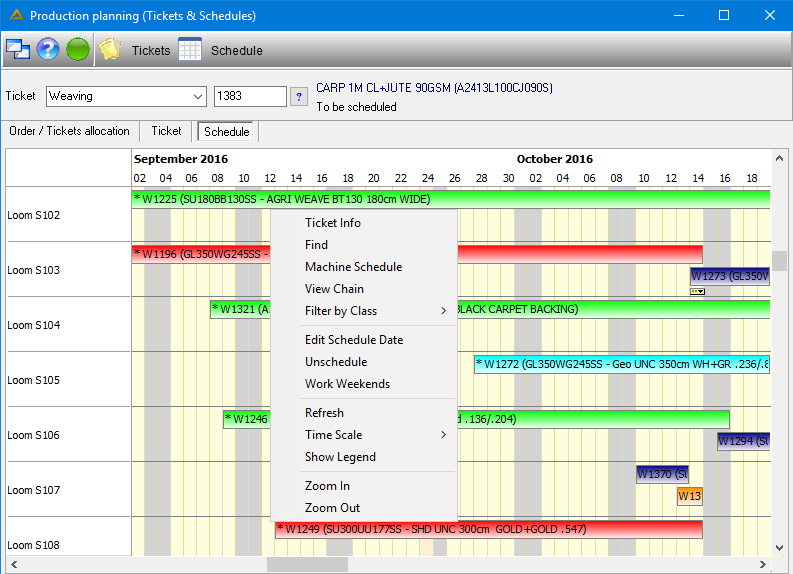
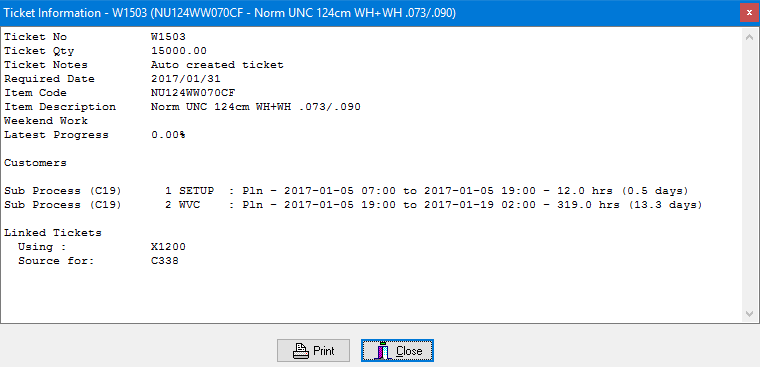
Ticket info - Shows all the information relating to the selected ticket.
The user can add multiple finishing tickets to the same asset at the same time using the same raw material.
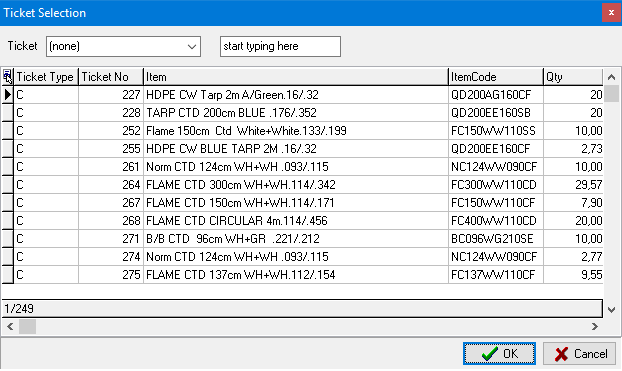
Find - Allows you to search for a specific ticket.
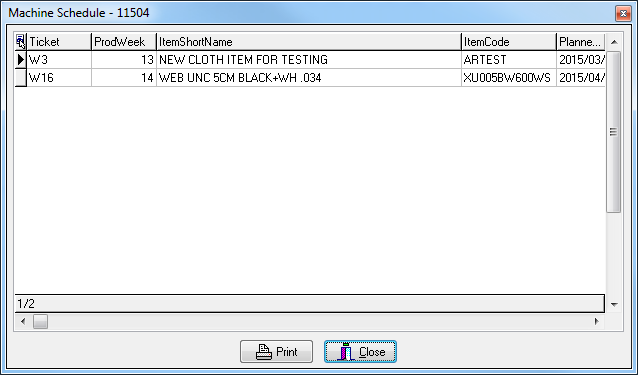
Machine Schedule - Shows the schedule for the machine related to the ticket.
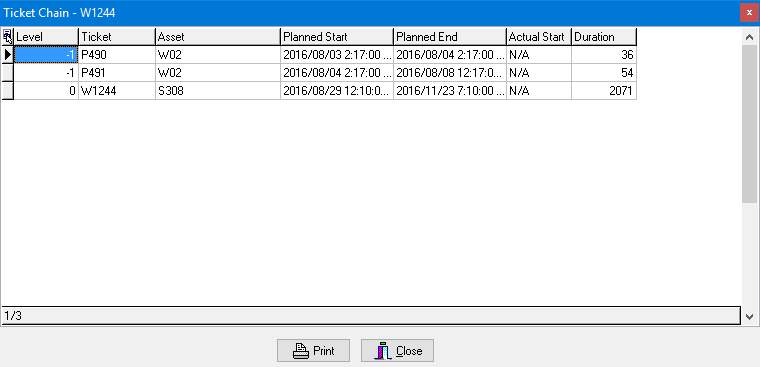
View Chain - When you click on a scheduled ticket you can view a screen with the ticket chain.
Filter by class - Allows you to filter the chart according to the following options:
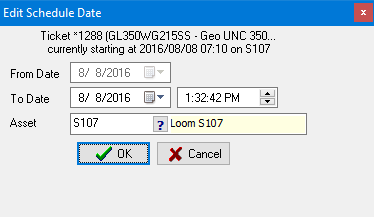
Edit Schedule Date - This allows the user to change the date that the ticket is scheduled to start. After selecting the ![]() button, the ticket will be reschedueld as will the subsequent tickets on the same asset as well as tickets linked to the edited ticket. A ticket cannot be scheduled to start on a weekend unless the 'Work Weekends' option is ticked.
button, the ticket will be reschedueld as will the subsequent tickets on the same asset as well as tickets linked to the edited ticket. A ticket cannot be scheduled to start on a weekend unless the 'Work Weekends' option is ticked.
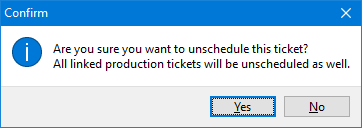
Unschedule - This option allows you to unschedule the selected ticket and remove it from the view. Upon confirmation the ticket will be unscheduled.
Work Weekends - If this is ticked the ticket schedule date can be edited to fall on a weekend. If ticked the duration of the ticket will be shortened by 48 hours for each weekend the ticket stretches over. The bar representing the ticket on the view will shorten. If it is unticked 48 hours for each weekend will be added back and the bar will lengthen. This will influence subsequent tickets on the same asset.
Refresh - This will refresh the data displayed to ensure the latest scheduled tickets are included.
Time Scale - Allows you to edit the time scale shown in the schematic.
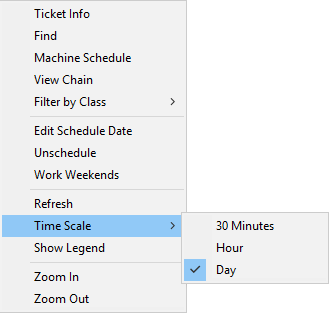
Show Legend - This will show the values of each colour on the schematic.
Various documents can be printed from the application. When selecting a ticket, a ![]() button will be seen in the General, Raw Material and Information tabs. Click on it and the following screen will appear:
button will be seen in the General, Raw Material and Information tabs. Click on it and the following screen will appear:
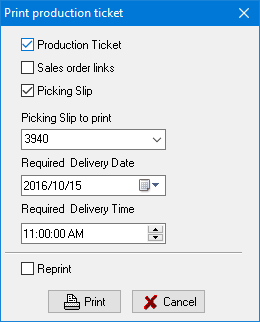
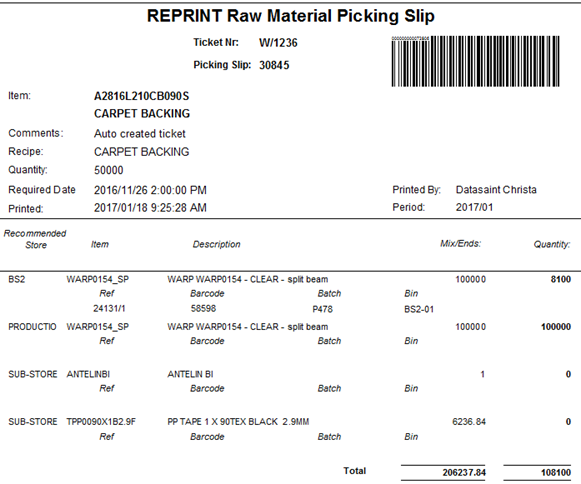
The required delivery date will be printed on the raw material picking slip.
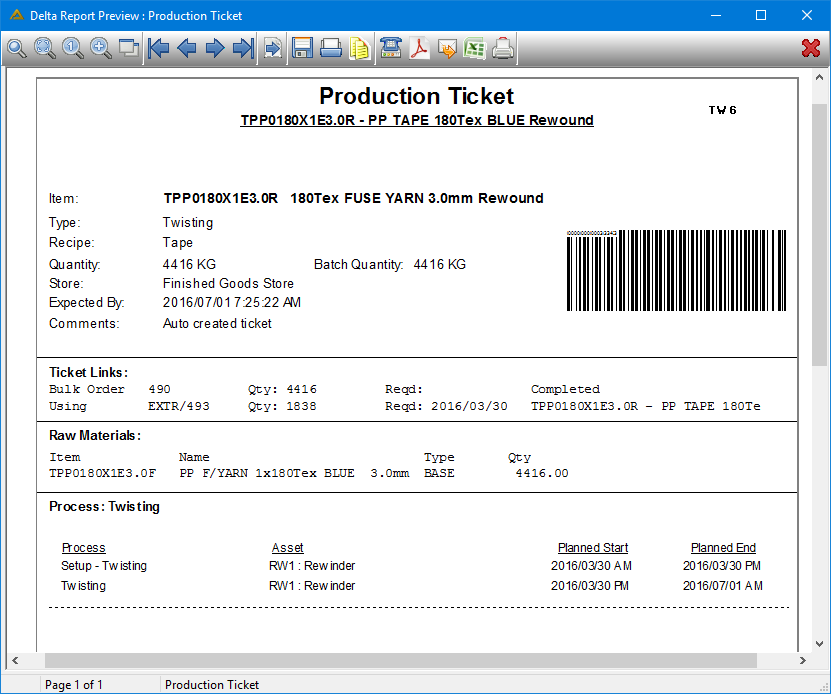
When the items does not exist anymore the store is only shown as sub-store and no barcodes are printed:
![]()