Overview
This application allows the user to manually capture an order. It will be used instead of an electronic requisition. The orders captured in this application would already have been approved by management.
Function
When the application is opened, you will view the following:
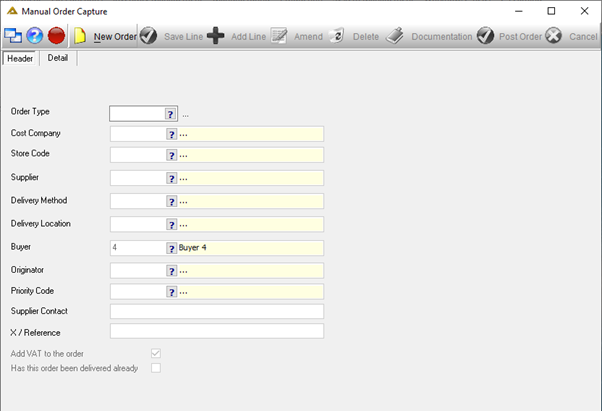
Header Tab
To start a new order, select the ![]() button. Select the type of order to be captured, either by entering the code or by using the picker.
button. Select the type of order to be captured, either by entering the code or by using the picker.
Some of the fields will automatically be populated as per default, but these can be changed.
Complete the following compulsory details:
•Store Code
•Supplier
•Delivery Method
•Buyer
•Originator
•Supplier Contact – not compulsory
•Supplier Reference – not compulsory
Check the ![]() option if you want VAT to be automatically added. Once this option has been checked the Details tab will automatically open.
option if you want VAT to be automatically added. Once this option has been checked the Details tab will automatically open.
Details Tab
The item lines are created using this tab.
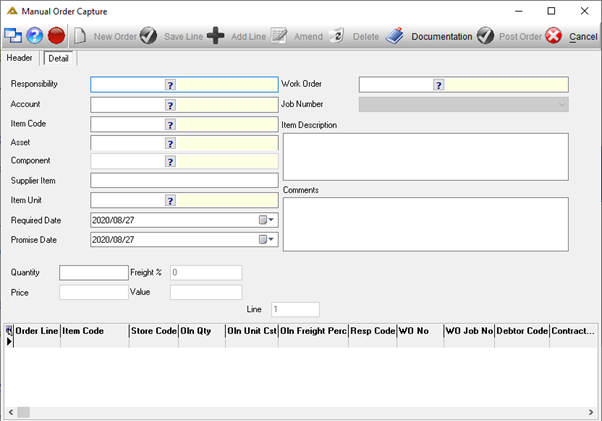
Creating an item line
Enter the following compulsory information:
•Responsibility – select user responsibility from the picker.
•Account – select the account to which the expense will be allocated. Only accounts allowed by the responsibility of the user will be available for selection.
•Item Code – select the store's item code to be ordered. If a different buyer is selected to the one linked to the item you have selected, you will have the option to change the buyer code to the default buyer as set up:
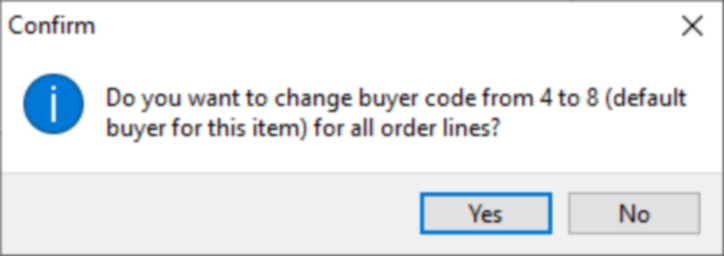
•Asset – not compulsory, complete when the order pertains to an asset. (Orders may not be raised against suspended Assets, these will not appear in the picker)
•Component – enter the relevant component, if the account is an asset. (Orders may not be raised against suspended Components, these will not appear in the picker)
•Supplier Item – not compulsory, if there is a supplier description assigned to the item chosen then it will automatically appear.
•Purchase Unit – the unit measure sold, will either be automatically set or selected using the picker.
•Required Date – the date the order should be delivered, using the drop-down arrow.
•Quantity – enter the quantity to be ordered.
•Price – enter the item price.
•Freight % – this will automatically be calculated.
•Value – this will automatically be calculated.
If you are using the Import Duties functionality, you will be able to view and select them here:

•Work Order – if the purchase order is for a work order then enter the work order number by using the picker.
•Job Number – if the order is for a work order.
•Reason for Purchase – enter the reason.
•![]() button – the item line will be displayed in the grid. If you are using the import duties functionality and a foreign supplier has been selected the following screen will be displayed before the line can be saved:
button – the item line will be displayed in the grid. If you are using the import duties functionality and a foreign supplier has been selected the following screen will be displayed before the line can be saved:
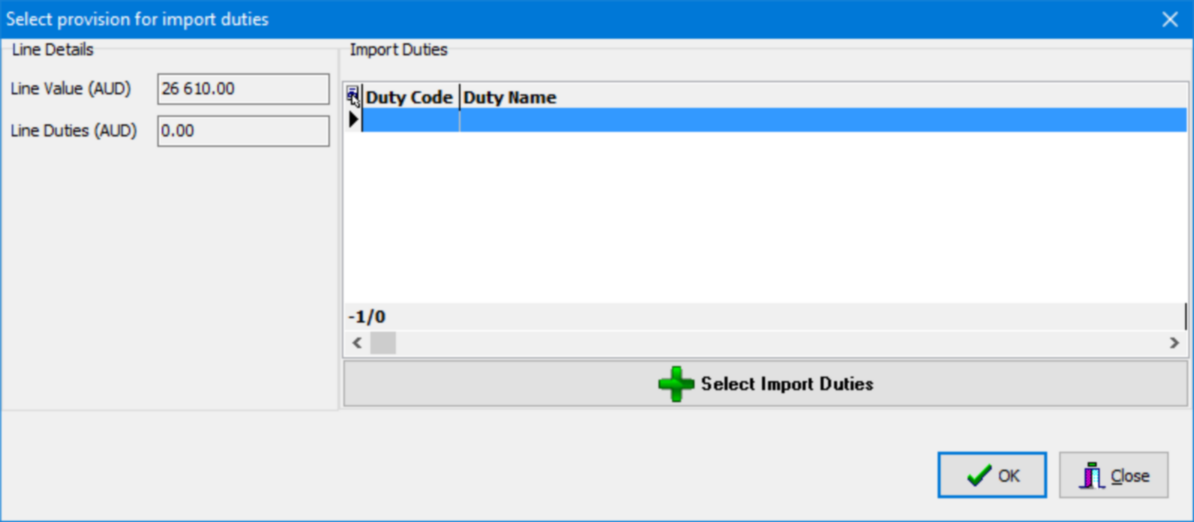
The ![]() button allows you to select the duties from a list:
button allows you to select the duties from a list:
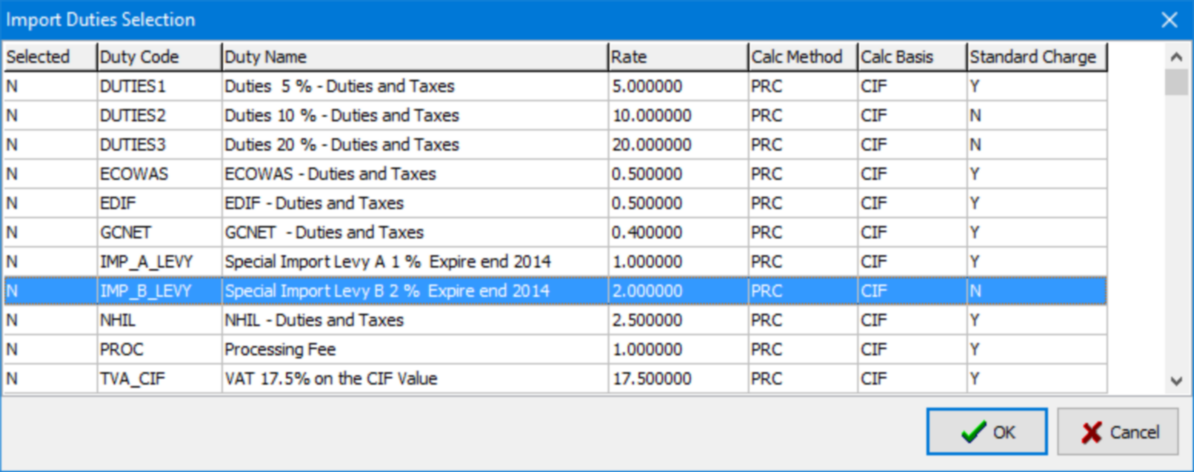
Once completed, click on the ![]() button to save.
button to save.
Add more lines
To add more lines to the order, select the ![]() button. Enter the items details in the respective fields and select the
button. Enter the items details in the respective fields and select the ![]() button. The second line will be displayed in the grid. You can add more lines as needed by repeating this process.
button. The second line will be displayed in the grid. You can add more lines as needed by repeating this process.
Amend
To change an existing line, double click on the line and select ![]() . The item line details will be available in the respective fields for change.
. The item line details will be available in the respective fields for change.
Change the details required and select the ![]() button to save changes.
button to save changes.
Delete
To delete an existing item line, double click on the line and click on the ![]() button. The following message will be displayed to confirm:
button. The following message will be displayed to confirm:

Posting an order
To post an order, click on the ![]() button. The following confirmation will be displayed:
button. The following confirmation will be displayed:
