Overview
This application assists buyers and expediters to follow up deliveries and overdue orders. Options exist to generate reminder e-mails or fax messages. The status of all outstanding orders can be viewed.
Functionality exists to send progress reminder emails before delivery and overdue reminder options are also available. This has to be requested by your system admin.
Function
Generate Data using Search Criteria
Select the store\s and buyer\s to generate data from the selection boxes in the top right corner.
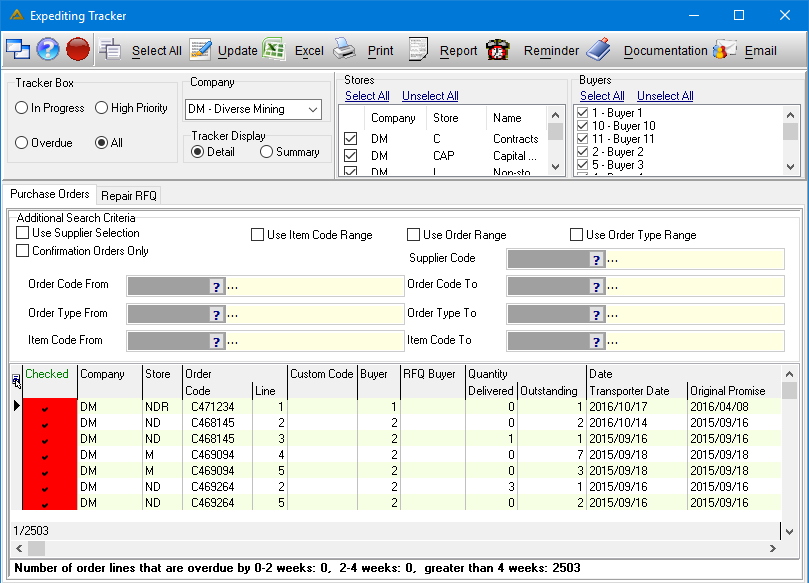
Select the orders by status in the Tracker Box, options:
•In progress
•High Priority
•Overdue
•All
Select the Company for which the data must be retrieved in the Company field using the drop down arrow.
A list of all the orders, in the status chosen, will appear in the display grid below.
To see who captured the e-Requisition for the order view the Originator Name column at the end of the grid:
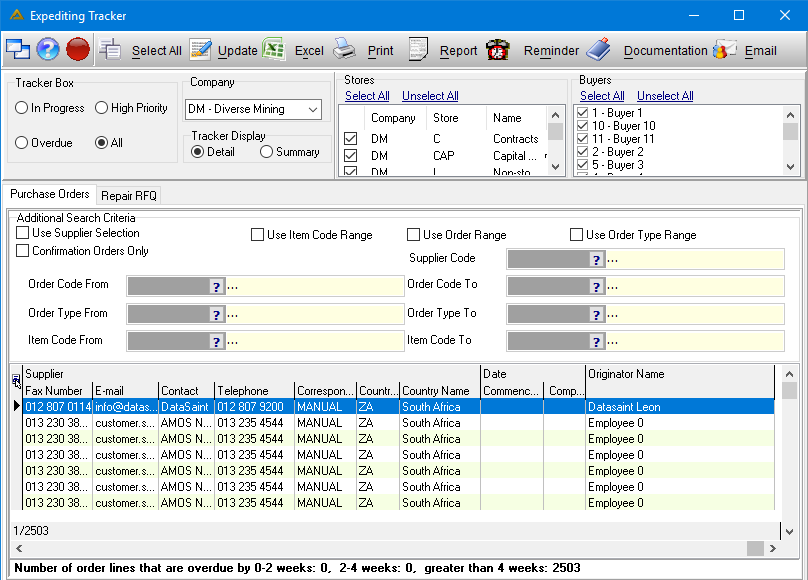
Additional search criteria can be chosen, the criteria include:
•Use supplier selection
•Use item code range
•Confirmation orders only
•Use order range
•Use order type range
•Order code from- Select the order code using the pickers.
•Order type from- Select the order type using the pickers.
•Item code from- Select the item code using the pickers.
•Supplier code- Select the supplier code using the pickers.
•Order code to- Select the order code using the pickers.
•Order type to- Select the order type using the pickers.
•Item code to- Select the item code to using the pickers.
With the selection of the status Overdue and All, the toolbar underneath the display grid shows the number of orders which are outstanding for a specific number of weeks, usually:
•0-2 weeks
•2-4 weeks
•weeks > 4
Updating Promised Date
Click on the relevant order line in the display grid. Right click on the selected line. The following pop up will appear.
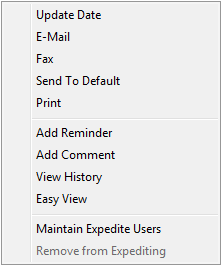
Select the ![]() option. The following screen will be displayed, enter the new date and comment on why the date was changed.
option. The following screen will be displayed, enter the new date and comment on why the date was changed.
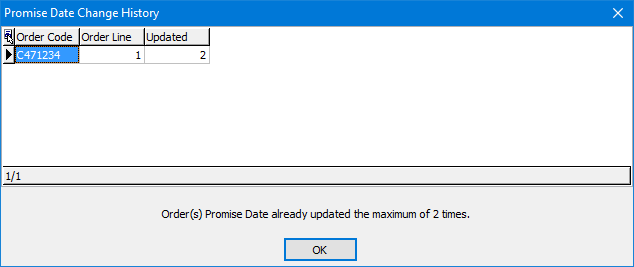
Note:
If the Promise Date has been changed more than the number of times specified by the parameter PROC_PROM_DATE_CHANGE_MAX, an email will be sent to the email address specified by the parameter PROC_NOTIFY_EMAIL, stating what has been changed.
Sending an E-mail
There are two methods to sending an e-mail:
•Right click on the selected line and select the E-mail option.
•Select the ![]() button.
button.
The system will first convert the report into a PDF file. The PDF can then be attached to an e-mail.
Send to Default
This will send the report to the supplier via e-mail as set in the supplier’s details. The report will first be converted into a PDF file and sending will happen as per normal.
Add a Comment
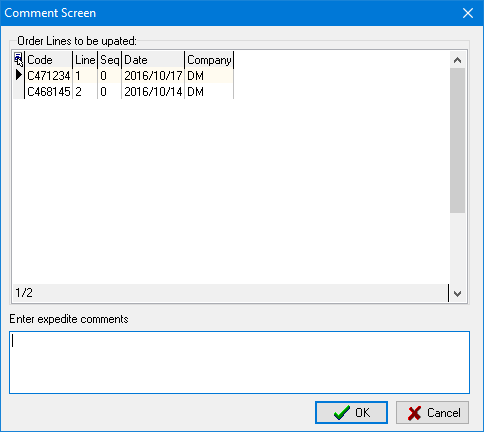
Right click on the line to add a comment, select the ![]() option. This allows you to add a comment about the order, which will be linked to the order, and can be viewed in the history and on the report.
option. This allows you to add a comment about the order, which will be linked to the order, and can be viewed in the history and on the report.
View History
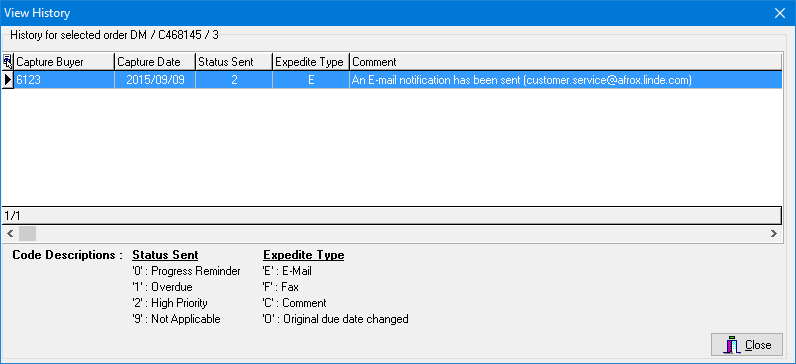
To view the history of an order, right click on the relevant line and select the ![]() option. The history will show all the comments linked to the order.
option. The history will show all the comments linked to the order.
Maintain Expedite Users
This option allows the maintaining of the users who will be in contact with the suppliers with regards to relevant orders.
Right click on the relevant order and select the ![]() option.
option.
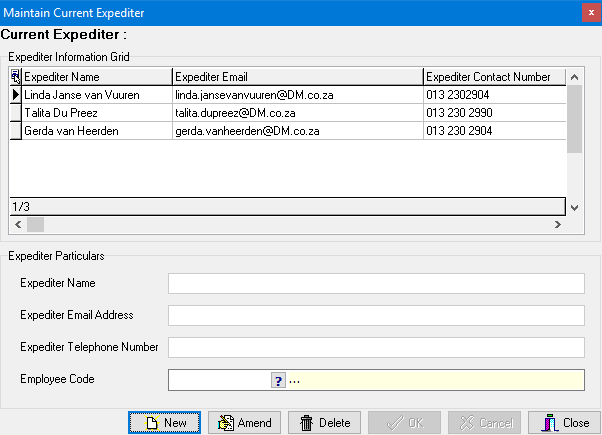
Select the 'New' button to add a user. Enter the necessary information in the relevant fields:
•Expediter Name - enter users full name.
•Expediter Email Address - enter users e-mail address.
•Expediter Telephone Number - enter users contact number.
•Employee Code - select the users employee code using the picker.
Select the ![]() button to save the record. The system will prompt the following message to confirm that the record was saved. Select
button to save the record. The system will prompt the following message to confirm that the record was saved. Select ![]() to continue.
to continue.

Amend Record
Click on the expediter user to amend and select the ![]() button in the 'Maintain Current Expediter' screen. The fields will be open for changes. When changes are complete select the
button in the 'Maintain Current Expediter' screen. The fields will be open for changes. When changes are complete select the ![]() button to save changes.
button to save changes.
The system will prompt the following message to confirm that the record was saved. Select ![]() to continue.
to continue.

Delete Record
Click on the expediter user to erase, and select the ![]() button.
button.
The system will prompt the following message to confirm if the user would like to erase the record. Select ![]() to continue.
to continue.
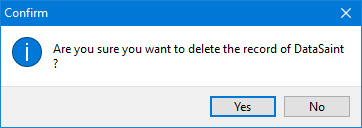
The next message will confirm that the record was erased. Select ![]() to continue.
to continue.

Remove From Expediting
This option will remove an order permanently from the report, and will not appear again even if the order is overdue.
Right click on the order and select the 'Remove from Expediting' option to perform this transaction.
Printing the order
Click on the relevant order line to print and select the ![]() button. You will have the following options:
button. You will have the following options:

'Print Grid' will give you the following options:
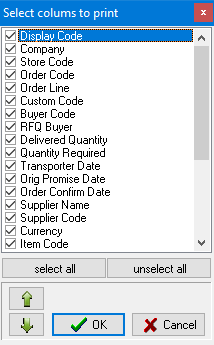
A print preview will be generated and from the print preview you can view and print the order. Each order will be on a separate page.
Converting Data to an Excel Spreadsheet
Select the ![]() button. The system will allow you to select where the spreadsheet should be saved.
button. The system will allow you to select where the spreadsheet should be saved.
Select the location to save under and the data will automatically be converted.
Generating a Report
To generate a report select the ![]() button, the following screen will appear.
button, the following screen will appear.
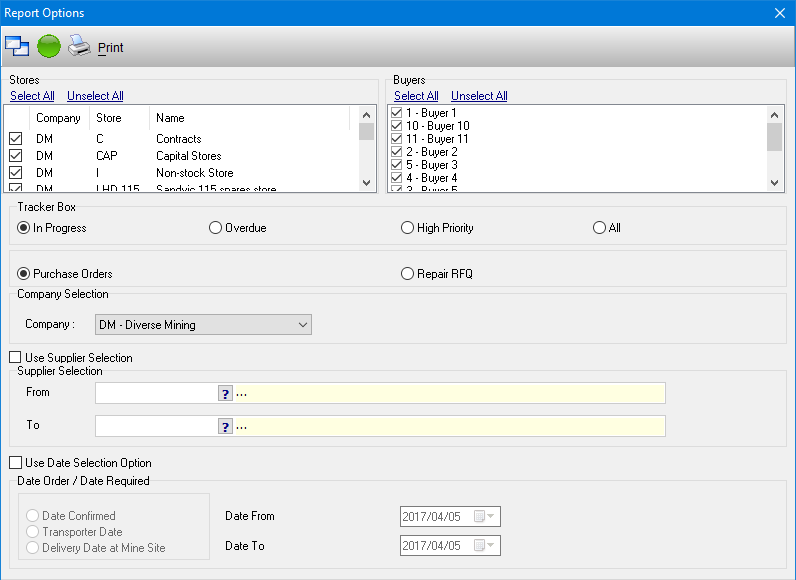
Select the following search criteria for retrieving data in order to generate the report:
•Stores and Buyers - select the store\s and buyer\s.
•Company Selection - select the relevant company using the drop down arrow.
•Supplier Selection - select the 'Use Supplier Selection' box to activate the supplier fields to select the supplier range.
•Date Selection - select the 'Use Date Selection' box to activate the date fields to select the date range.
Select the ![]() button to generate the results.
button to generate the results.
Set a Reminder
To set a reminder for any appointments etc. Select the ![]() button.
button.
The reminder screen will appear. All reminders set will appear in the display screen.
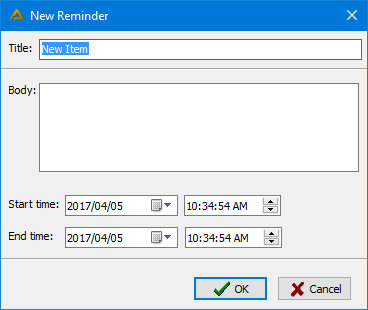
Enter the following:
•Title - enter the title of the reminder.
•Text - enter the body message.
•Date and Time - select the date and time for the reminder using the arrows.
Select the ![]() button to save the reminder.
button to save the reminder.
![]()