Overview
This application allows the user to generate an invoice or credit note for a selected debtor.
Function
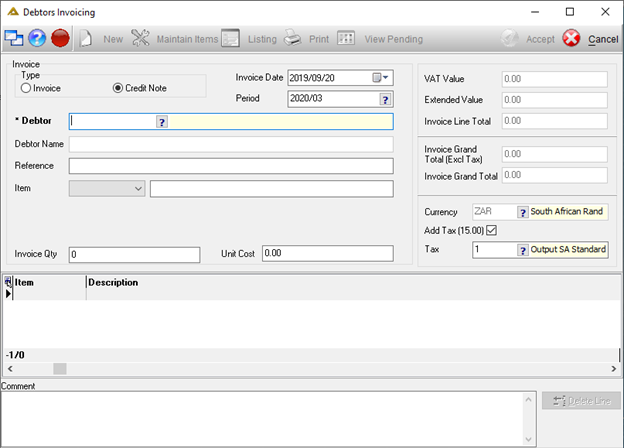
When the application is opened, you will view the following:
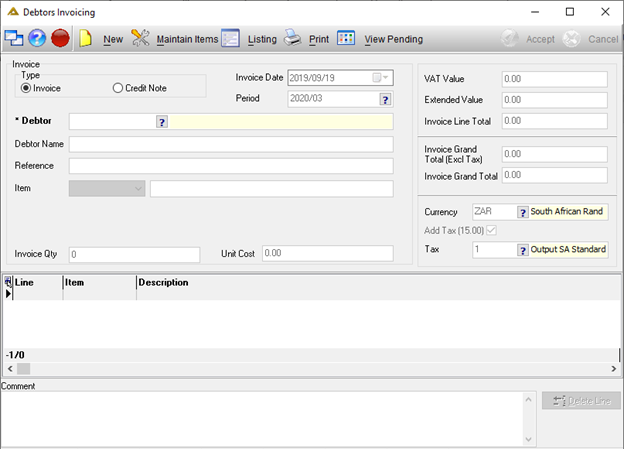
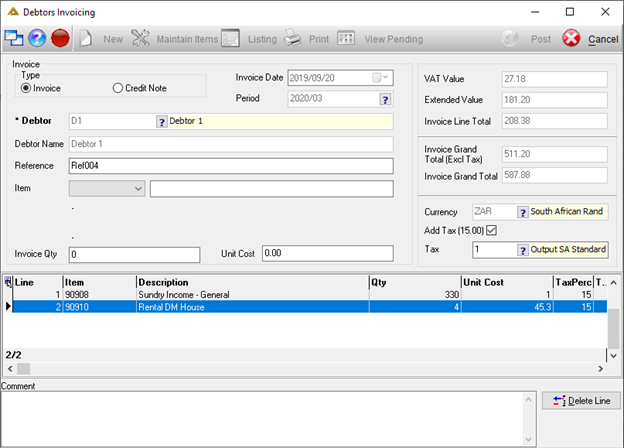
Invoice
To capture a new invoice, click on the ![]() button. By default, the Invoice radio button will be selected.
button. By default, the Invoice radio button will be selected.
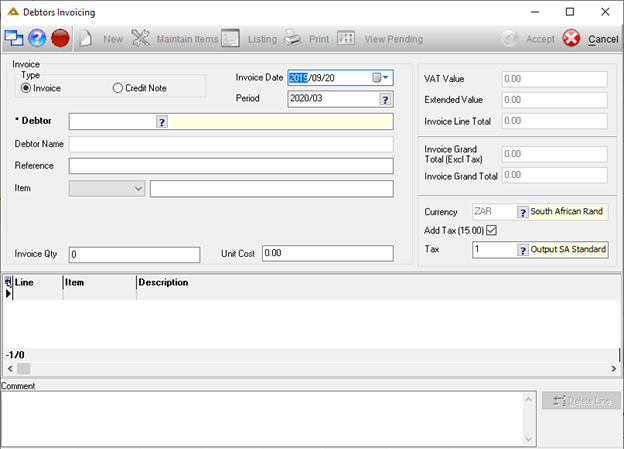
Select the invoice date. The date selected doesn't have to be in the current period. The application doesn't allow you to capture invoices in any other period.

The Debtor field is compulsory. Select the debtor using the picker or by manually entering the debtor code. If DEBT_CASH_SALE is active, you will be able to enter a debtor code used for cash sales and manually type the name into the field. You will also be able to amend the name field for other debtors after selection. If this parameter is not active, this will not be allowed.
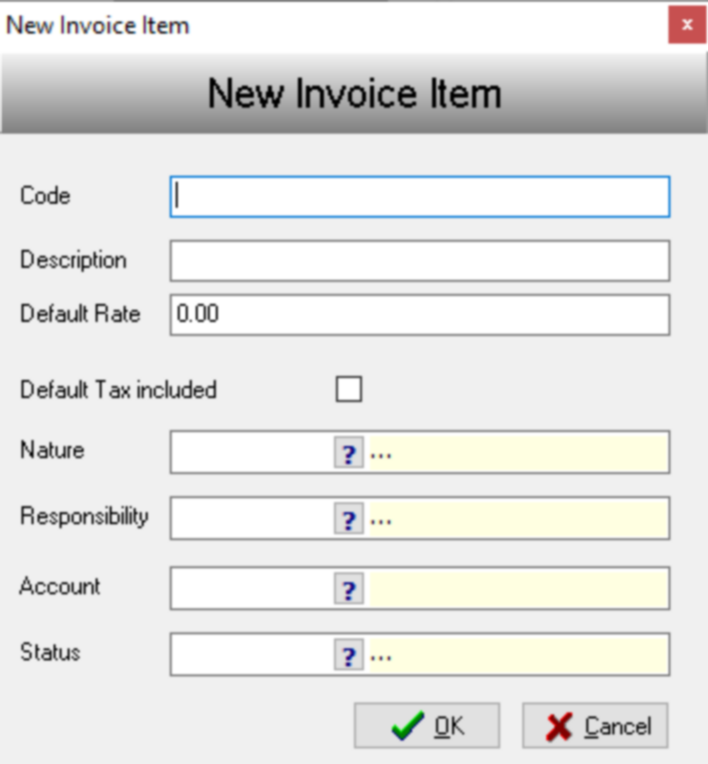
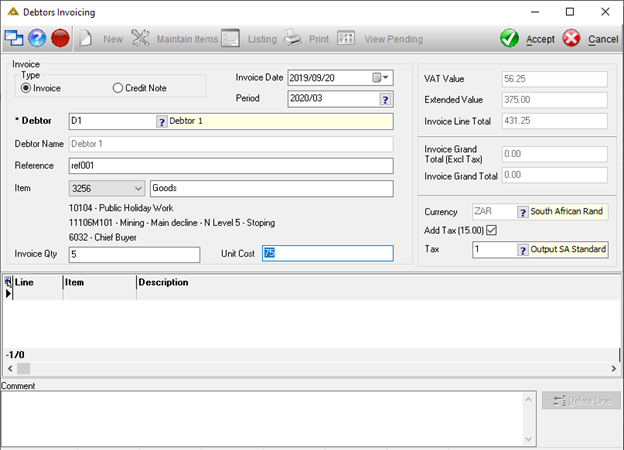
Complete the rest of the fields as required. To create a new item, select the <NEW> option from the drop-down list. The following screen will be displayed allowing you to add the item you wish to invoice for:
Once you have completed the details, click on the ![]() button to save.
button to save.
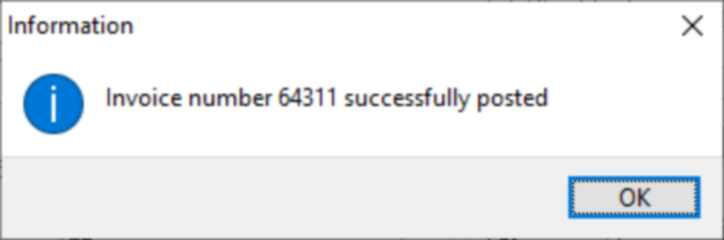
Click on the ![]() button to save. You will receive the following confirmation message:
button to save. You will receive the following confirmation message:
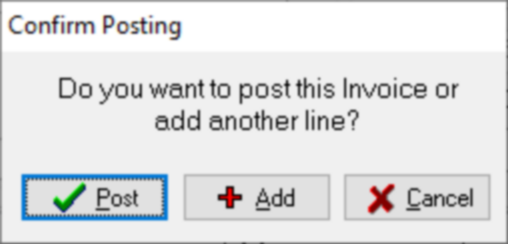
To add an invoice line, click on the ![]() button or click on
button or click on ![]() to post.
to post.
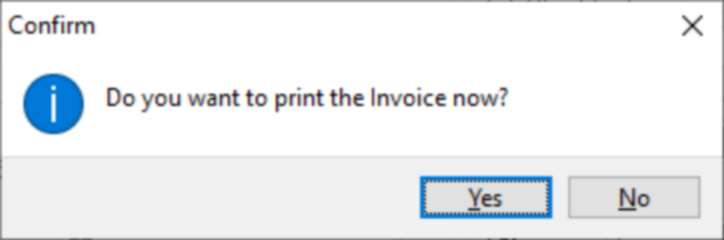
Invoice print preview:

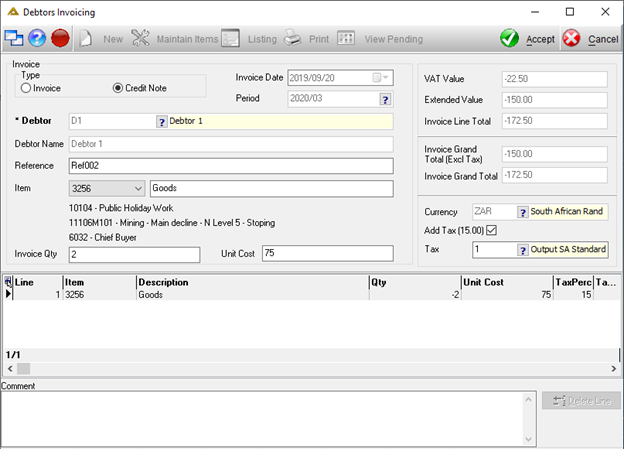
Credit Note
To capture a new credit note, click on the ![]() button and select the Credit Note radio button.
button and select the Credit Note radio button.
Select the credit note date. The date selected doesn't have to be in the current period. The application doesn't allow you to capture credit notes in any other period but the current one.

The Debtor field is compulsory. Select the debtor using the picker or by manually entering the debtor code.
Complete the rest of the fields as required. To add a new item, the same steps apply as described in the section above. Click on the ![]() button to post the credit note.
button to post the credit note.
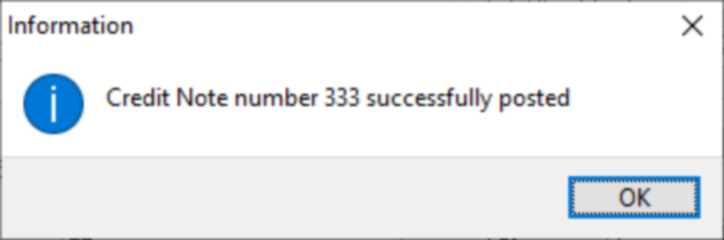
You will receive the following confirmation message:
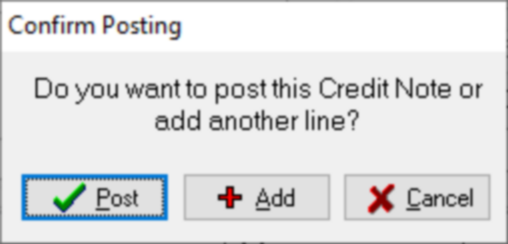
To add another line to the credit note, click on the ![]() button or click on
button or click on ![]() to post.
to post.
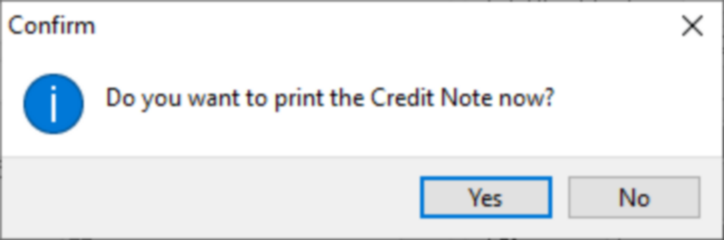
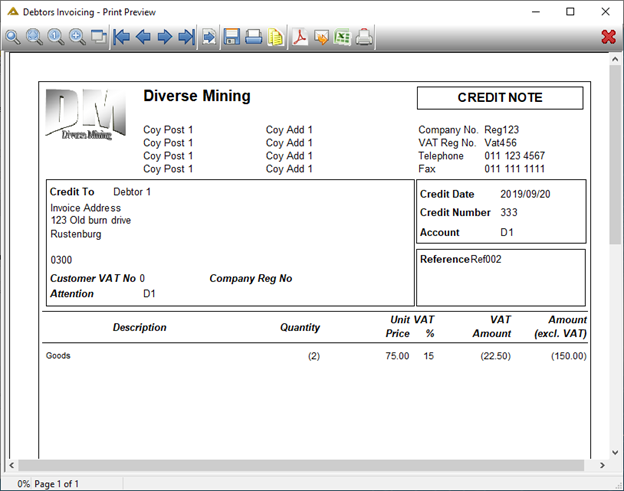
Credit note print preview:
Other Functionality
To delete lines captured before posting, click on the ![]() button after selecting the line you wish to delete:
button after selecting the line you wish to delete:
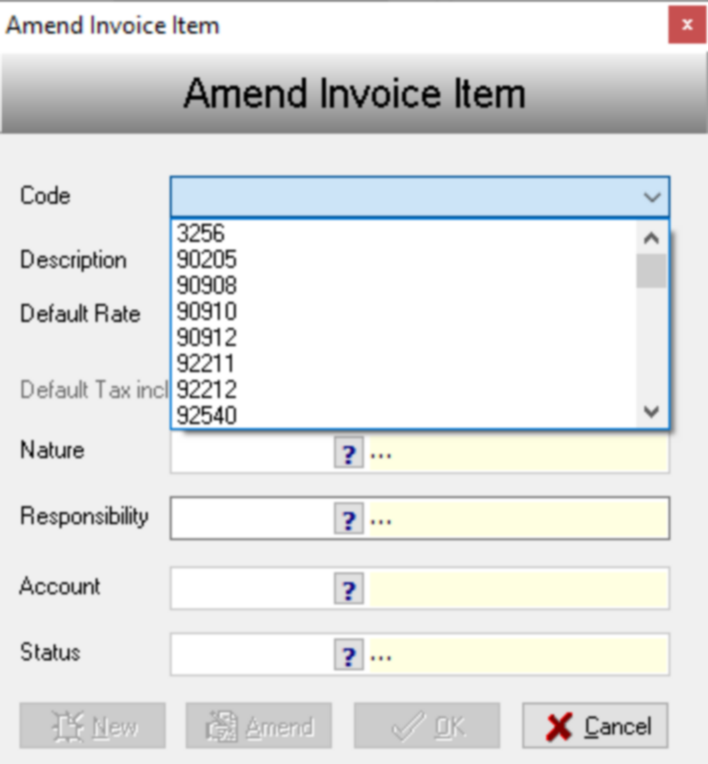
The ![]() button allows you to maintain invoice/credit note items. The following screen will be displayed:
button allows you to maintain invoice/credit note items. The following screen will be displayed:
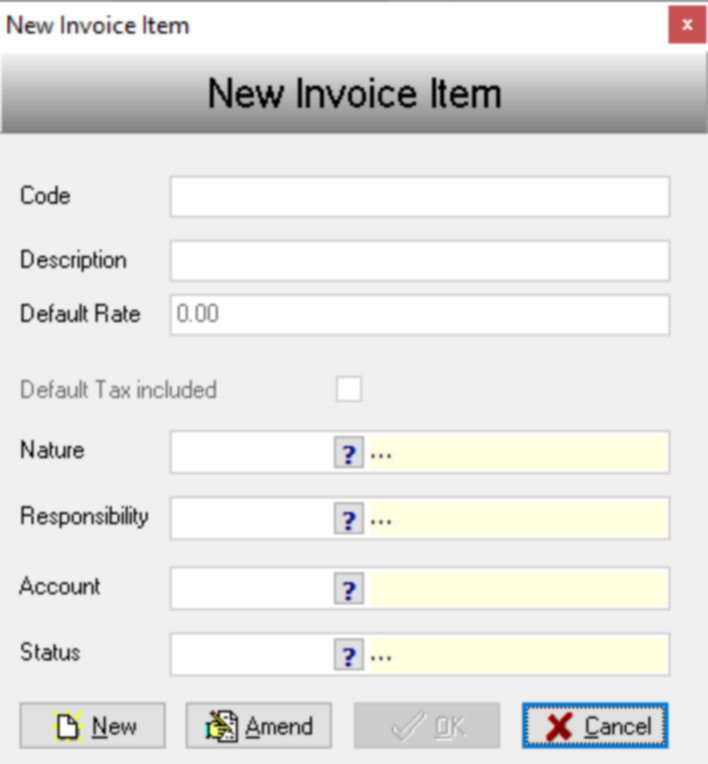
Click on the ![]() button to add a new item. The
button to add a new item. The ![]() button will allow you to select an item code using a drop-down arrow and then edit the selected item.
button will allow you to select an item code using a drop-down arrow and then edit the selected item.
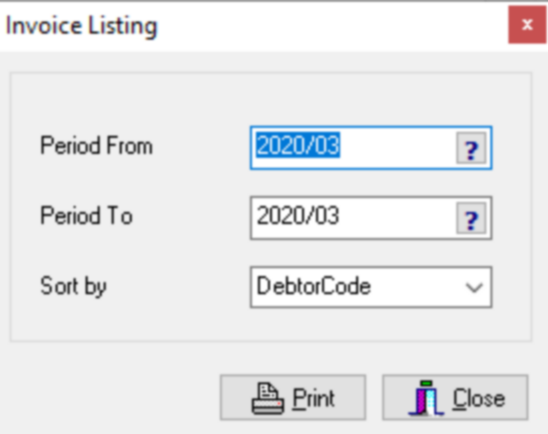
The ![]() button allows you to print an invoice listing. Select a period range and sort by option, then click on the
button allows you to print an invoice listing. Select a period range and sort by option, then click on the ![]() button to generate a report preview.
button to generate a report preview.
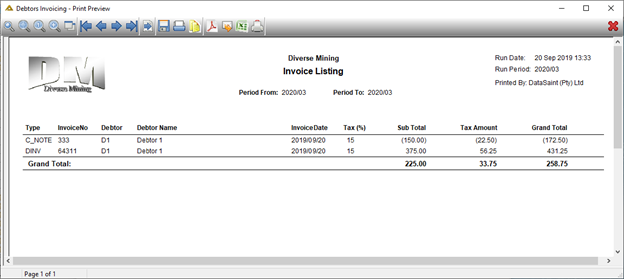
Invoice Listing report example:
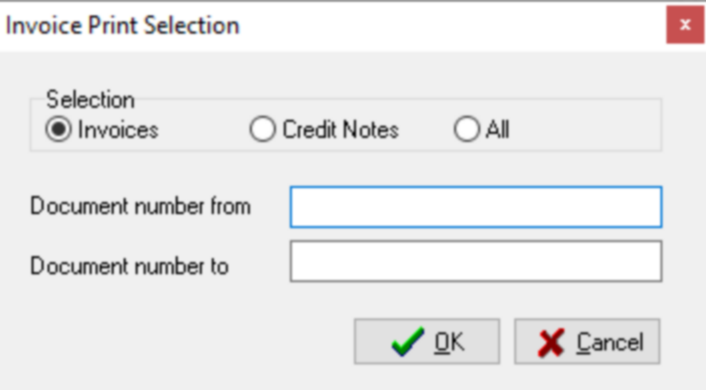
The ![]() button allows you to print invoices or credit notes:
button allows you to print invoices or credit notes:
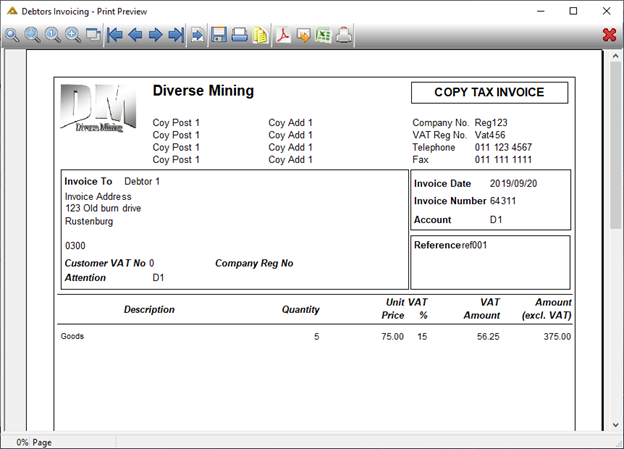
Invoice reprint preview:
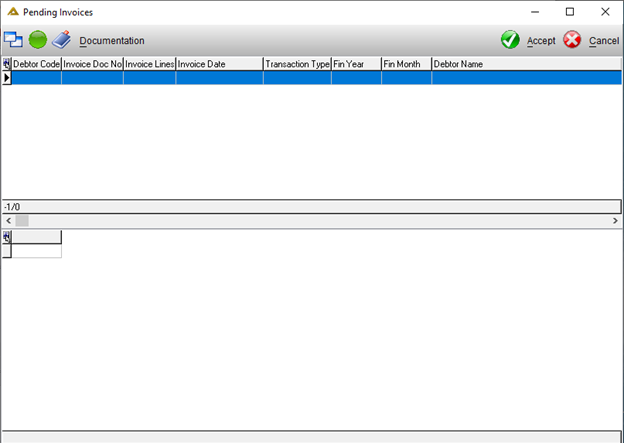
The ![]() button allows you to view all invoices/credit notes which need documentation to be attached before they can be posted. (This is determined by the table TT_CountryOptions. If the debtor is linked to a country code in TD_Debtor which, in this table, is flagged Y in the XML Invoice column, documentation has to be uploaded before the invoice can be posted. This functionality is not used by all.)
button allows you to view all invoices/credit notes which need documentation to be attached before they can be posted. (This is determined by the table TT_CountryOptions. If the debtor is linked to a country code in TD_Debtor which, in this table, is flagged Y in the XML Invoice column, documentation has to be uploaded before the invoice can be posted. This functionality is not used by all.)
The ![]() button allows you to upload the required documentation to the selected invoice. Click on the
button allows you to upload the required documentation to the selected invoice. Click on the ![]() button to approve.
button to approve.