Overview
This application is widely used at various mining operations as the primary tool to record when any asset (mining & plant) breaks down, undergoes planned maintenance or daily inspection and when it is brought back online again. Specific downtime reasons can be selected to record and differentiate between downtime events and at the same time operators can generate WO's/EWR's for corrective action. Data generated in this application forms the basis of many reports.
Function
Asset State Monitor
This is the CAMS Dashboard Header report which is also available in SSRS and can be viewed from any web browser with the correct setup.
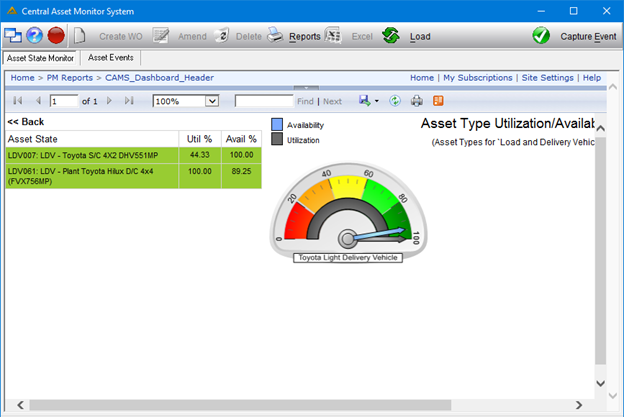
Main Dashboard
The dashboard main screen shows all the assets which has engineering and mining reason down time events captured in the period selected, along with their statuses, utilization and availability on the left-hand side. Several filtering criteria is available. Gauges summarizing Availability and Utilization for each group of assets takes up the rest of the screen. Similar gauges are shown on all the drill down levels.

Asset Detail
There are several levels available for viewing. Selecting one of the gauges on the main screen will drill down to the asset type, showing the utilization and availability for all the asset types linked to the selected asset group.
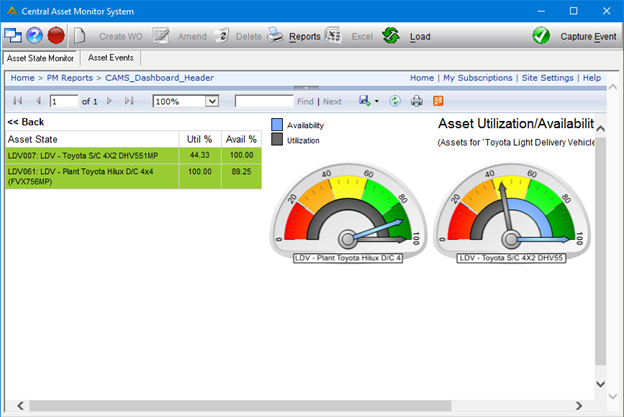
Selecting the gauge on the asset type level, will drill down to the assets of the type showing a gauge for each of the assets in the grid on the left.
Selecting an asset directly from the left-hand grid on any level, will load the asset detail level:
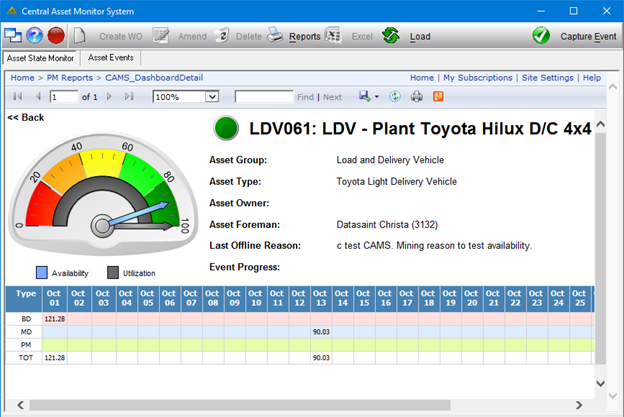
Each asset can have one of three states namely:
•Online (Green) - Asset is currently online and in production
•Offline (Red) - Asset is experiencing downtime, such as asset breakdowns / services / inspections / etc.
•Standby (Yellow) - Asset is not in production but not necessarily broken down.
Asset Events
The 2 tabs, Asset State Monitor and Asset events, function independently. They will display the same assets if the date range is the same for the tabs and no filtering is applied on either tab. The user can freely move between the 2 tabs.
For any changes from the Asset Events tab, like online or offline events, the ![]() or
or ![]() buttons must first be selected for the data to update on the Asset State Monitor tab. It does not auto-update.
buttons must first be selected for the data to update on the Asset State Monitor tab. It does not auto-update.
Four buttons on the top right is available to capture Online, Standby, Offline and Daily events. Online only enables when data is loaded in the grid.
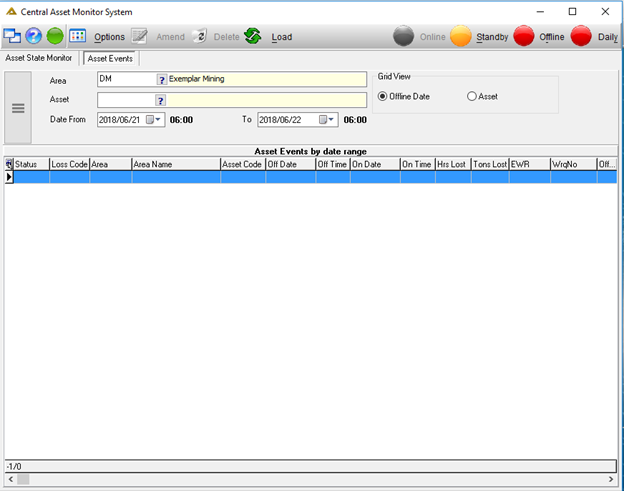
Loading data in the grid or search
Each time after selection criteria was changed, the ![]() must the clicked to refresh the grid.
must the clicked to refresh the grid.
Several options exist to load data in the grid or search for the events of a specific asset or date:
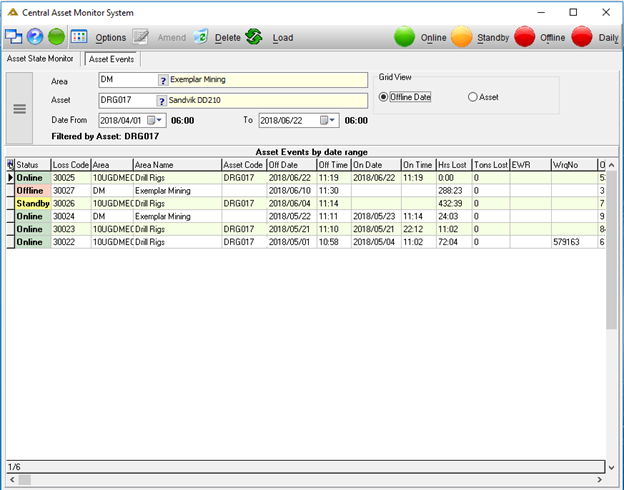
1. Using Asset picker only or combined with the Date From and To selection, or using the Date From and To option only while the Offline Date radio button is chosen.

The date selection will always default to the current date and when using the Asset picker only, no data might be returned if there were no events for today. The Offline Date radio button will only check for events in the selected date range for the asset and/or area.
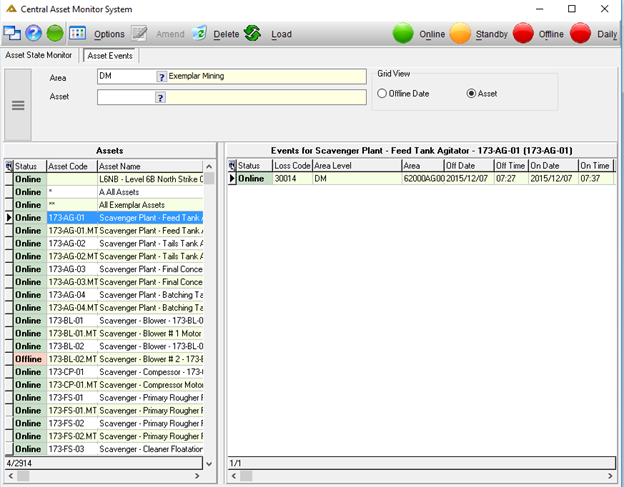
2. Using the Asset Radio button. The user can change between the buttons at will with no need to clear search criteria already entered.
This radio button doesn’t take date ranges into account and any date selection defaulted to or entered while on the Offline Date radio button will be ignored. Selecting the Asset radio button will change the screen to look as below. All assets in the Area picker will be displayed on the left of the split view. The application will default to the main area when opened, but another area can be selected from the picker under either of the radio buttons.
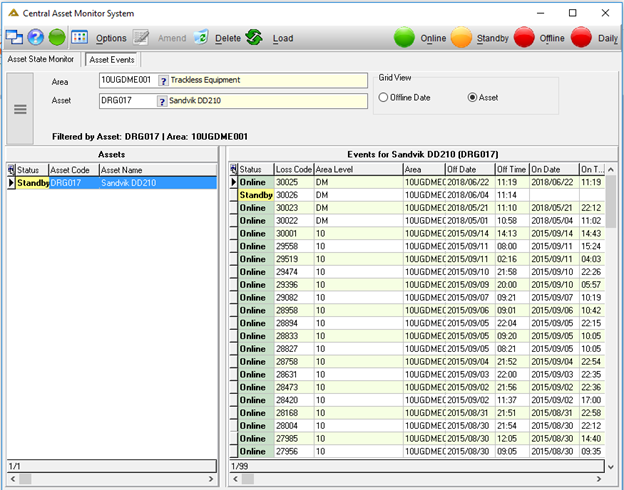
All events for the asset focused on the left part, will display on the right of the split screen. Remember, this is for the life of the asset, not a specific date range.
Specific Area and Asset selected in the pickers.
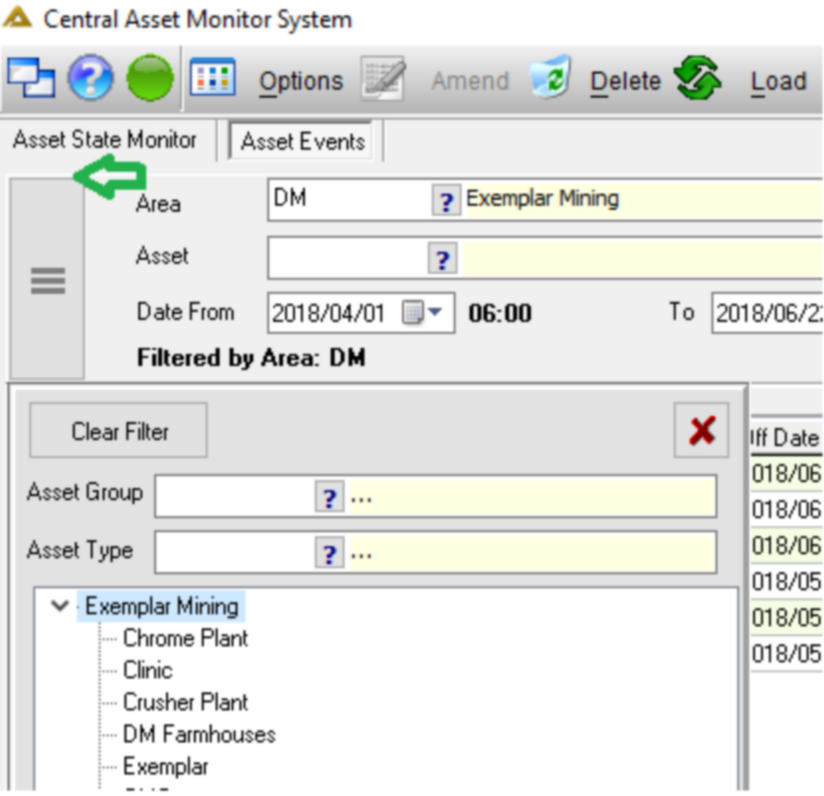
3. Clicking on the button with 3 horizontal lines on the far left of the application opens the area tree and give access to the Asset Group and Asset Type pickers to refine a search further. Clicking on an area in the tree, will load all the assets in that area, but the area tree must be closed with the red X to view them. The Area tree can be opened at any time while on any radio button, but when on the Offline date radio button, only the events in the date range for the area will load.
Capturing events
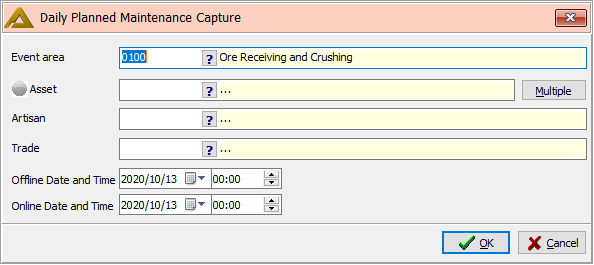
The Daily Maintenance Downtime option will open a shortcut dialog requiring only the asset and the artisan to be completed. All the other fields normally required for a downtime event will be created in the background. This option might not be available for all clients.
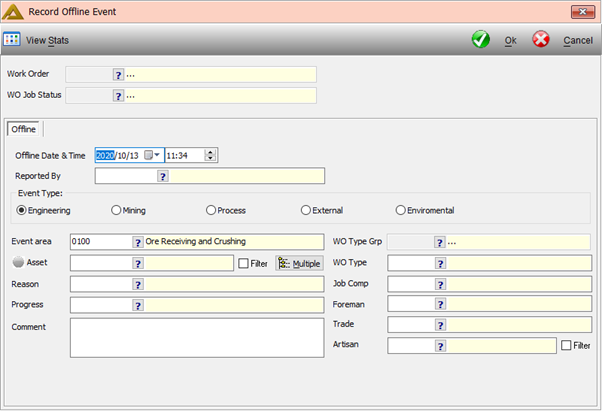
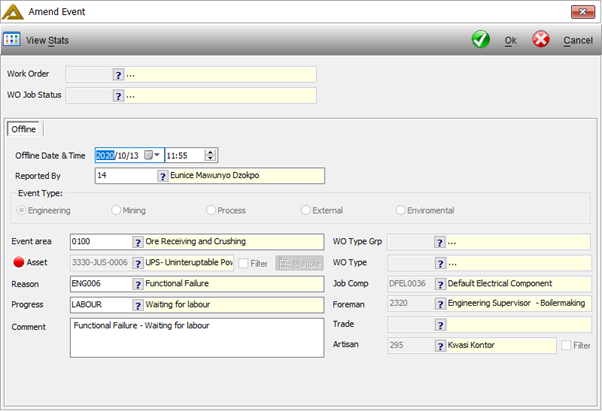
Offline Event Screen example:
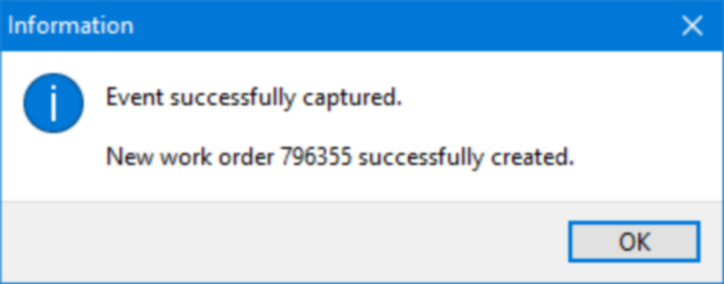
When you click on the ![]() button a work order will be created:
button a work order will be created:
For the Mining reasons radio button, no work order will be created when capturing the Offline event but the option to create a work order is always available. Simply click on the red Offline event line, click on the ![]() button and select
button and select ![]() from the drop down which will open the Capture Work order application.
from the drop down which will open the Capture Work order application.
Operational and Environmental reasons will capture an event against the area, not a specific asset.
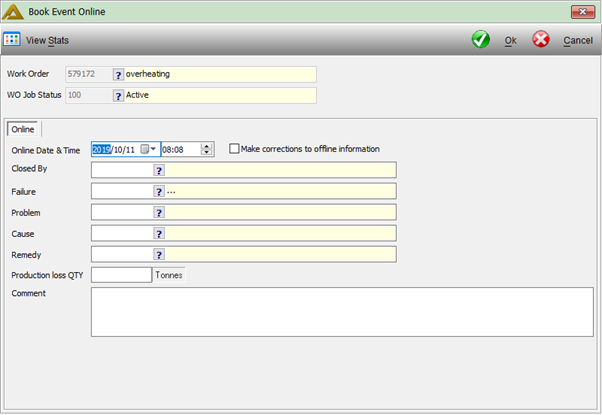
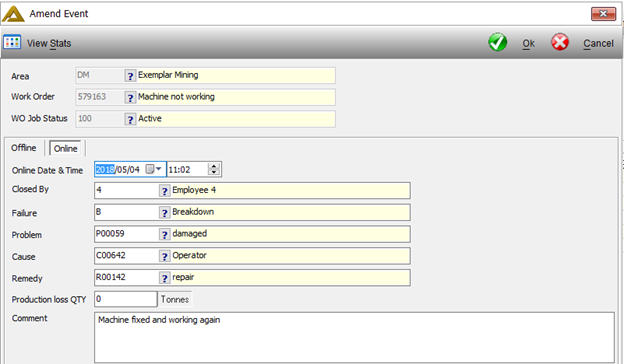
Online Capture screen example:

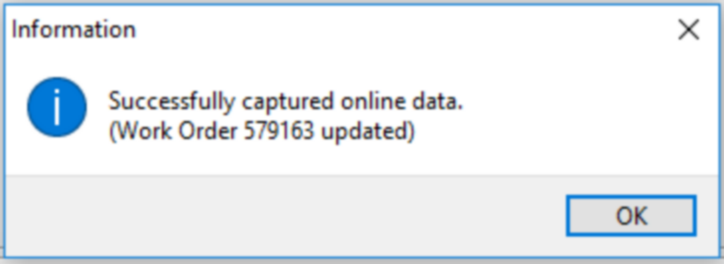
The work order will be updated with the details captured when you click ![]() :
:
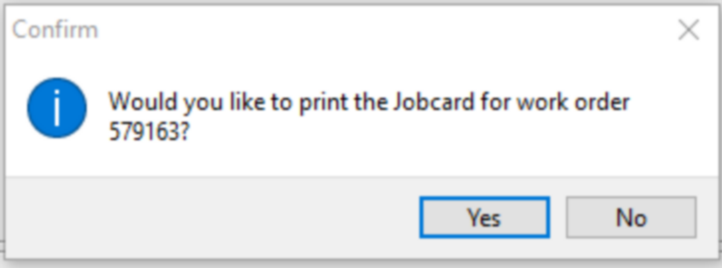
You also have the option to print the job card for this work order:
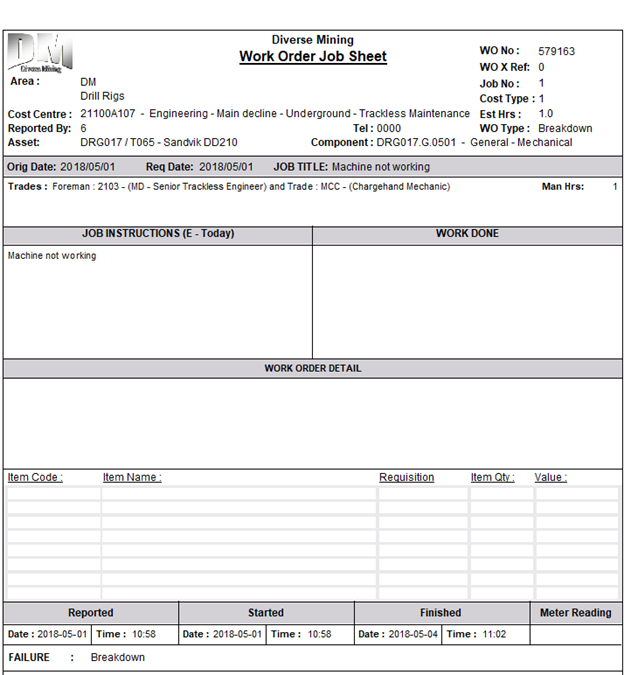
Job card example:
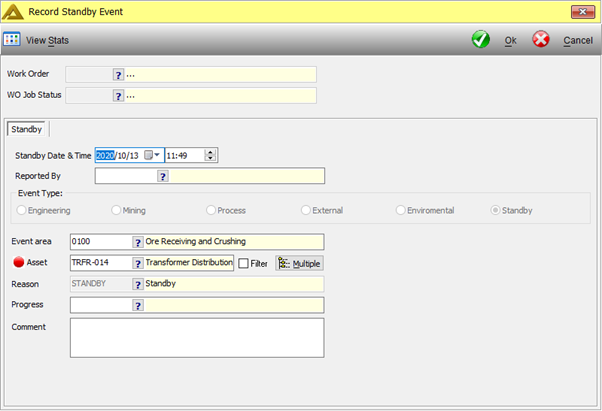
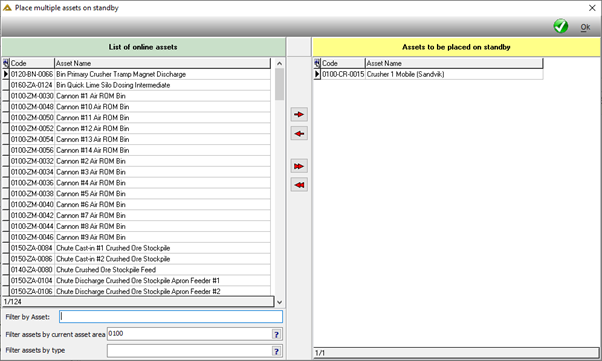
Standby functionality: it must be noted that Standby is a state between Offline and Online where the asset is not working but is not necessarily broken either. An asset can only be booked to Standby while in an online state. It cannot be booked offline from a standby state, neither can the asset status be changed from Offline to Standby, it must first be booked online from offline, then to Standby. Capture screen example:
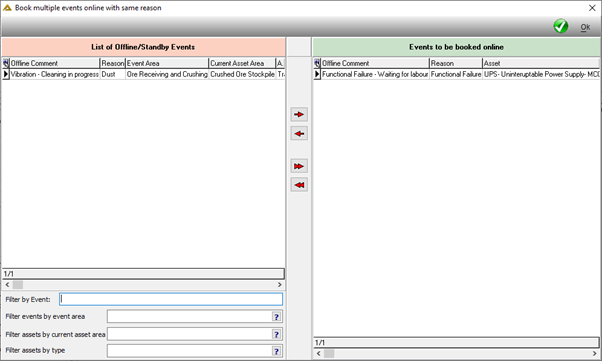
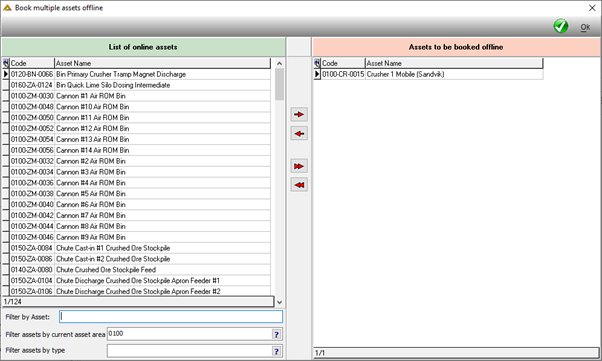
Online, Standby, Offline and Daily have a ![]() button. This allows for capturing an event for multiple assets instead of doing it one by one.
button. This allows for capturing an event for multiple assets instead of doing it one by one.

Correct offline information functionality
There can be scenarios when an offline event is created based on incorrect information.
This incorrect information can be anything: the asset, area, event reason, work order type, reason or component. Although it was possible to amend an Offline entry, fields like Event Reason and Asset were disabled and could not be amended. The Make corrections to offline entry information option allows the user to change any field of the original offline entry at the time of booking the event online.
Online capture screen:
Ticking the Make corrections of offline information tick box will open an offline tab with all the data of the original offline event. If the tick box is not ticked, capture the online event as usual per explanation above.
Correct offline tab:
This screen differs from the normal amend Offline entry screen in that all fields are enabled and can be changed. A few important rules must be taken note off:
•This option is not available for Standby and Daily maintenance downtime events, these can only be booked online using the standard procedure.
•The correct offline data functionality is linked to the Online process and is done simultaneously. After correcting offline data, and then clicking ![]() , the screen will return to the online tab which must be completed before any posting will be allowed.
, the screen will return to the online tab which must be completed before any posting will be allowed.
•When the asset is changed, the Job Component field will be cleared and a new component must be selected.
•Offline comment is a compulsory field and will be blank when the tab is opened. In other words, the comment for the original offline entry will not be returned here as it is deemed irrelevant.
•If Progress was selected for the offline entry it will be blank here. It can be re-selected, but is not compulsory
•Reason for the correction is a compulsory field.
•Work order type can be changed and normal WO group logic per client will apply.
•Engineering events always create work orders which have implications when changing to an event that does not automatically create work orders.
oA Cancel Work Order tick box will be displayed when changing from an Engineering event to any of the other reasons.
oA work order can only be cancelled if Workflow is enabled, a warning message will inform the user of this.
oWhen the user opts to cancel the work order, the Failure, Problem, Cause and Remedy on the Online tab of this screen will be disabled as no work order which needs to be updated will exist anymore.
•Changing an offline event originally created as Operational, Mining or Environmental event to an Engineering event will require an asset, component and the work order detail. A work order will be created in this case once the online event is posted.
•
Online entry:
After doing corrections to the offline entry, the user can either click ![]() to get to the Online tab, or just click directly on the online tab. Complete the fields as usual and click
to get to the Online tab, or just click directly on the online tab. Complete the fields as usual and click ![]() for the posting of the changed information.
for the posting of the changed information.
Some logic rules for the enabling of Failure hierarchy on this tab exists:
•Enabling is first and foremost parameter driven. If the parameter is off, the hierarchy will never enable.
•When an engineering event reason code which is grouped as PM is selected, a work order will not create because the assumption is made that a planned work order already exists.
oWhen booking this event online, without any corrections of offline data, the failure hierarchy will be disabled because no work order was created for the offline event.
oBooking event online with changes to offline data, except the WO type will not cause a work order to create and the failure hierarchy will be disabled.
oWhen booking this event online with corrections to offline data, the WO type, Foreman and trade will clear. Changing work order type to breakdown for instance, will create a work order and the hierarchy will be enabled.
•Booking an Operational, Mining or Environmental reason online with changes to online data (except changing event reason to Engineering) will have the failure hierarchy disabled due to the lack of a work order.
Amend
Any event line can be amended. This button will be enabled based on access rights. Simply click on the line and then ![]() .
.
Online events have 2 tabs which can be amended separately. Save your changes each time by selecting ![]() before amending the other tab. Only certain fields will enable for editing.
before amending the other tab. Only certain fields will enable for editing.
Delete
Any event line may be deleted. A confirmation message will prompt the user to confirm the action.
Options
Clicking on the ![]() button will give you the following options:
button will give you the following options:
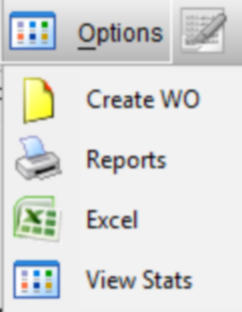
Create WO: will open the Capture Work order application. This is only applicable for Offline and Standby event lines. This option can also be accessed by right-clicking in the grid.
Excel: will export the data in the grid to an Excel spreadsheet.
View Stats: will open the below information screen.

Reports: will open the report options screen.
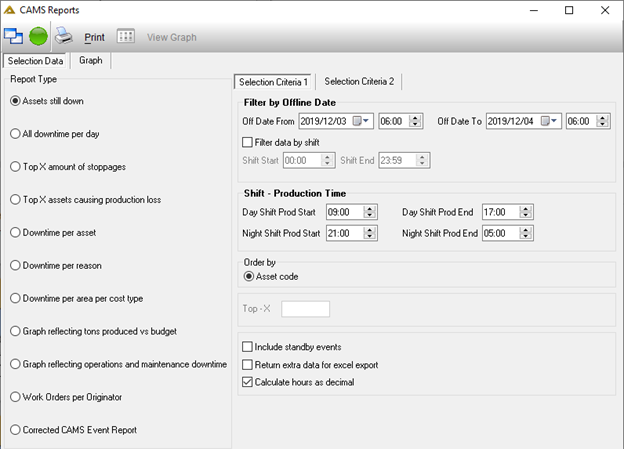
Selection Criteria 1
Selection Criteria 2
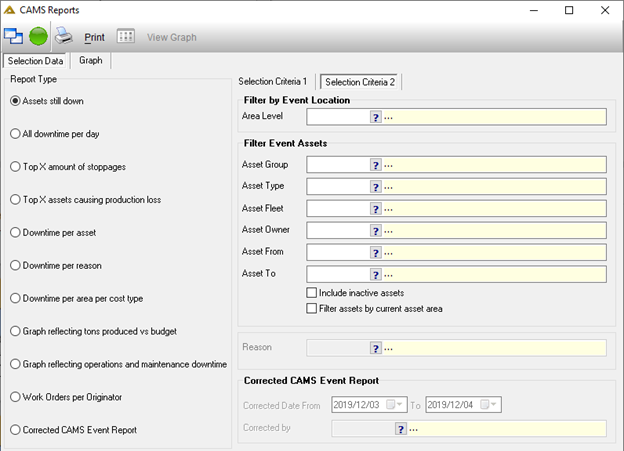
Complete the selection criteria as required and click the ![]() button.
button.
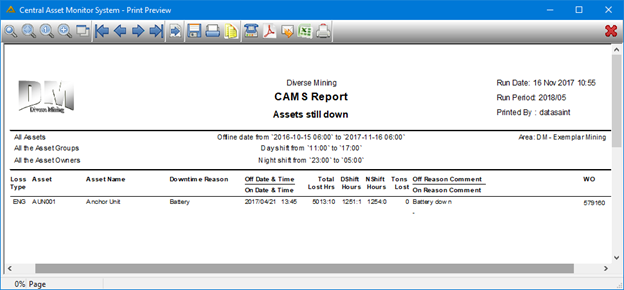
Assets still down Report Example:
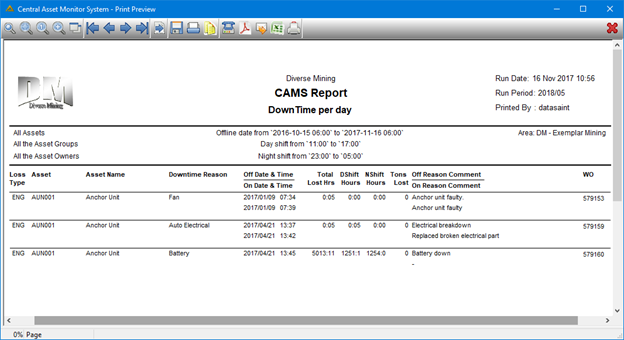
Down Time per Day Report Example:
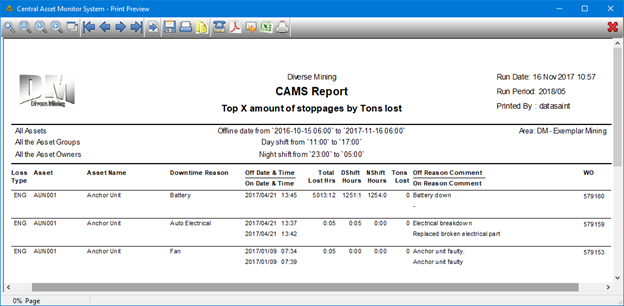
Top X Amount of Stoppages by Tons lost Report Example:
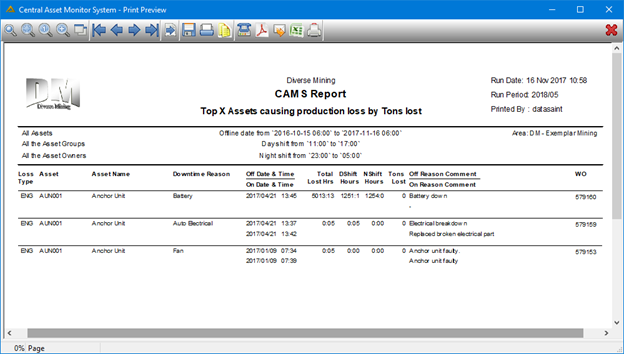
Top X Assets Causing Production Loss by Tons lost Report Example:
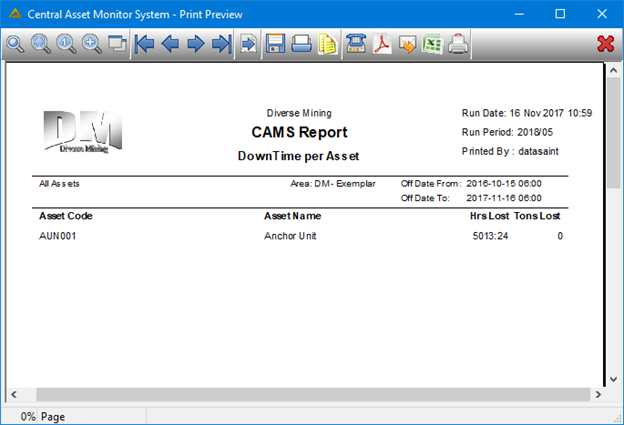
Down Time per Asset Report Example:
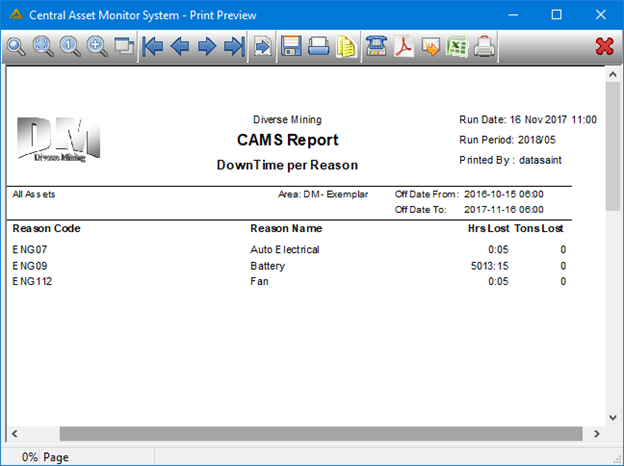
Down Time per Reason Report Example:
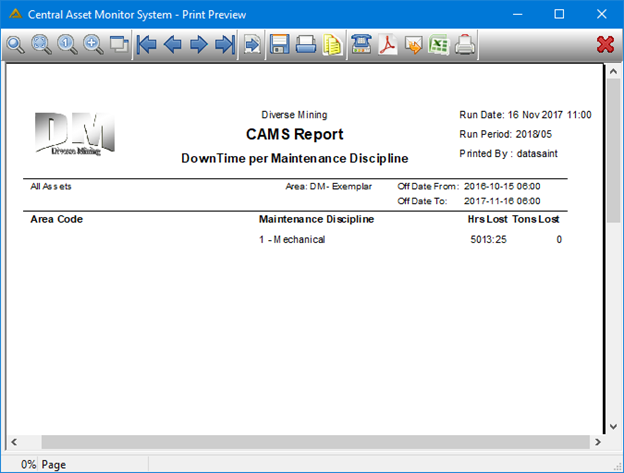
Down Time per Maintenance Discipline Report Example:
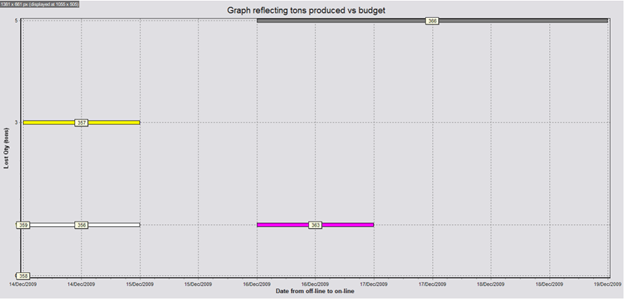
Graph Reflecting Tons Produced vs Budget Example:
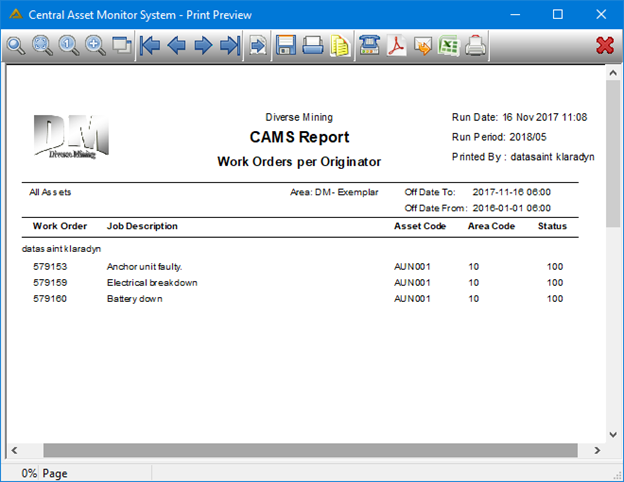
Work Orders per Originator Report Example:
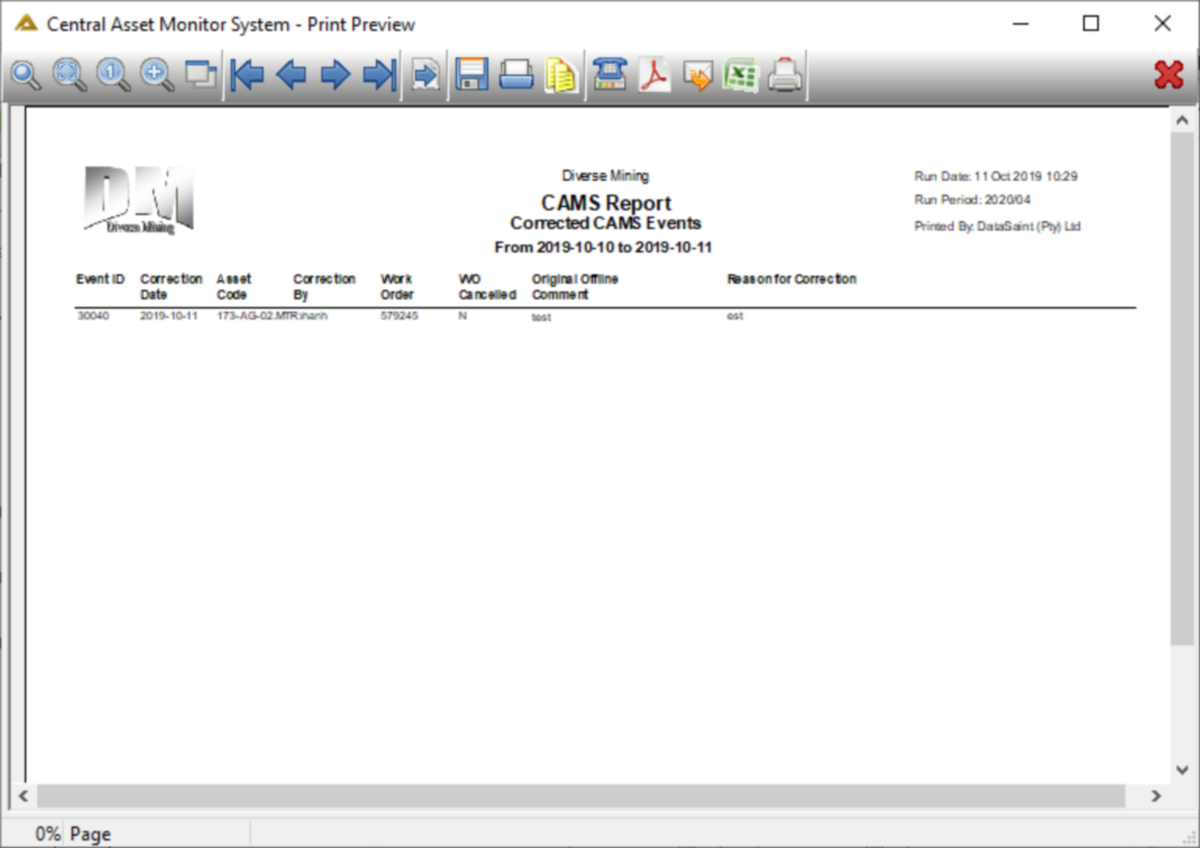
CAMS reports, Corrected CAMS events report
The report will reflect some basic data of corrected events. The WO Cancelled column only shows that the tick box to cancel the work order was ticked on posting. It does not indicate whether the request to cancel the work order was approved.