Overview
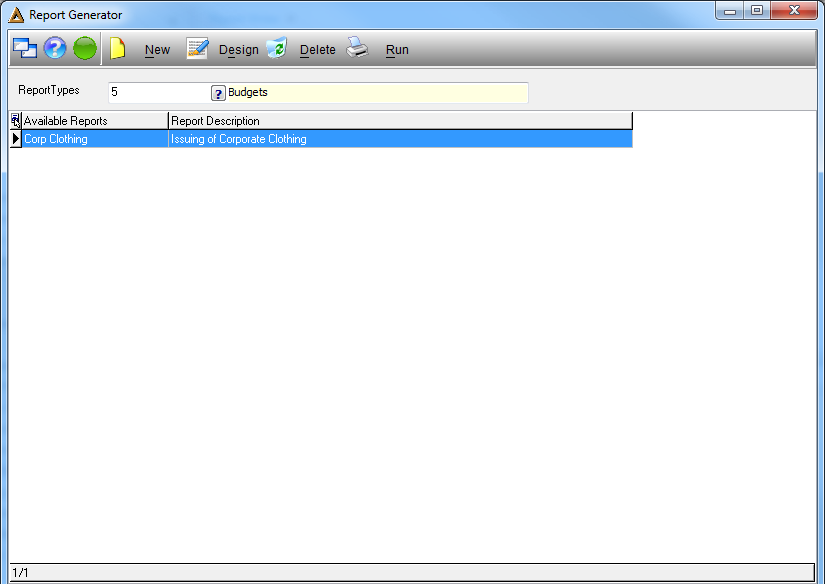
This application allows the user to design a report for which there are no standard reports in the menu. The report will be designed according to the exact results required by the user.
Function
Designing a Report

Select the ![]() button.
button.
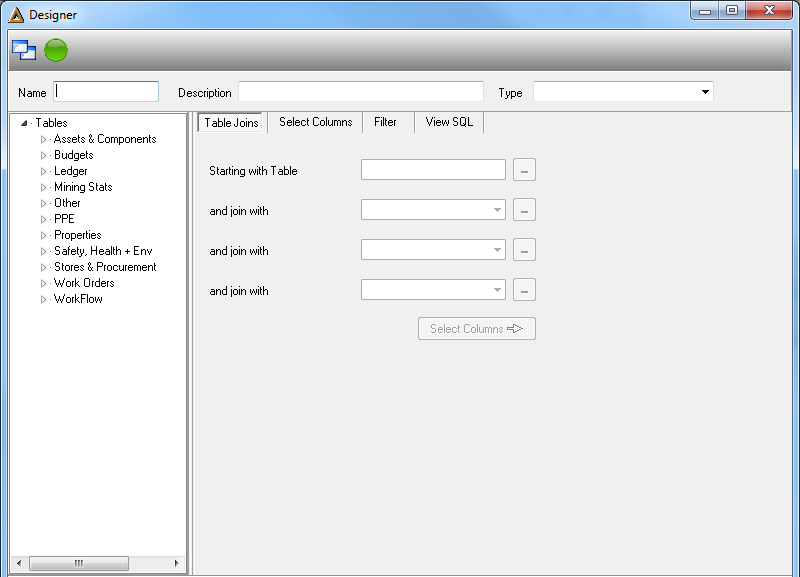
The report designer screen will automatically be opened.

Under the Table Joins Tab select the system module from which the data must be extracted from.
Enter\Select the following information:
• Name - enter the name of the template.
• Description - enter the description.
• Type - select the type of report you would like to generate.

• Starting with Table - double click on the system module on the left hand screen to extract the information from.
• And join with - each module has certain data tables which are linked to it, select the ones to link in the remaining fields.
•Select the 'Select Columns' button to open the next tab.
•Under the Select Columns tab select which columns to include in the report.
•All the column options available will appear in the left hand screen.
•Double click on the available column option. The column selected will appear in the right hand screen.
•Certain selection criteria are available under the columns:
| • | Function - groups selected data, once selected the following screen will appear: |
This option allows the user to select a function to group selected data:
| o | Sum - can be used only with numeric columns, returns the sum of all values. |
| o | Average - can be used only with numeric columns, returns the average of values in a group. |
| o | Minimum - returns the minimum value in the expression, can be used with numeric, character or date time columns. |
| o | Maximum - returns the maximum value in the expression, can be used with numeric, character or date time columns. |
| o | Count - returns the number of items in a group, can be used with any data type. |
| • | Sort - arranges data in either 'Ascending' or 'Descending' order, or nothing if left blank. |
| • | Print column - use the up and down arrows to select 'Yes' or 'No'. |
| • | Report break - use the up and down arrows to select 'Yes' or 'No'. |
| • | Total on Report - use the up and down arrows to select 'Yes' or 'No'. |
If a column needs to be erased, click on the column and select the 'Delete Column' button.
The system will prompt the following message:
Select 'Yes' to continue.
•When all the columns have been added, select the 'Define Filter' button.
•Under the Filter Tab the default filters are selected which will then be performed automatically when the report is run.
•To insert filters double click on the options available on the right hand screen. The filter will appear in the first field.
Use the drop down arrow in the next field to select the limitations:
| o | containing |
| o | starting with |
| o | ending with |
| o | matching |
| o | not matching |
| o | >, <, = |
•In the last field enter the limitation or select the 'User Input' option for the user to enter the limitation when the report has run.
•Select the 'Finish Report' button to save the template designed.
•The new report designed will appear under the system module for selection.
Run a Report
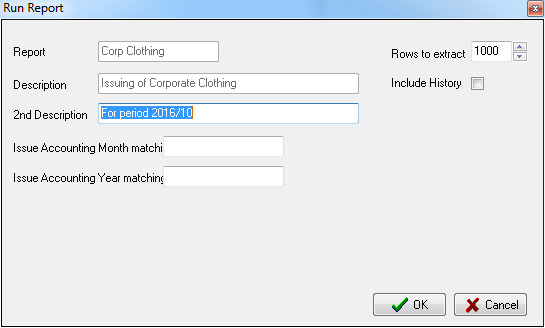
• Right click on the report option and select the 'Run' option or double click on the report line to open the 'Run' screen.
• Alternatively select the ![]() button.
button.

•If there are any user input filters required then they will appear under the '2nd Description' field. The user must enter the selection filters.
•Select the number of rows to generate by using the up and down arrows.
•To include data from the history, select the 'Include History' option.
•Select the ![]() button to generate the report run.
button to generate the report run.
![]()