Overview
This application is used for the management and monitoring of where each LHD will work for each day/month and who will operate these machines.
Function
Daily Allocation
To capture daily allocation, do the following:
Select the Daily Allocation radio button.
Select the ![]() button on the screen as shown in the image below:
button on the screen as shown in the image below:
Start Allocation
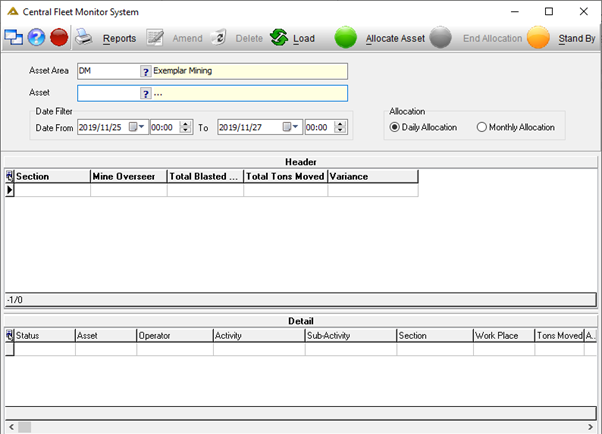
Select the desired asset area if you want to filter the assets by area. Leave blank to not filter.
Select the asset to be allocated. Only active LHDs online (CAMS) will be available. Asset type and group are only for display purposes. The asset may not already be allocated, validation when posting the allocation will inform the user if the chosen asset is already allocated.
Select the activity and sub activity (created in the Master files section using the Ore Flow Master File application). Only sub-activities marked as Daily will be available here.
Select the allocation start date and time. Future dating is not allowed when allocating assets, but back dating allocation start time and date is possible.
Select the Shift of Day, Cycle and the Operator. If the sub-activity you have selected is marked as Need Operator, the operator field will be compulsory. Operators shown here must be synced from the SACO Employee Mapping table.
Select the Shaft, Workplace Type, Section and Work Place ID and Mine Overseer. For all sub-activities marked as non-Production activities, the working place ID is compulsory, e.g. Waste Tram. The mine overseer will be auto populated based on section chosen.
Select ![]() to save the allocation.
to save the allocation.

Viewing Daily Allocations
To view the selected allocation, do the following:
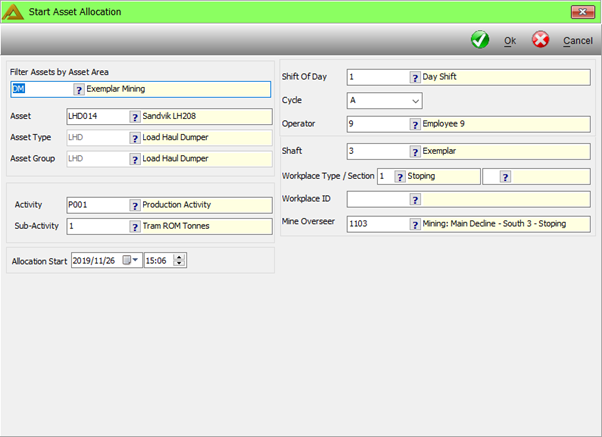
Select the asset area if you wish to filter the assets by area. Leave blank to not filter.
Note: Asset areas available can be filtered by employee areas. Employee areas are maintained using the PM Master File application. If no area is selected, you will be able to view all areas. If an area is linked to an employee, they will only be able to view assets for the linked area.
Select the asset if you would like the results to be filtered by asset. Leave blank to not filter. Select the date range to filter the allocation returned within the selected range.
Select Allocation. By default, the Daily Allocation radio button will be selected.
Click on the ![]() button.
button.
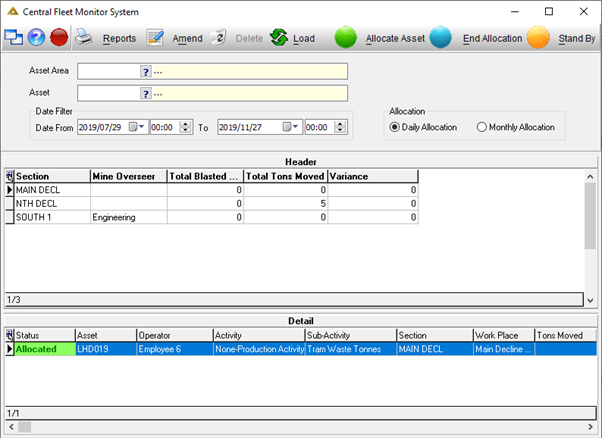
The header grid displays the summarized data by section and mine overseer.
Selecting a header line will display the relevant details. Detail lines showing Allocated means the asset is currently allocated to that area.
Ending Allocation
To end the daily allocation of an asset and make it available for the next allocation, simply select the line you wish to unallocate and click on the ![]() button or double click on the detail line.
button or double click on the detail line.
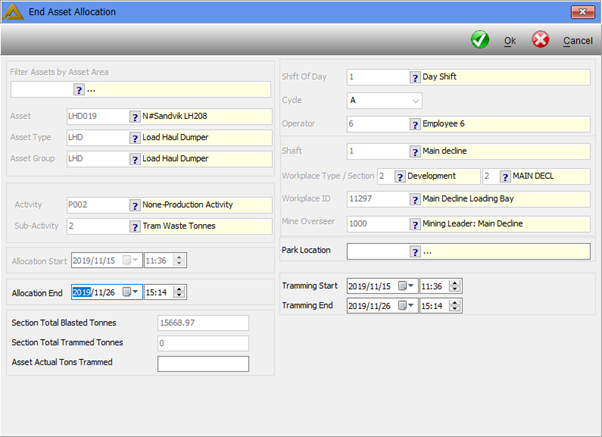
The End Allocation screen will be displayed with all the details captured.
Enter the allocation end date and time. The asset daily allocation cannot exceed 24 hours.
Note: The asset cannot be allocated again if the previous allocation was not ended.
The allocation end can be backdated.
If the sub-activity was marked as Move Material, the user will need to enter the actual trammed tons.
When ending the daily allocation, the use must select the park location where the asset will be parked. Currently, there is no parking location list available, however, the user can select a working place ID as a parking place for the time being.
Capture the actual time the tramming started and ended. These times should be within the allocation start and end.
Click on the ![]() button to end the allocation
button to end the allocation
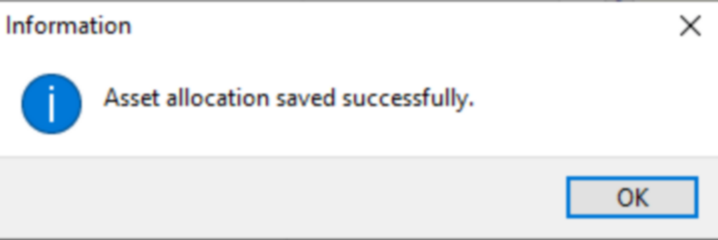
The following message will be displayed asking the user if they would like to capture the meter readings for the asset:

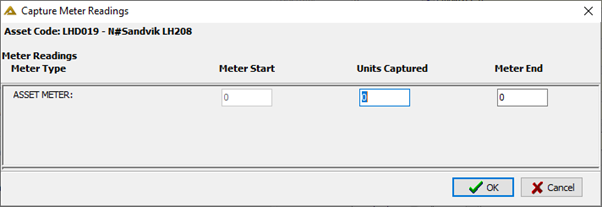
Selecting no will close the screen and selecting yes will open the Capture Meter Readings screen.
Here the user can capture the readings for the asset. Meter readings are only captured on asset level.
The asset is now available to be allocated for the next shift.
Amending Daily Allocation
All daily allocations can be amended. To amend, select the desired allocation entry to edit and select the ![]() button.
button.
Amending an allocated asset
Amend the allocation start date if needed.
Amend the section and working place if needed.
Click on the ![]() button to save the amendment.
button to save the amendment.
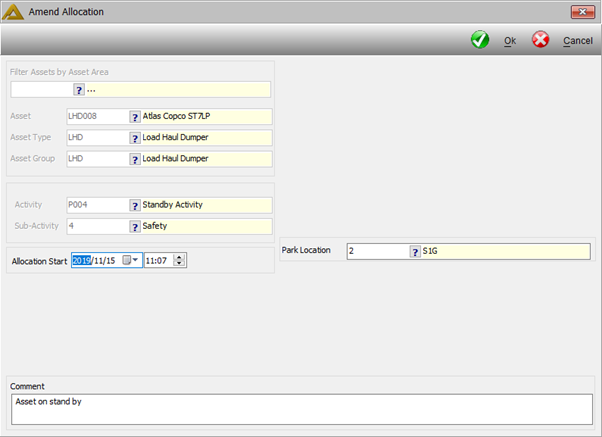
Amending an available asset
Amend allocation start and end.
Amend actual tons trammed.
Amend Park Location.
Tramming start and end.
Click on the ![]() button to save the amendment.
button to save the amendment.
**Same validation rules apply as with ending allocation
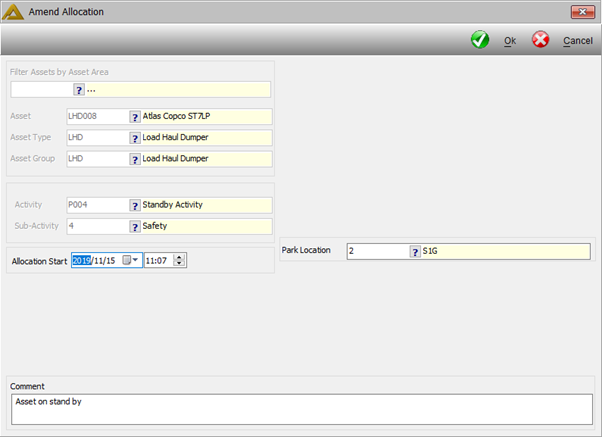
Standby
An asset can also be put on standby for daily allocation. To do so:
Click on the ![]() button.
button.
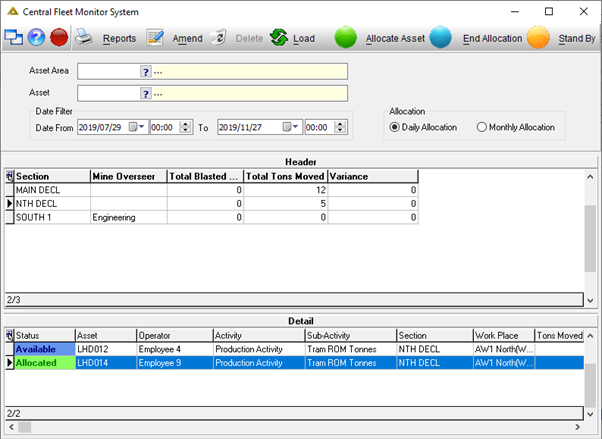
Starting Standby
Select the asset area if you wish to filter out the assets by area. Leave blank to not filter. Note: Asset areas available can be filtered by employee areas. Employee areas are maintained using the PM Master File application. If no area is selected, you will be able to view all areas. If an area is linked to an employee, they will only be able to view assets for the linked area.
Select the asset if you wish the results to be filtered by the asset. Leave blank to not filter. Select the date range to filter the allocation returned by with in the range selected.
Select the standby activity and sub-activity. Only sub-activities marked as Standby will be available.
Select the start standby date and time.
Select the park location where the asset will be during standby.
Provide a comment as to why the asset is put on standby.
Click on the ![]() button to save.
button to save.
Viewing Standby Events
Standby events are only applicable to daily events. The mine overseer for standby events will always be Engineering
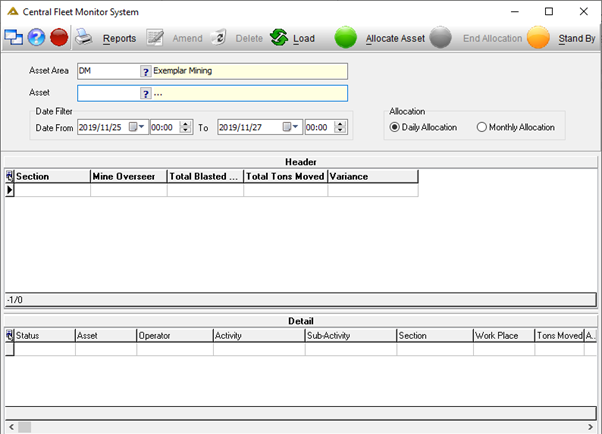
Ending Standby
To end standby, select the standby record and select the ![]() button again or simply double click the standby line.
button again or simply double click the standby line.
Select the allocation end time.
Select ![]() to end the allocation.
to end the allocation.
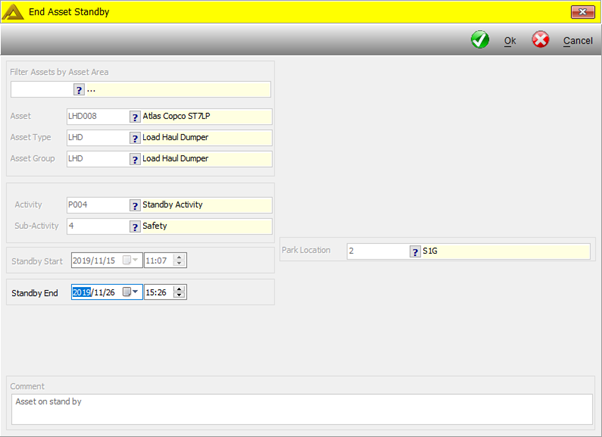
Amending Standby events
Standby allocation can also be amended much like daily events.
Monthly Allocation
The assets available for selection depends on the parameter: OREFLOW_CFMS_DAILY_GROUPS
To capture daily allocation, do the following:
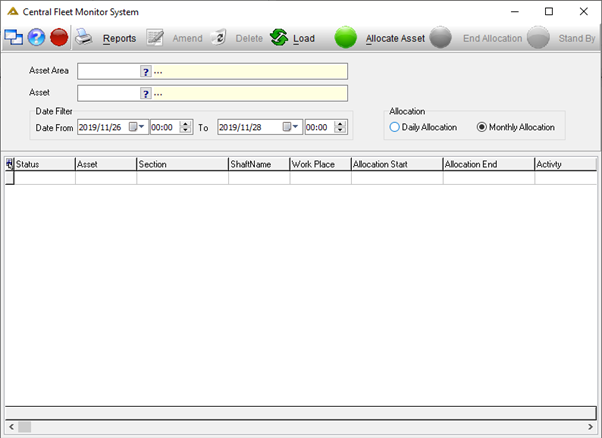
Select the Monthly Allocation radio button.
Select the ![]() button on the screen as shown in the below example.
button on the screen as shown in the below example.
Start Allocation
Select the desired asset area if you want to filter the Assets by area. Leave blank to not filter. Select the asset to allocated. Only assets not part of the LHD group, active, online (CAMS) will be available. Asset Type and Group are only for display purposes. The asset may not be already allocated.
Select the monthly activity and sub-activity. Only sub-activities not marked as Daily will be available.
Select the allocation start. This may not be future dated, but backdating is allowed.
Select the allocation section and work place. The work place is optional for monthly allocations. The mine overseer is auto populated when selecting the section.
Select ![]() to save the allocation.
to save the allocation.
Viewing Monthly Allocations
To view the selected allocation, do the following:
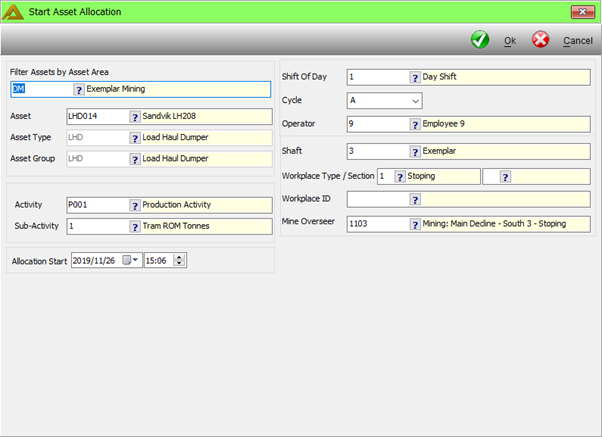
Select the asset area if you wish to filter out the assets by area. Leave blank to not filter. Note, asset areas available can in turned be filtered by employee areas. Select the asset if you wish the results to be filtered by the asset. Leave blank to not filter. Select the date range to filter the allocation returned by with in the range selected.
Select Monthly Allocation,
Click on the ![]() button.
button.
The grid displays all monthly allocations within the selection criteria.
Ending monthly allocation
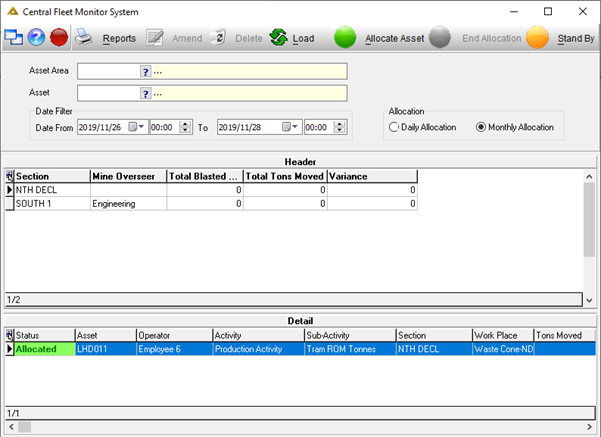
To end the monthly allocation of an asset and make it available for the next allocation, select the end allocation button or double click on the detail line.
Select the allocation end time.
Select ![]() to end the allocation.
to end the allocation.
User will be prompted to capture meter readings exactly like when closing daily allocations.
Amending monthly allocations
Monthly allocations can also be amended much like daily allocations.
** No Standby applicable for monthly allocation.
Reports
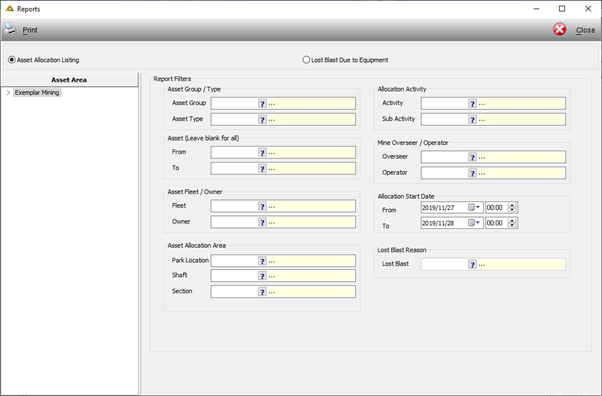
Two standard report exist namely, Asset allocation listing and Lost blasts due to equipment.
To access the reports, select the ![]() button.
button.
