Overview
This application is used to capture and maintain Schedules. Schedules are used to generate work orders for planned jobs.
The application is also used to maintain the tasks shown on the schedules and to specify which of the schedules should automatically be generated every week.
The phrase ‘auto job cards’ refers to a scheduled event each Tuesday where jobs will automatically be created for the schedules if the schedule has been set to auto release.
Function
Maintain Schedules
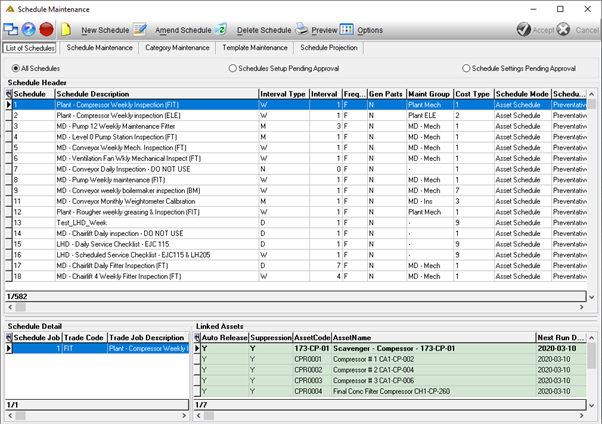
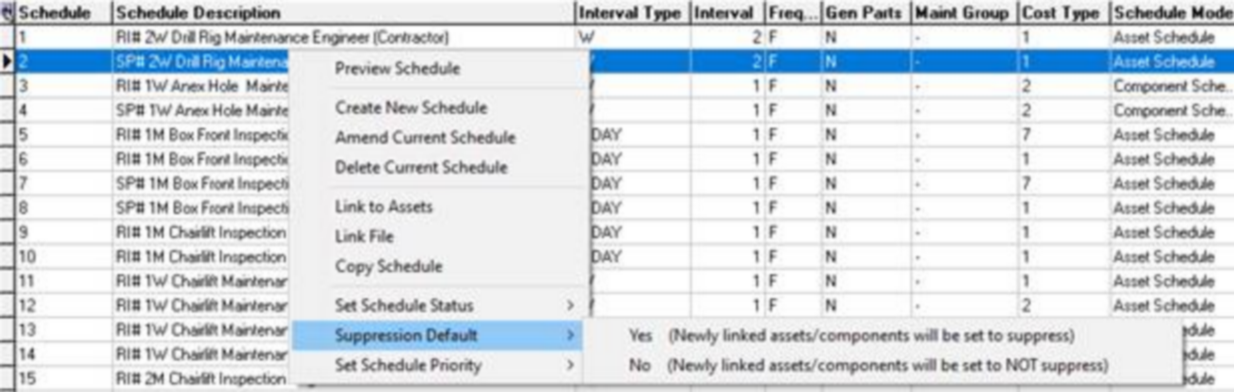
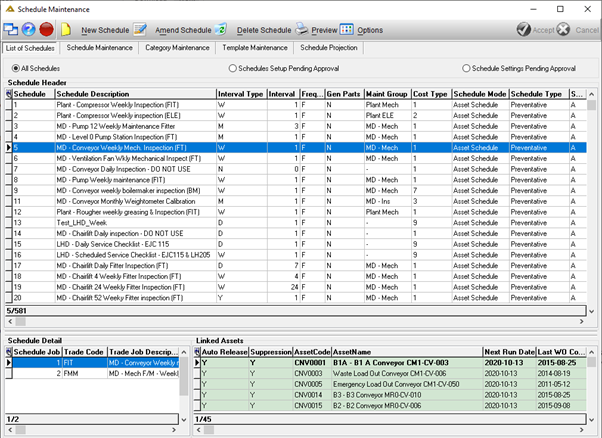
List of Schedules
This tab displays all the existing schedules. The option exists to show/hide closed schedules, inactive schedules and invalid schedules.
All Schedules radio button:
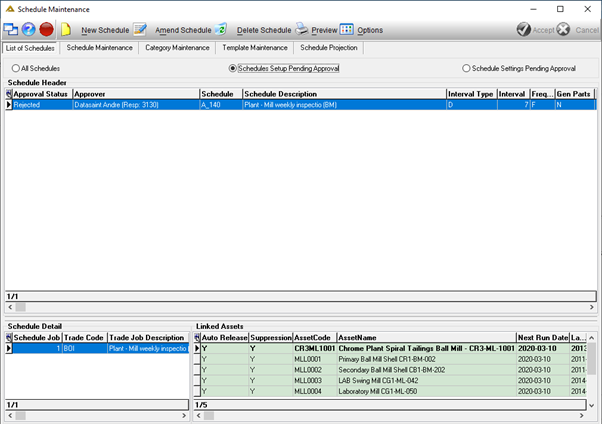
Schedules Setup Pending Approval radio button:
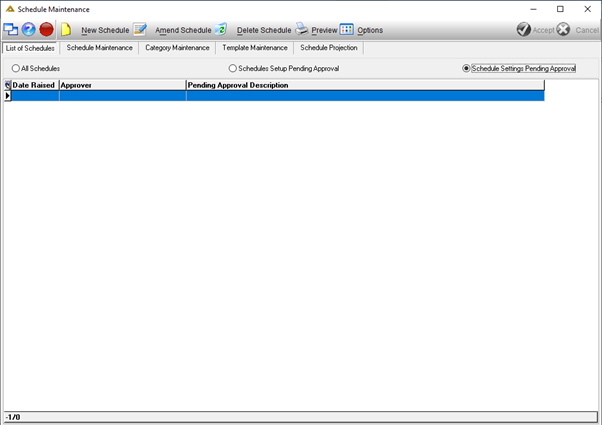
Schedule Settings Pending Approval radio button:
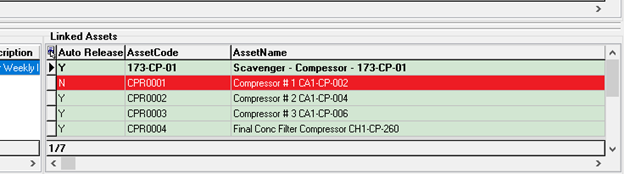
Inactive equipment will be highlighted in red on the Linked Assets grid:
When you right-click on a selected schedule you will have the following options:
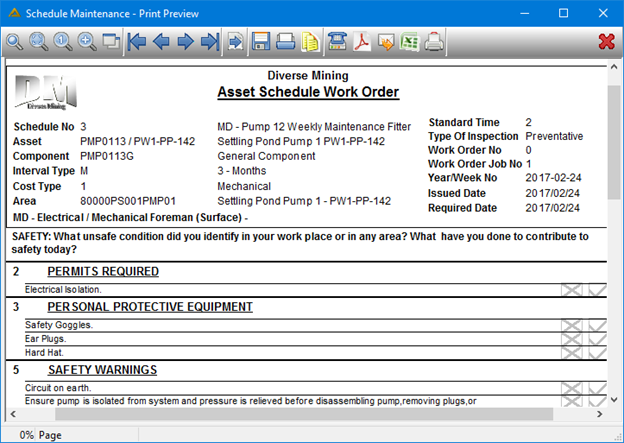
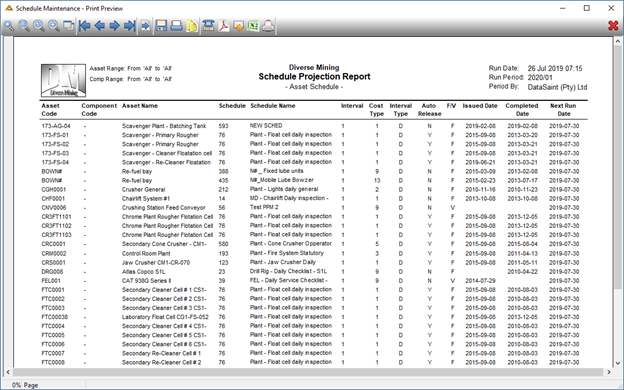
Preview Schedule will view the Asset Schedule Work Order for the selected schedule:
To Create a New Schedule
A new schedule can be created either by using the right click functionality and selecting ‘Create New Schedule’ as in the example of the right-click options above, or by clicking on the ![]() button. The Schedule Maintenance tab will be opened:
button. The Schedule Maintenance tab will be opened:
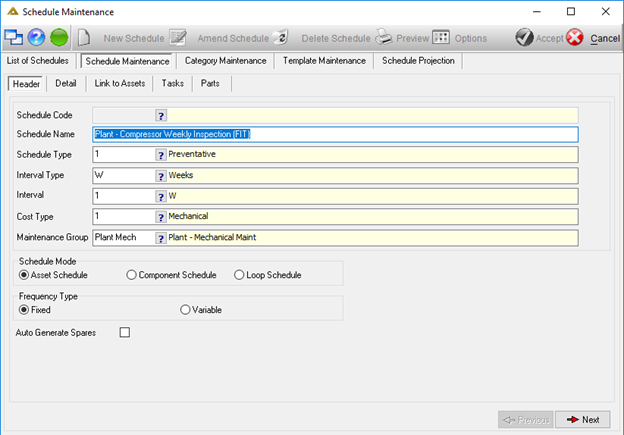
Header Tab:
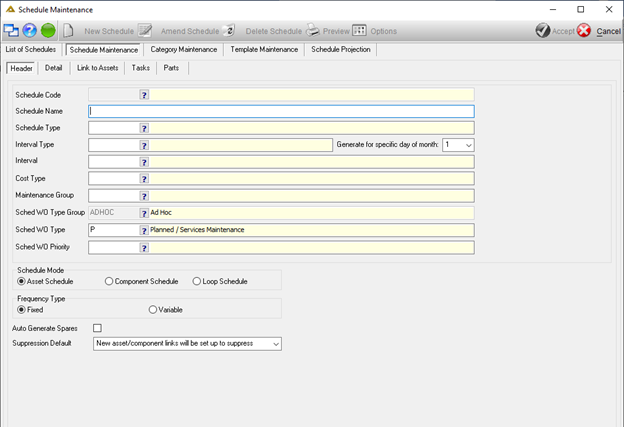
The schedule Code is populated automatically.
Type the name of the new schedule in the Schedule Name field.
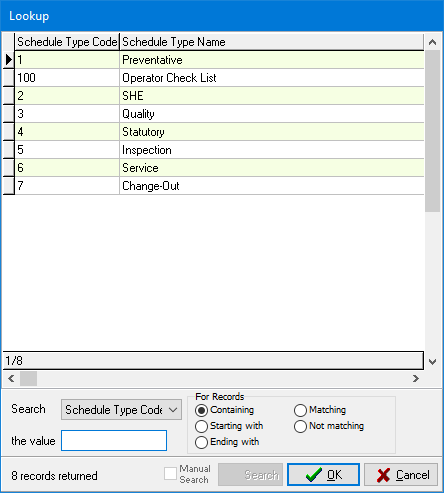
Use the picker to select a Schedule Type, Interval Type and Interval. Select Schedule Type 7 for a change out component:
When the change out schedule is generated, the change out table will be populated with the initial change out information, such as current component and serial number.
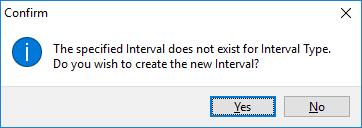
You can add new intervals by entering any numeric value in the picker edit box. The following confirmation box will display:
Select the Cost Type for the Schedule you are creating. The system uses the cost type to determine which foreman is responsible for carrying out the job and which cost centre must be used for the work order. At least one component on an asset should have a cost type that matches the cost type of the schedule.
Select a Maintenance Group. This is used for grouping relevant schedules together.
Specify if the schedule will apply to assets, components or loops.
![]()
Select the Frequency Type. Fixed Frequency schedules will generate based on the last issue date and Variable Frequency schedules will generate on the completion date of the work order.
![]()
Tick the 'Auto Generate Spares' check box to automatically generate any parts linked to the schedule. The parts will be created depending on the company policy i.e. Normal e-requisition approval or MCO approval.
Suppression Default options will give you the following options:

Once completed, click the ![]() button in the bottom right of the screen to continue to the next tab.
button in the bottom right of the screen to continue to the next tab.
The back button can be used to return to this tab to make changes before finally posting the schedule.
Detail Tab:
The detail tab determines the trades and jobs that will exist on work orders created from the schedule. To add a job line to the schedule, click on the ![]() button.
button.
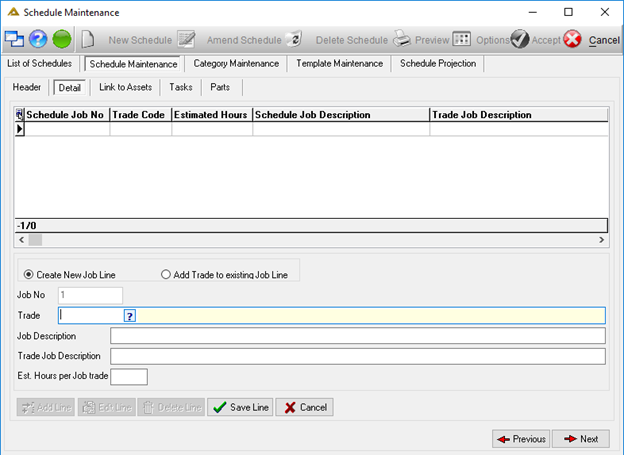
Choose whether you want to add a new job or add a line to an existing job line. The job number will automatically be populated.
Select a trade for the job.
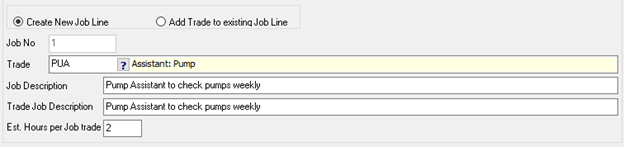
Enter a description for the job, trade and estimate hours per job trade:
Click on the ![]() button to create the new job for the schedule.
button to create the new job for the schedule.
To amend or delete an existing line, click on the ![]() or
or ![]() button.
button.
Click the ![]() button in the bottom right part of the screen to continue to the next tab after all of the trades and jobs have been captured.
button in the bottom right part of the screen to continue to the next tab after all of the trades and jobs have been captured.
Link to Assets Tab
The Links tab determines the Assets or Components for which schedules will be generated (The screen will look slightly different for component schedules, but the principle remains the same)
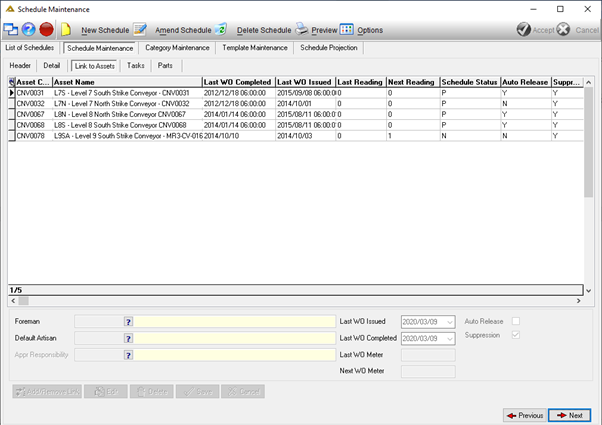
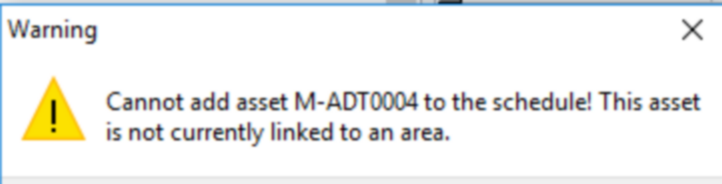
Inactive assets/components linked to the schedule will be highlighted red here as well. Inactive assets/components will not appear on the Available Assets grid on the Add/Remove Link Dialog. Removing an inactive asset/component from the schedule will also cause it not to show in the Available Assets side of the dialog. After the asset status has been amended to active using the Assets and Components application, it will show in the Available Assets list, but only after the schedule was selected again in the picker or the list of schedules. Assets not linked to areas comes up as available assets to be linked, but when double clicking them, the following message will be displayed:
Add a new Asset Link:
Click on the ![]() button.
button.

Select an Asset Type. Once you have selected an asset type, the available assets will be shown in the grid. Double click on an asset line to link it to a schedule.

When you have completed this, click on the ![]() button.
button.
The system automatically tries to determine the foreman that must carry out the work based on the asset and the schedule cost type. Specifying a foreman here will overwrite the automatic foreman determination logic. The schedule will always go to the specified foreman.

(The same data will be saved for each asset link if multiple assets get linked at a time. Each asset will for example has the same Foreman. The “Amend Link” button can be used to change the data for each asset individually)
You can enter the “Last WO Meter” and the “Next WO Meter”.
![]()
You can check the “Auto Release” box if work orders for the schedule should automatically be generated.
![]()
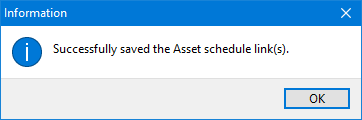
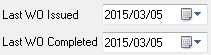
You can Specify the “Last WO Issued” and the “Last WO Completed” dates.
These dates will be used by the auto job cards to determine whether the schedule must be generated (See explanation on Frequency Types)
Click the ![]() button in the bottom right part of the screen to continue to the next tab after all of the asset/components links have been captured.
button in the bottom right part of the screen to continue to the next tab after all of the asset/components links have been captured.
Notes (Amending or Deleting links)
•Select the link that must be removed or changed.
•Click the ![]() button to change details on a selected line.
button to change details on a selected line.
•Click the ![]() button to remove the selected line.
button to remove the selected line.
Tasks Tab
A task refers to the work that must be done and will show on the work order job cards.
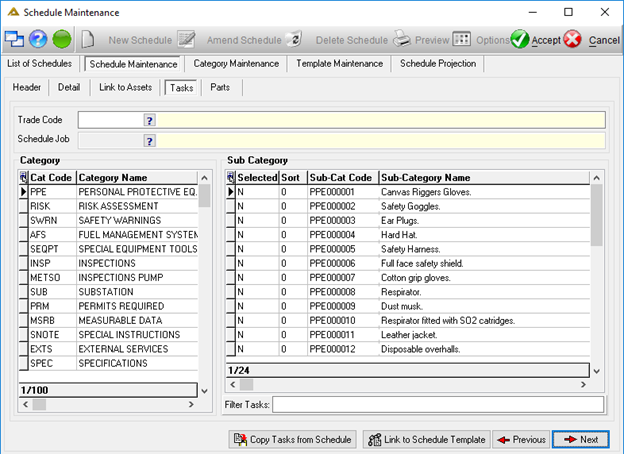
Linking Tasks Manually
Select a Trade and Job.
Select a Category from the grid to the left.
Click on tasks in the grid to the right to mark the tasks as selected.

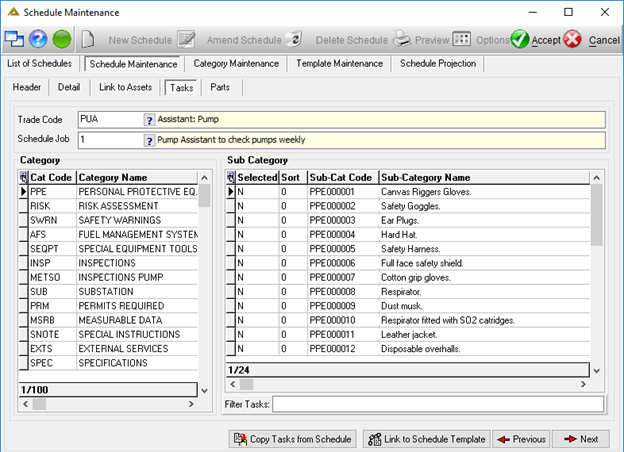
(Note: All selected tasks are automatically moved to the top of the grid to make it easier to see which tasks have been selected from each category)
There isn’t a save button on the Tasks tab. Clicking the task automatically saves the link. Each trade on a job has its own set of tasks.
Linking Tasks with a Templates
Select a Trade and a Job.
Click the ![]() button in the bottom right part of the screen.
button in the bottom right part of the screen.
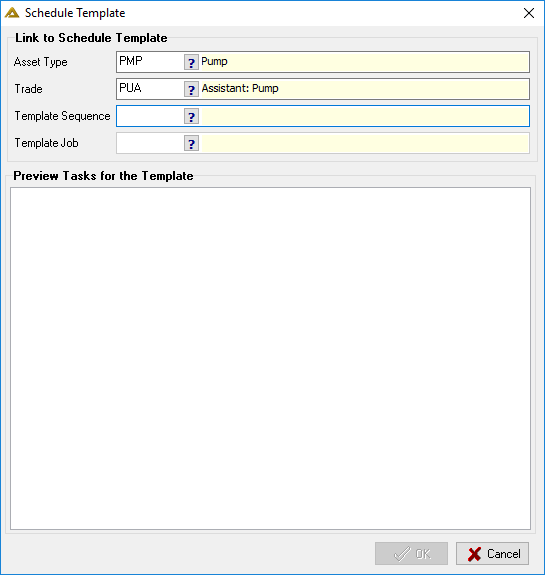
(The template was created ahead of time for the example. Please see the “Maintain Schedule Templates” section for guidance on how to create templates)
Select a Template Sequence.
The Template Sequence allows more than one Template to be selected for a specific trade and job.
For example:
Service Template Sequence
Inspection Template Sequence
Select a Template Job
The template job allows for multiple task lists to be linked per template.
For example:
Service Template Sequence
Full Service Template Job
Emergency Service Template Job
Minor Service Template Job
Inspection Template Sequence
Full Asset Inspection
Engine Inspection
Structural Inspection
A preview of the list of tasks will be shown after selecting a Template Job.
Click the ![]() button to load the task list for the selected Trade.
button to load the task list for the selected Trade.
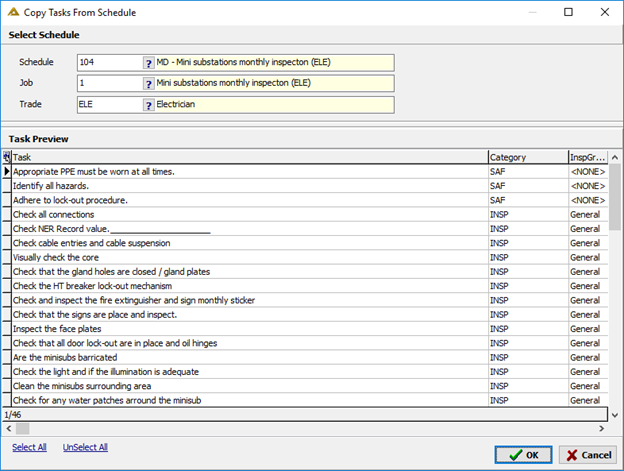
The ![]() button allows you to copy existing tasks from existing schedules to the new schedule you are creating.
button allows you to copy existing tasks from existing schedules to the new schedule you are creating.
Click the ![]() button in the bottom right part of the screen to continue to the next tab after all of the tasks for the schedule have been defined.
button in the bottom right part of the screen to continue to the next tab after all of the tasks for the schedule have been defined.
Parts Tab
Parts refers to any items needed to complete the job. The parts specified will print on the job cards.
Parts can be handled in one of two ways depending on the system setup:
•MCO – Jobs will be sent to a Material Controller who is responsible for verifying the spares request. e-Req stores issues will only be created for verified parts.
•No MCO – e-Req stores issues will automatically be created for the parts.
•Non-stock items can be linked to Schedules. This functionality is controlled by a system parameter and will only be available if the parameter is active (PM_SCHED_ALLOW_NSTK_PRTS)
•The 'Auto Generate Spares' box on the Header tab must be checked for the schedule to automatically request the parts.
Adding parts to a Schedule
Click the ![]() button in the bottom left part of the screen.
button in the bottom left part of the screen.

Select a Trade, Job, Item and Delivery Location.
The Delivery location field is only active and required if the client uses the MCO routing functionality. The Delivery Location will only return certain types of delivery locations.
Please Note:
Non-stock items without a valid contract will not generate a requisition. These items are displayed as 'Awaiting Approval' on the job card. The schedule job card layout was updated to indicate that no requisition was generated for these items.
Notes (Amending or Deleting part lines)
Select the item line that must be removed or changed
Click the ![]() button to make changes to the selected item.
button to make changes to the selected item.
Click the ![]() button to remove the selected item.
button to remove the selected item.
Notes (Amending or Deleting part lines)
All the changes made on the tabs up to this point are still contained in the memory and have not physically been saved yet.
The ![]() button in the bottom left can be used to return to previous tabs to make changes before the schedule is finally saved.
button in the bottom left can be used to return to previous tabs to make changes before the schedule is finally saved.
Click the ![]() button in the top left to finish creating the schedule.
button in the top left to finish creating the schedule.
Click the ![]() button in the top left cancel creating the new schedule.
button in the top left cancel creating the new schedule.
The button to save the schedule is only available on the Parts and Tasks tabs. Use the ![]() button to navigate to the parts or tasks tabs to save changes to the schedule.
button to navigate to the parts or tasks tabs to save changes to the schedule.
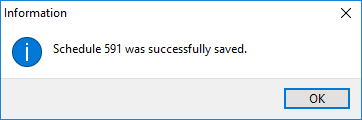
The Schedule has now been created after clicking the ![]() button.
button.
Managing Schedules
Select the 'List of Schedules' tab.
Methods for Maintaining schedules:
•Double-click a schedule in the Schedule Header grid to amend it.
•Double-click an asset/component in the bottom left grid to link assets or components to the schedule.
•Click the 'New Schedule' option to create a new schedule.
•Click the 'Amend Schedule' option to amend a schedule.
•Click the 'Delete Schedule' option to delete a schedule.
•Click the 'Preview' option to see how the job card will look when printed out.
•Right-click the Schedule Header grid for a pop-up menu.

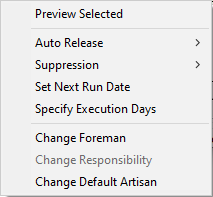
Mark Assets/Components for auto job cards generation:
Select the 'List of Schedules' tab.
Right-click the links grid.
Select the 'Auto Release' menu option. The Auto Release option will only be enabled if the user has the correct level of access rights.
Select the 'Yes' menu option.

The asset will now be marked for auto job card generation.

When you suspend a schedule using the Suspend Schedule application, the Auto Release flag for this asset on the schedule will update to N and cannot be manually amended. Should you right click on the linked Assets grid, the Auto Release line is disabled. It will only enable when the schedule suspension ends by date or is manually stopped. This applies to linked components on Component Schedules as well.
Suppression:
This option is access controlled and will only be available to users with access level Other (3). It allows you to stop work orders from automatically being generated for example where previous work orders have not been completed. It won't generate new work orders until the suppression has been set back to No. Can also be used for instances where an asset has a weekly schedule and monthly schedule for the same day. One of the schedules can then be suppressed to avoid duplicates.
Select the 'List of Schedules' tab.
Right-click the links grid.
Select the 'Suppression' menu option and select 'Yes' or 'No'.

Manually set when a Schedule should next auto generate:
This option will be disabled for inactive equipment highlighted in red.
Select the 'List of Schedules' tab.
Right-click the links grid.
Select the 'Set Next Run Date' menu option.

Select the date you would like the job to be generated for next.
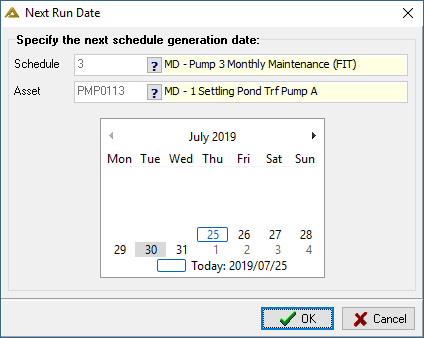
Click the ![]() button.
button.
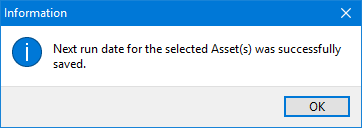
The next run date of the schedule will now be updated.
If a schedule is manually generated, the next run date will reset to the date of the next Tuesday.
Set the week day when the work must be done:
Select the 'List of Schedules' tab
Right-click links grid.
Select the 'Specify Execution Days' menu option.

Select a day of the week for when the job must be done.
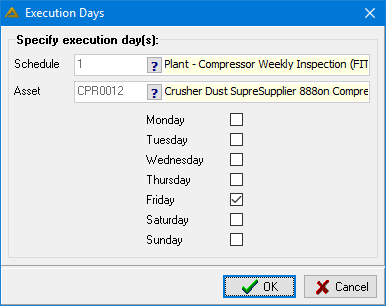
Multiple week days can be selected for a daily schedule. If an estimated number of 4 hours was specified for a daily schedule job and Monday and Tuesday was checked, then both days will have 4 hours estimated, giving a total of 8 hours.
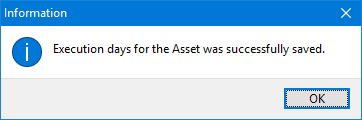
Click the ![]() button to save the changes to the execution days.
button to save the changes to the execution days.
Change the Foreman for whom the job must be created:
Select the 'List of Schedules' tab.
Right-click links grid.
Select the 'Change Foreman' menu option.

Select a Foreman.
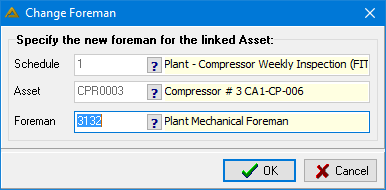
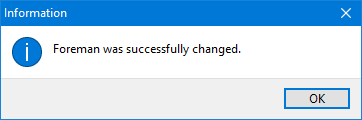
Click the ![]() button to change the Foreman for the job.
button to change the Foreman for the job.
Change Responsibility
To change the approving responsibility, select 'Change Responsibility' from the right click menu:
Preview Schedule Job Cards
Schedules can be previewed to see how they will look before generating work orders (NOTE: This is only a preview and no work order will be created)
Preview work orders will not print for inactive equipment linked to a schedule.
Select a schedule to view from the grid.

Click the ![]() button to view the schedule.
button to view the schedule.
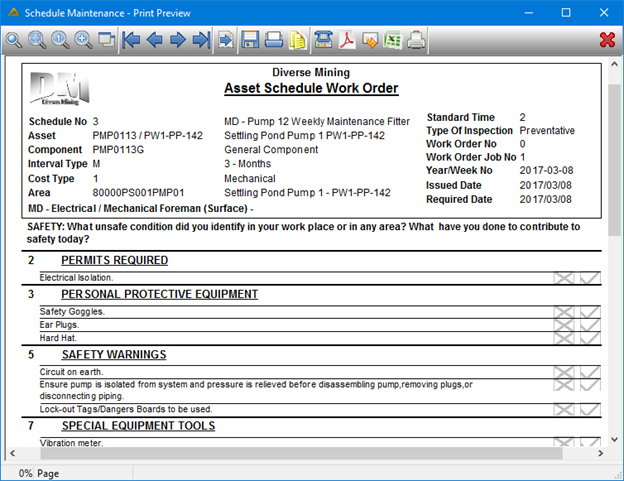
Using the ![]() button to view the schedule will display the job cards for all assets linked to the schedule.
button to view the schedule will display the job cards for all assets linked to the schedule.
If you wish to only preview a specific asset / component schedule, select the schedule from the grid and right click on the linked components grid.
Select the 'Preview Selected' option:

The system will now only preview the scheduled job card for the selected asset.
Maintain Schedule Tasks
The categories and sub-categories determine the available tasks when creating schedules.
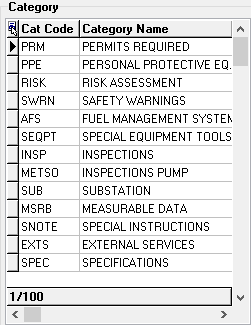
Categories – Grouping of related sub-categories (Service, Inspection …)
Sub-categories – The individual tasks in each category (10000km Service)
Create Categories
Select the Category Maintenance tab.
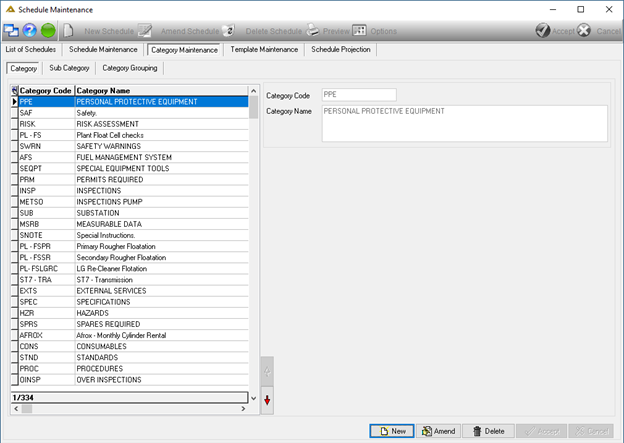
Click on the ![]() button.
button.
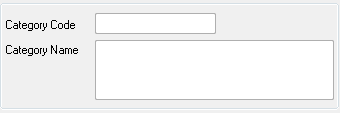
Enter a Category Code and a Category Name into the fields.
Click the ![]() button to create the new category or
button to create the new category or ![]() to discard.
to discard.
Categories can be amended or deleted when clicking the ![]() or
or ![]() buttons.
buttons.
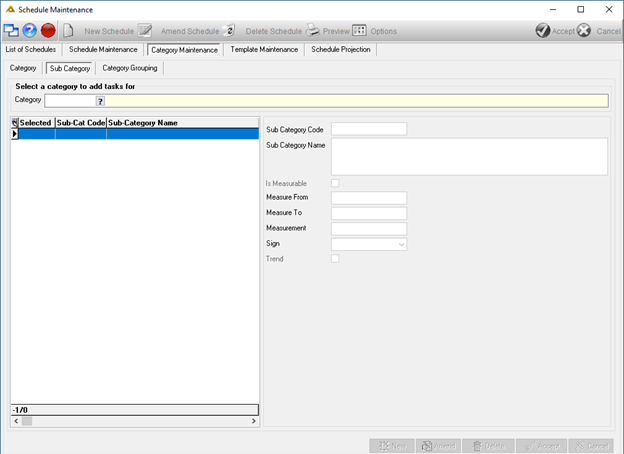
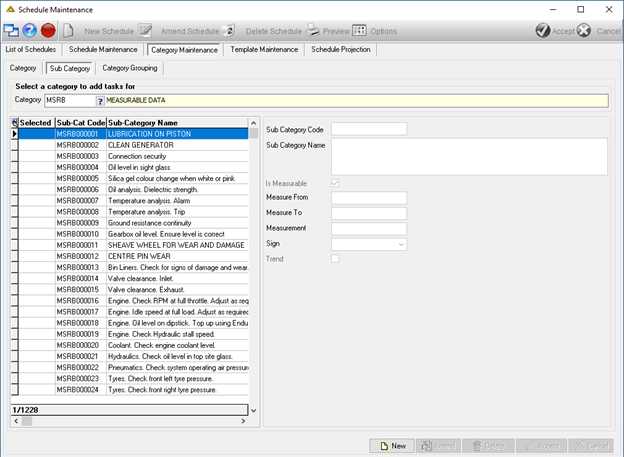
Create Sub-Categories
Select the Sub Category tab from the Category Maintenance tab or the grid can be double-clicked to automatically go to the Sub Category tab with the category selected.
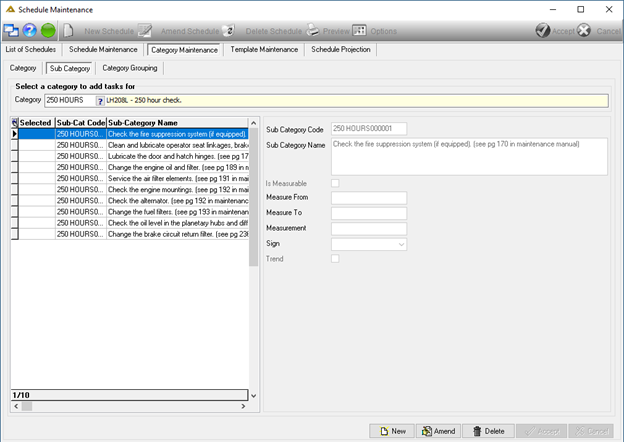
Select a Category from the picker and click the ![]() button.
button.
Enter a Sub Category Name. The code will automatically be populated.
The measurement fields are only applicable to the Measurable tasks and will only enable when the Is Measurable tick box is ticked. For measurable sub-categories, the user will be forced to enter values in Measure From, Measure To, Measurement and Sign fields.
Click the ![]() button to create the new sub category.
button to create the new sub category.
Sub Categories can be amended or deleted when clicking the ![]() or
or ![]() buttons.
buttons.
Grouping Category Tasks
Tasks can be grouped under a common heading per category.
Create a new Category Grouping
Select the Category Maintenance tab.
Select the Category Grouping tab.
Select the category where task grouping must be applied.
Click the ![]() button in the bottom left corner.
button in the bottom left corner.
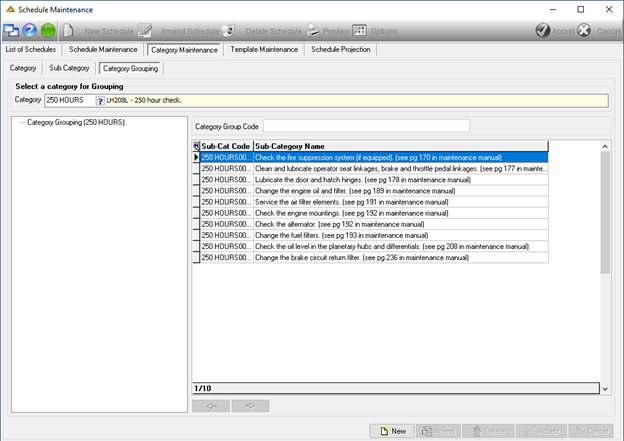
Enter a code (This code will be the name displayed on the job card)
Click the ![]() button in the bottom left corner of the screen to create the grouping.
button in the bottom left corner of the screen to create the grouping.
Link Tasks to the category groupings
Select the Category Maintenance tab.
Select the Category Grouping tab.
Select the category which you want to work with using the picker.
Enter the Category Group Code and click on the ![]() button. The category you've created will now be displayed under the category selected.
button. The category you've created will now be displayed under the category selected.
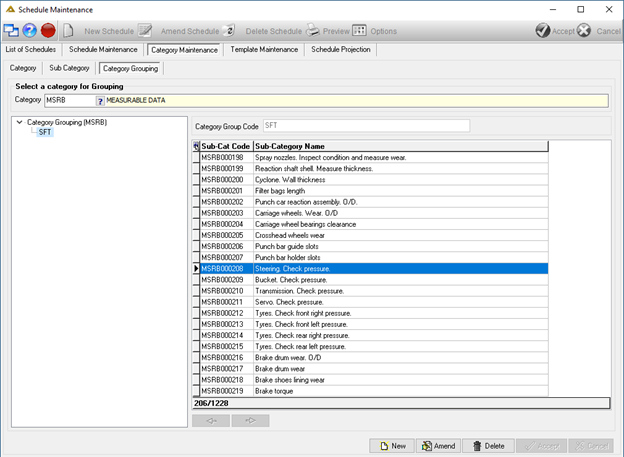
Select the category from the tree view to which you wish to add sub-categories.
You can now use the arrows to add and remove items by selecting them and clicking on the corresponding arrow.
![]()
![]()
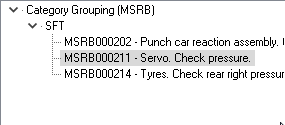
Tasks added will be displayed in the tree view as follows:
(Double-clicking the grid will also add the tasks)
The name of the category grouping can be amended using the ![]() button.
button.
The category grouping can be deleted using the ![]() button. Groupings can only be deleted if they are not in use by any schedules.
button. Groupings can only be deleted if they are not in use by any schedules.
Measurable Tasks
Measurable tasks allow users to capture measurable data when capturing feedback for work orders.
This measurable data can then be viewed in the Schedule Trending Graph report.
Create a new Measurable Task
Select the Category Maintenance tab.
Select the Sub Category tab.
Select the MSRB category from the category picker. (MSRB = Measurable Data)
Click on the ![]() button and enter a Sub Category Name, Measure From and To and Measurement. Select a sign using the drop-down arrow and mark the Trend tick-box if applicable.
button and enter a Sub Category Name, Measure From and To and Measurement. Select a sign using the drop-down arrow and mark the Trend tick-box if applicable.
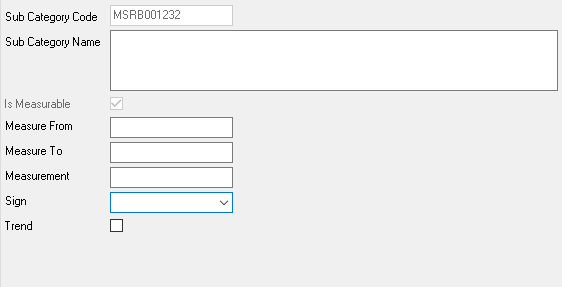
The Sign field describes how the measurement is to be assessed.
Example:
Measurement should be between 1 and 10
Measurement should be = to 10 (equal to)
Measurement should be > than 10 (greater than)
Click on the ![]() button to add the new task.
button to add the new task.
The measurable data captured in the Feedback capture program needs to fall between the Measure From and the Measure To range specified.
If the measure falls outside of the specified range, then it means that something is wrong, or the asset needs to be serviced.
Example of Measurable data on the job cards:

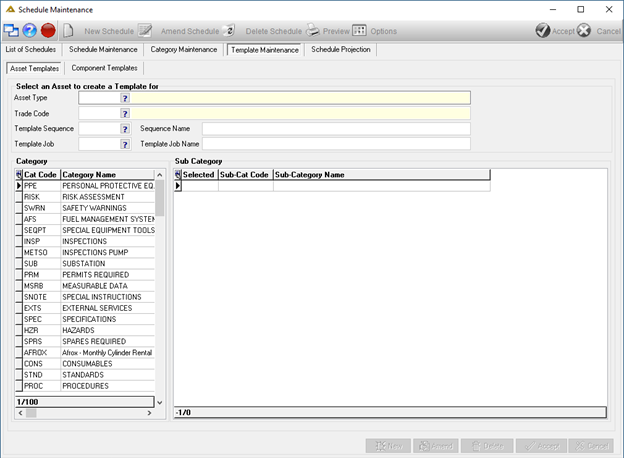
Maintain Schedule Templates
A schedule template is a list of tasks created ahead of time. These tasks can be loaded so that the tasks do not have to be selected individually.
Component and Asset Schedules use their own set of templates.
Select the Asset Templates or Component Templates tab accordingly.
Select the Template Maintenance tab
Select an Asset Type and Trade.
Create a new Template Sequence:
The Template Sequence allows more than one Template to be created for a specific trade and job.
For Example:
Service Template Sequence
Inspection Template Sequence
The template job allows for multiple task lists to be created per template.
For example:
Service Template Sequence
Full Service Template Job
Emergency Service Template Job
Minor Service Template Job
Inspection Template Sequence
Full Asset Inspection
Engine Inspection
Structural Inspection
Click the ![]() button in the bottom left corner.
button in the bottom left corner.
Enter a Sequence Name and a Template Job Name.
Select a category from the Category grid to the left.
Click the tasks in the Sub Category grid to mark them as selected.
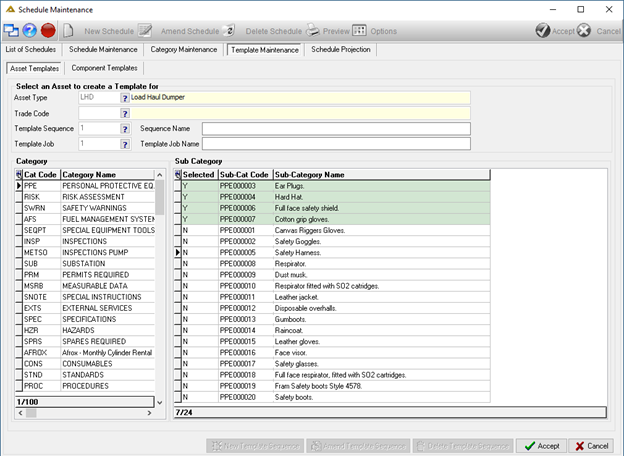
Click the ![]() button in the bottom left corner to save the new Template.
button in the bottom left corner to save the new Template.
Add Template jobs to a Template Sequence:
Select an Asset Type and a Trade Code.
Select an existing Template Sequence.
Select an existing Template Job.
Click on the ![]() button.
button.
Enter the Sequence Name and Template Job Name.
Select the tasks for the new template job.
Click the ![]() button to save the new template job.
button to save the new template job.
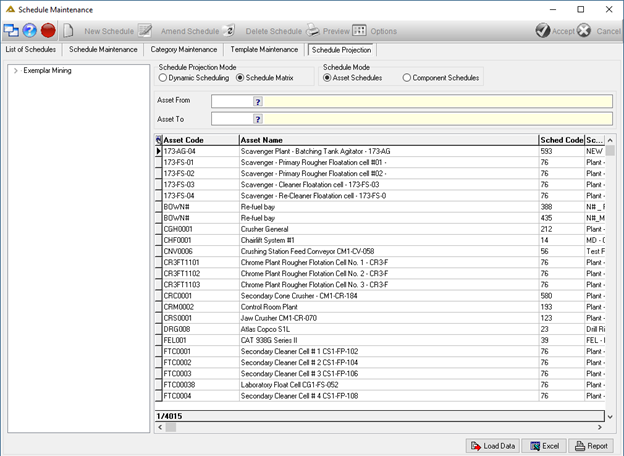
Schedule Projection
Select the Schedule Projection tab.
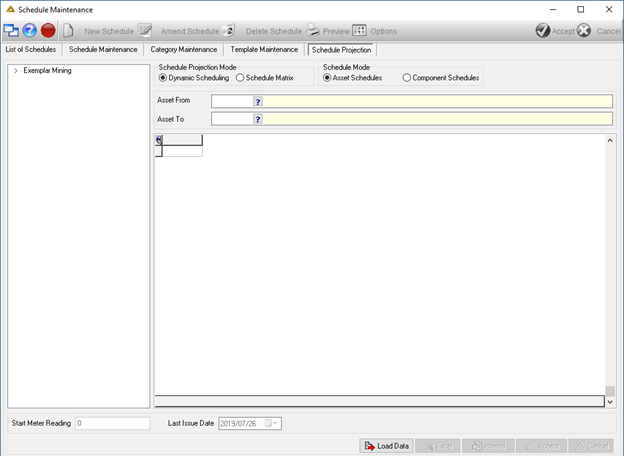
Select the Schedule Projection Mode.
![]()
The dynamic schedule projection shows the estimated next run date for meter readings like kilometres.
It also shows the estimated days and meters before the next schedule run date.
The schedule mode is used to switch between projections for Assets or Components.
![]()
(Optional) Select an area from the tree to filter the projection by area.
(Optional) Select an asset range to filter the projection by asset.
Click the ![]() button to load the projection.
button to load the projection.
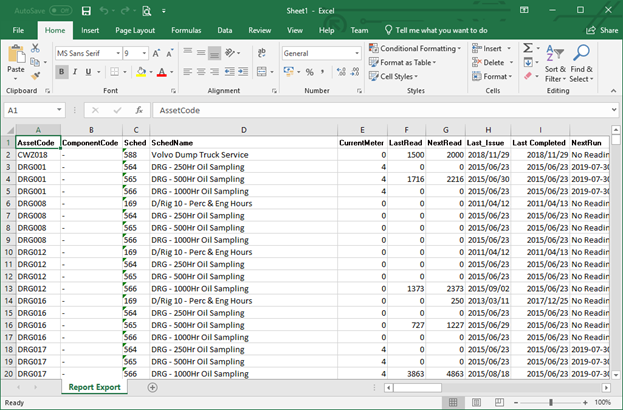
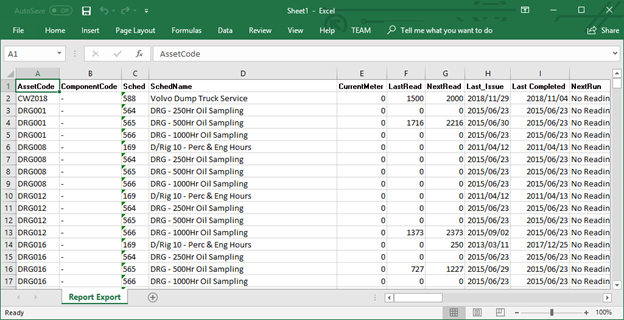
The ![]() button in the bottom left corner can be used to export the results to excel.
button in the bottom left corner can be used to export the results to excel.
Change the Issue and Meter Reading:
Select an asset in the grid.
Click the ![]() button.
button.
Enter a new Start meter reading and Last Issue Date.
![]()
Click the ![]() button to save the changes.
button to save the changes.
(Changing the start reading and last issue date influences when the schedule will next be generated)
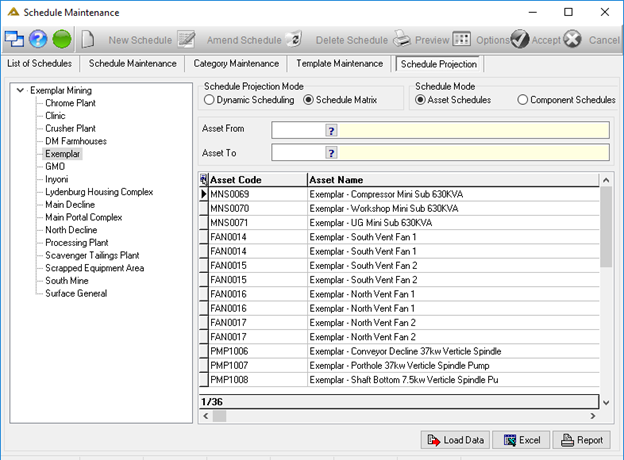
Schedule Matrix Reporting
The schedule matrix projects in which weeks the schedule will be generate for the next year. This projection shows all schedules.
Select the Schedule Projection Tab.
Select the Schedule Matrix Mode.
Select an area from the tree to filter the projection by area.
Select an asset range to filter the projection by asset.
Click the load button to ![]() the projection.
the projection.
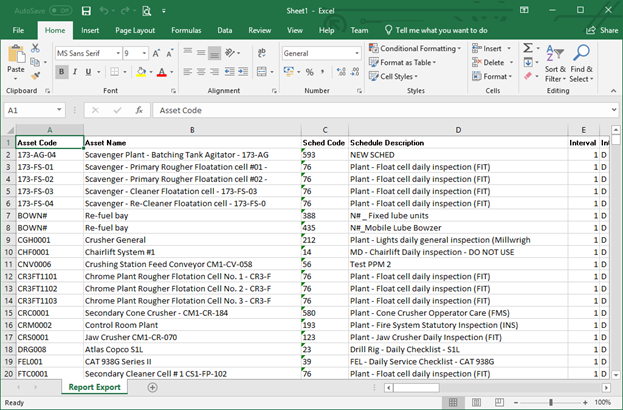
The ![]() button in the bottom left corner can be used to export the results to excel.
button in the bottom left corner can be used to export the results to excel.
Matrix Projection Report:
Select the 'Schedule Matrix' radio button in the 'Schedule Projection Mode' section:
Select the area or asset range you wish to view and click on the ![]() button.
button.
The ![]() button exports the data to a Microsoft Excel spreadsheet:
button exports the data to a Microsoft Excel spreadsheet:
Click the ![]() button to generate a report preview:
button to generate a report preview:
The ![]() button has the following options:
button has the following options:
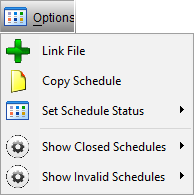
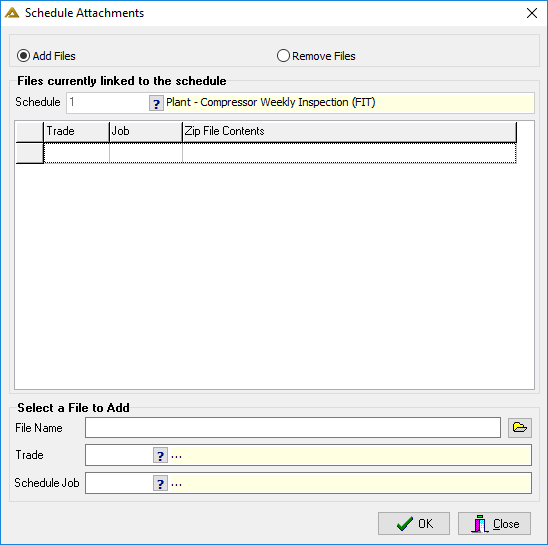
Linking a file:
![]() allows you to link or remove linked files/documents to the selected schedule.
allows you to link or remove linked files/documents to the selected schedule.
DeltaERP will print out these documents when printing the schedule. Note that the documents will not show when previewing a job card. It will only print the attached documentation when physically printing to a printer.
This documentation is useful if, for example, you want to attach a specification sheet for the equipment that must be maintained.
Copying a schedule:
![]() allows you to create a copy of an existing schedule. The details can be changed as required and the schedule can then be saved as a new schedule.
allows you to create a copy of an existing schedule. The details can be changed as required and the schedule can then be saved as a new schedule.
Set schedule status
![]() allows you to set the schedule status to either active or closed.
allows you to set the schedule status to either active or closed.
Show closed schedules:
![]() allows you to choose whether or not you wish to view closed schedules.
allows you to choose whether or not you wish to view closed schedules.
Show invalid schedules:
![]() gives you yes or no options to choose whether you wish to view invalid schedules.
gives you yes or no options to choose whether you wish to view invalid schedules.