Overview
This application is available to most users that can log into the system. The main purpose of this application is to increase integrity and control over budget usage. The application allows for everyone to raise electronic requisitions but limits the number of people who can approve those requisitions.
Cost accountants cannot select the originator's responsibility when changing the budget holder/approver of the e-req.
The parameter (ONLINE_REQ_FORCE_RESP) will enable or disable the selection of the supervisor responsibility.
Function
When the application is opened you will be able to view the pending tab.
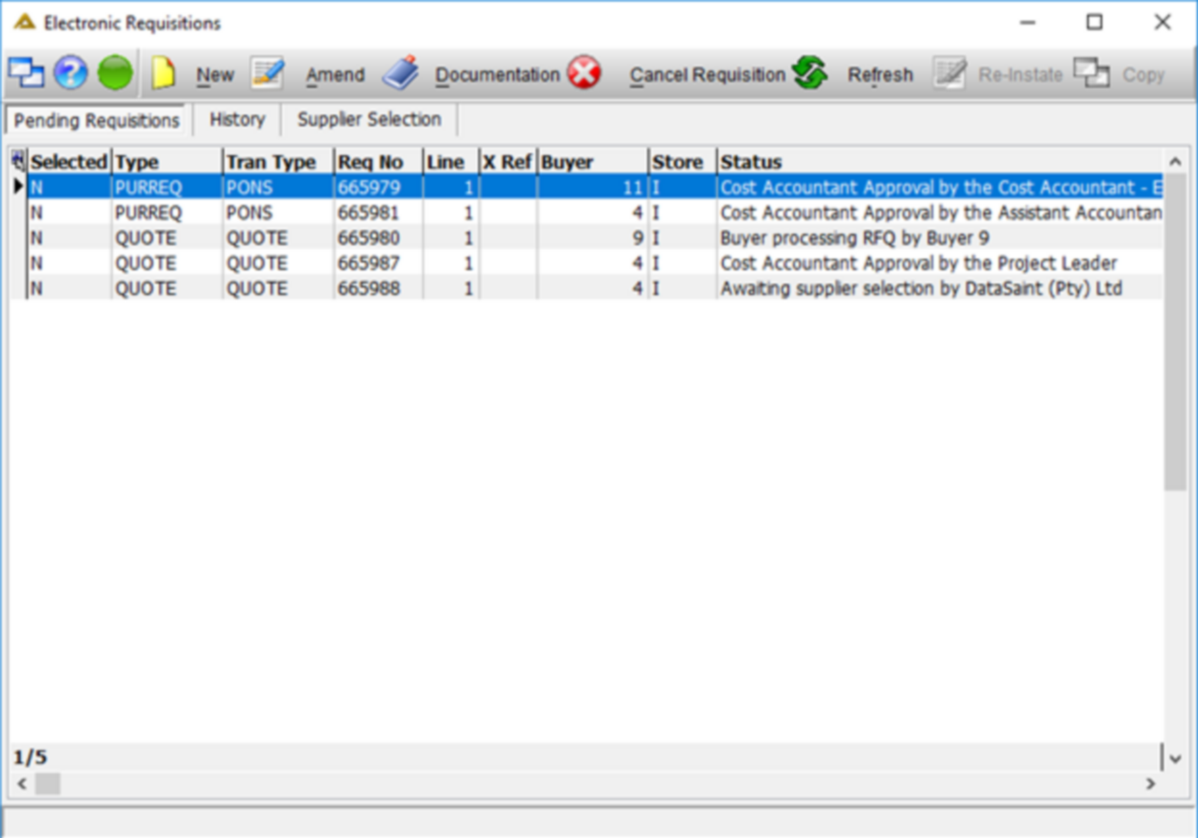
Click on the ![]() button.
button.
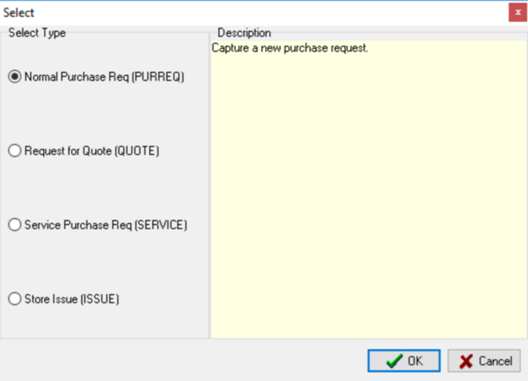
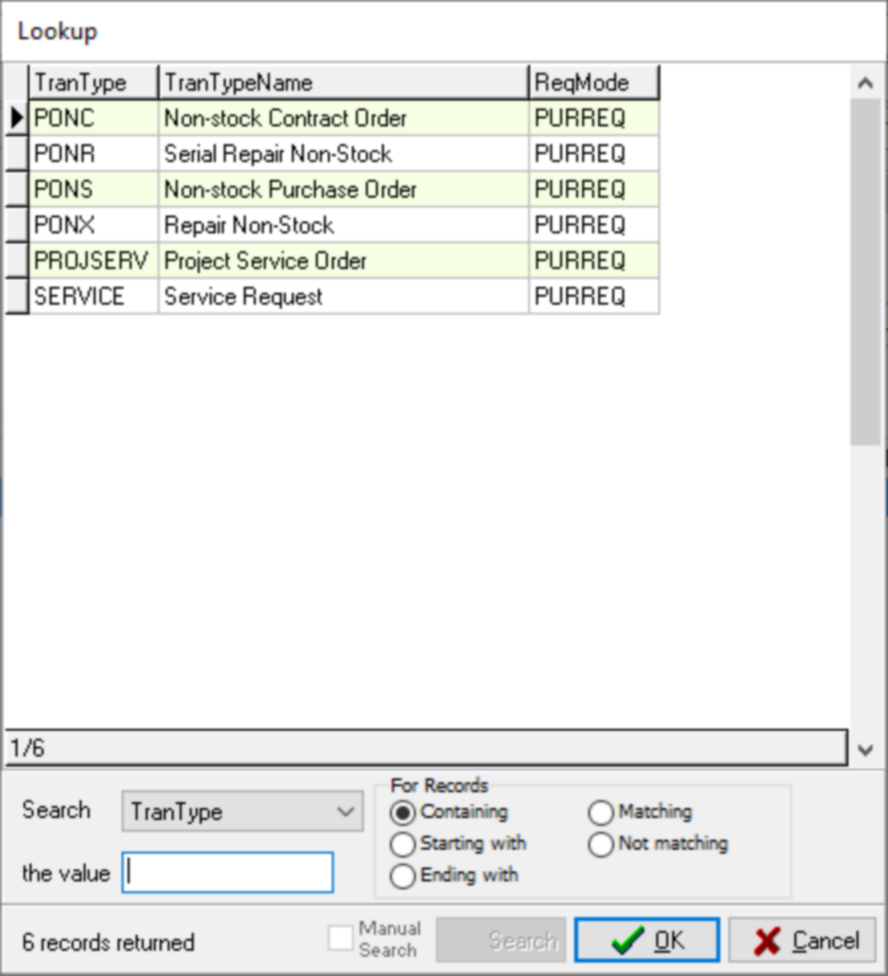
Select the requisition type from the options screen and click on the ![]() to continue to the capture screen. The types shown on the selection screen will differ as per client requirement. The types are set up using the Profile Maintenance application.
to continue to the capture screen. The types shown on the selection screen will differ as per client requirement. The types are set up using the Profile Maintenance application.
Select the required information using the ![]() or enter it manually.
or enter it manually.
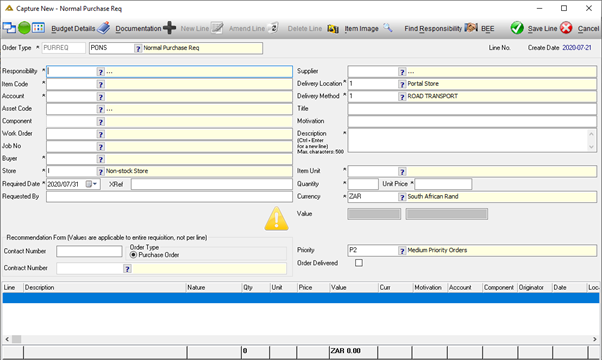
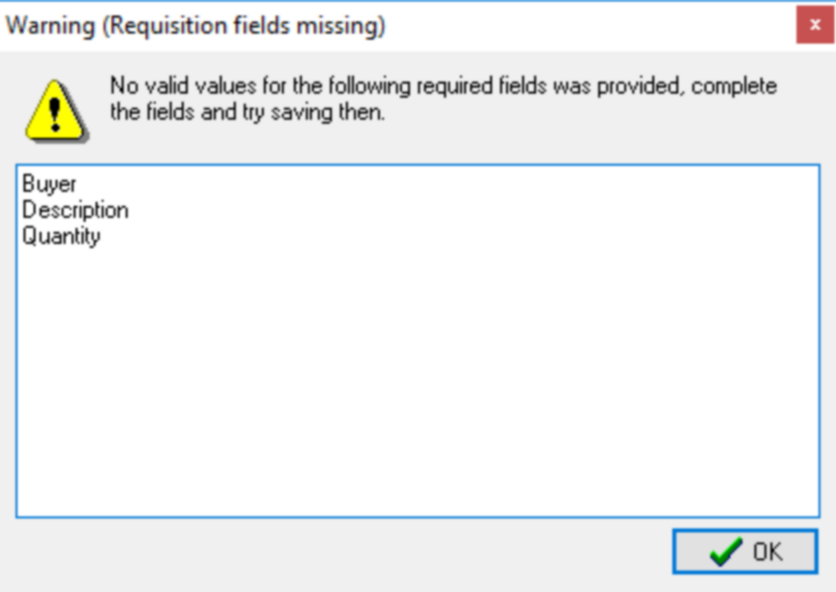
The ![]() indicates mandatory fields which have not been completed. If the user clicks the
indicates mandatory fields which have not been completed. If the user clicks the ![]() button while the yellow triangle is still displayed, a validation warning will list the fields still outstanding.
button while the yellow triangle is still displayed, a validation warning will list the fields still outstanding.
Order type
A specific order type should be selected and forms part of the prefix to an order. Order types available for selection is dependent on client specific set up.
Responsibility
This is the responsibility of the budget holder who will be approving the requisition.
Item Code
This is the item you are capturing the requisition for.
Account
This can either be a cost centre, ledger, debtor or project account. Only account ranges that have been assigned to the responsibility number will be available for selection.
Nature
Only nature ranges that have been assigned to the responsibility number will be available for selection. The Nature field won’t always be available/displayed. This is determined by a parameter, value can be I for Item Code, N for Nature or B for both.
Asset code
This field is used to link assets to the requisition you are capturing.
DeltaERP has 3 options regarding the data in the asset picker.
The assets available for selection can be filtered as follows:
•No filter on assets. Work Order to be filtered by Responsibility Code
•Filter asset by account selected, Work Orders by asset selected.
•No filter on assets, filter Work Orders by the selected asset.
Component
Components are linked to specific maintainable assets. Once you have selected an asset, only components linked to the selected asset will be available for selection.
Work order
Selecting a work order will populate the asset code and responsibility number as specified on the selected work order.
Job no
Selecting a job number linked to a specific work order will populate the asset/component specified on the job card and expenses will be recorded against the cost centre linked to the asset code.
Buyer
Buyers not marked as Can Select when Capturing using the Procurement Master File Maintenance application (Buyer Level tab), will not be available for selection when capturing requisitions.
Store
This is the store if the item selected. It will default to a Non-stock Store if you are capturing non-stock items.
Required Date
This is the date by when the item is required. The default date populated is determined by parameters ONLINE_REQ_PURREQLEADTIME and ONLINE_REQ_ISSUELEADTIME. This date can be changed to any date but cannot be back dated.
XRef
This is an external reference field. This can be used to refer documents, invoices, quotes, etc.
Requested By
This is the person who originally requested the item for which the requisition is being captured.
Supplier
A preferred or unallocated supplier may be selected.
Delivery Location
This is the location where the item should be delivered to.
Delivery Method
The delivery method determines how the items will be delivered. Freight provision can be linked to the different delivery methods. A certain percentage freight provision can be linked using the Procurement Master Files application, Delivery Methods tab.
Title
This is the title of the requisition. It could be a brief description.
Motivation
Motivate why the item is required. This is not a compulsory field but could be required based on company policy.
Description
This is a required field. Give a description of why the item is required. Expand on the title/motivation fields.
Item Unit
This is the unit of measure used for the selected item. The item types available for selection can be maintained using the Stores Maintenance application > Item Types tab.
Quantity
This is the actual quantity of the item required.
Unit Price
The unit price per item excluding VAT.
Currency
This is the currency in which the supplier invoice is received.
Value
This field will automatically be calculated based on the quantity and unit price field values. It cannot be edited.
Contact Number
This is the contact number of the person whose name was filled in in the Requested By field.
Contract Number
If the item on the requisition is on contract, select the applicable contract number using the ![]() .
.
Priority
The priority determines how urgent the item on order is. This can range from low priority to emergency orders depending on company setup. The priorities available for selection is set up using the
Order delivered indicator
With this option selected, the user states that the order has been delivered already. The requisition will still follow the normal approval process and create an order for the buyer to release but doesn't require any expediting. This will only be an indication to the buyer to not place the order to the supplier for delivery (again) – indication will be a highlighted order in Order Confirmation with a green colour.
To view the budget information, click on the ![]() button.
button.

When all mandatory fields are completed, and the yellow triangle is no longer displayed, click on the ![]() button.
button.
The following buttons will now be enabled: ![]() ,
, ![]() or
or ![]()
System parameters will determine if multiple line requisitions may be captured.
The ![]() button allows you to attach supporting documents to the requisition. Functionality exists to force users to upload documentation before a requisition can be saved.
button allows you to attach supporting documents to the requisition. Functionality exists to force users to upload documentation before a requisition can be saved.
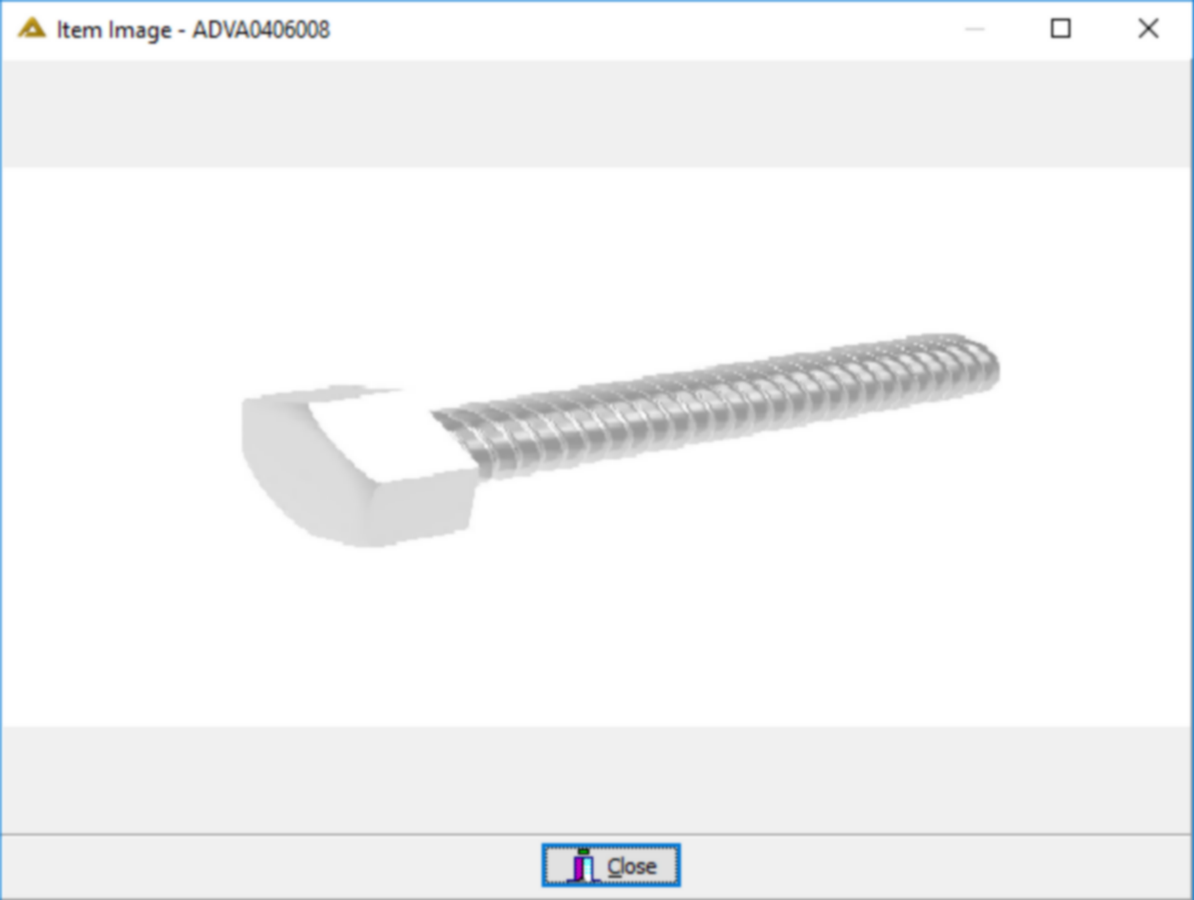
The ![]() button allows you to view an image of the selected item.
button allows you to view an image of the selected item.
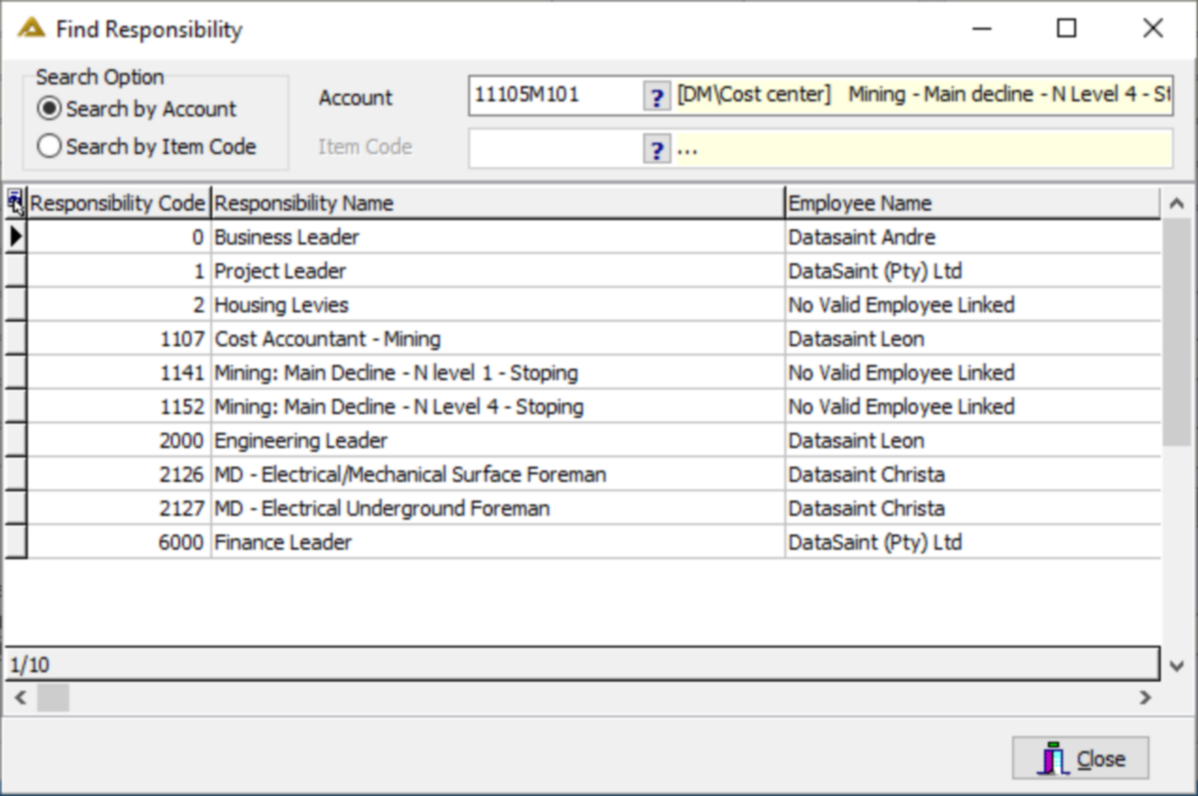
The ![]() button will help you easily find or populate the responsibility field.
button will help you easily find or populate the responsibility field.
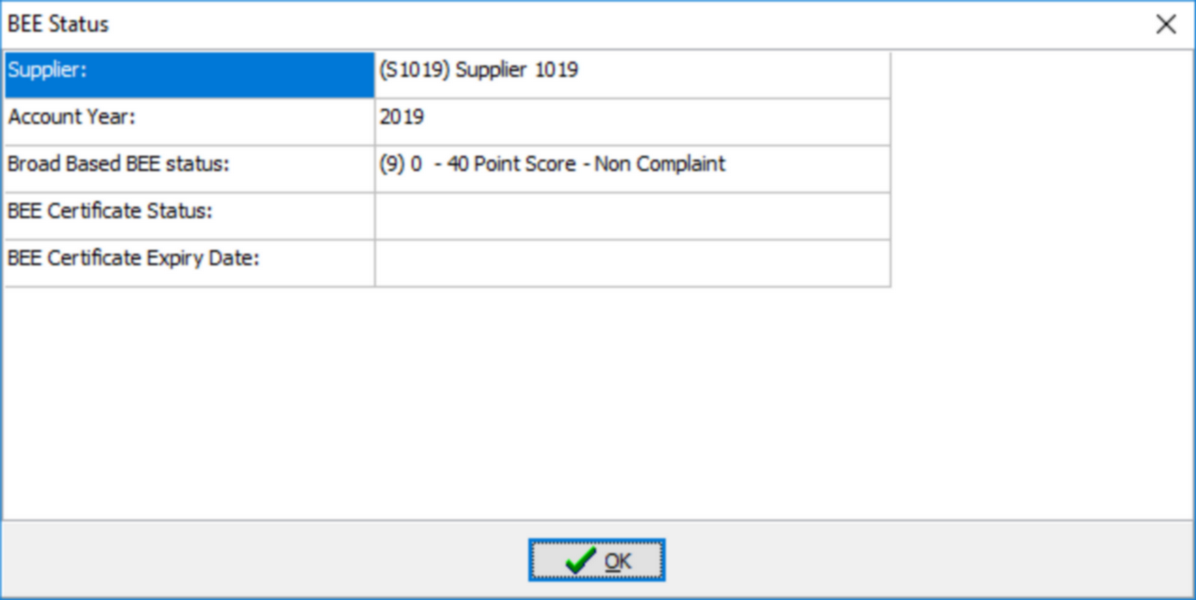
The ![]() button allows you to view the selected supplier's BEE information.
button allows you to view the selected supplier's BEE information.
Once everything has been captured, click on the ![]() button to save the requisition and forward for approval.
button to save the requisition and forward for approval.
Keep the requisition number for reference purposes.

Request for Quote (RFQ) Screen:
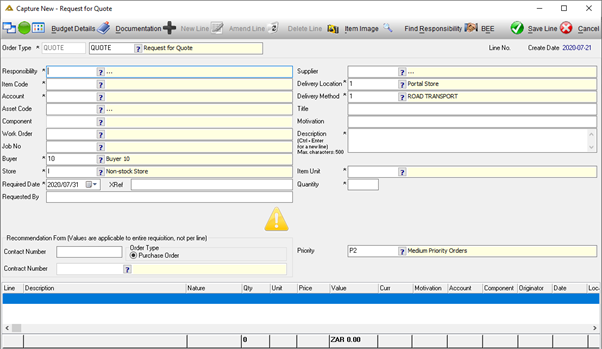
Once everything has been captured, click on the ![]() button to save the request for quote. Multiple currencies can be captured in one RFQ. Each line can have its own currency. When the RFQ is finalised and sent for approval, it will split into 2 or more requisitions (depending on how many different currencies have been captured) before routing for approval.
button to save the request for quote. Multiple currencies can be captured in one RFQ. Each line can have its own currency. When the RFQ is finalised and sent for approval, it will split into 2 or more requisitions (depending on how many different currencies have been captured) before routing for approval.
Note that this depends on your specific Workflow set up – it could be that the RFQ will first route to the buyer to obtain quotes and then be sent for financial approval.
Once the supervisor has approved the RFQ, the requisition is sent to the selected buyer to gather quotes.
Click the Supplier Selection tab to view the RFQs processed by buyers, awaiting supplier selection:
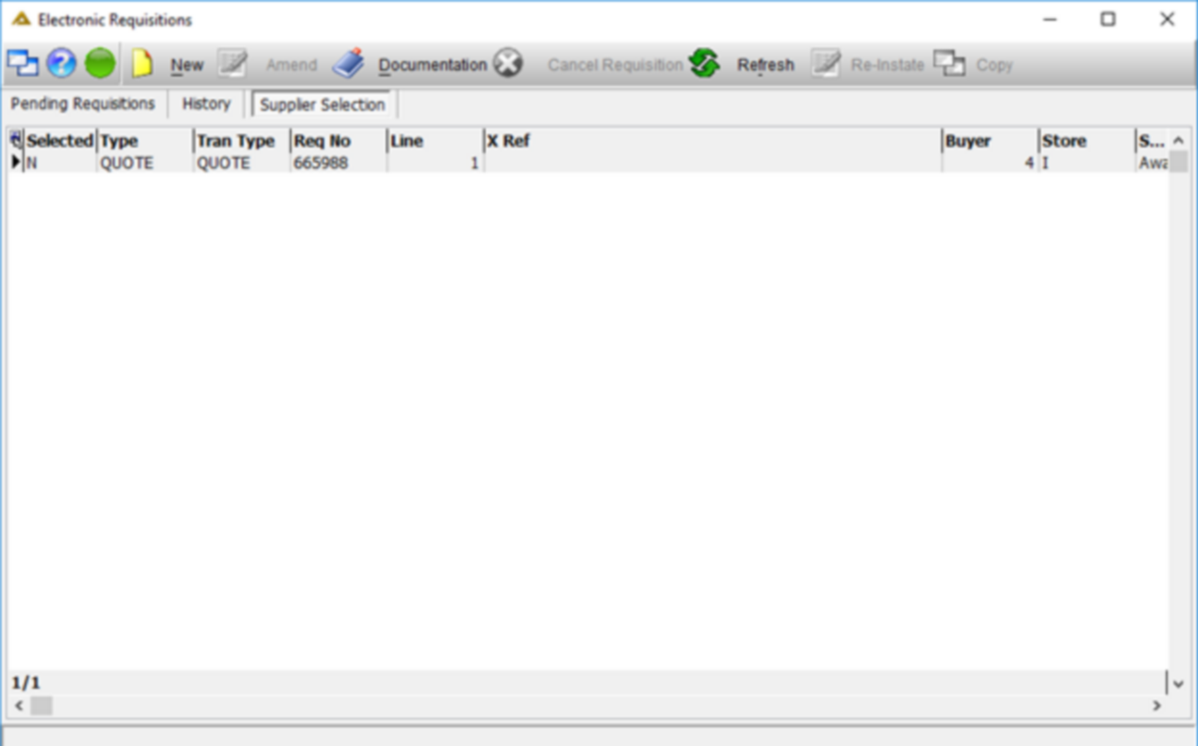
Double-click the requisition in the grid for which the supplier needs to be confirmed.
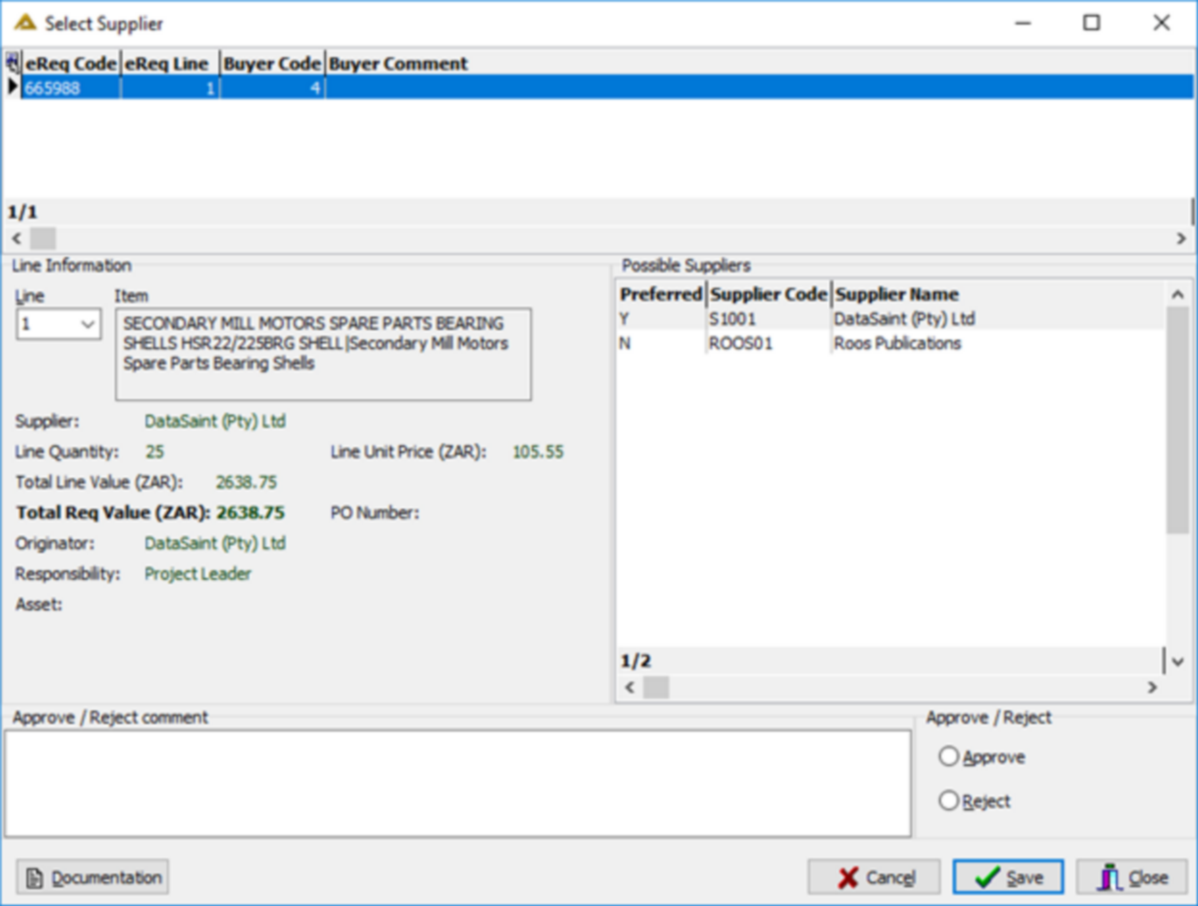
Where applicable, provision for import duties will be displayed.
To approve, select the Approve radio button. Before selecting the Reject radio button, enter the reason for rejection. When rejected, the RFQ will route back to the buyer to either get new quotes or change the preferred supplier (from where the buyer will send it back to the originator to confirm the new preferred supplier). If approved, the requisition will route for further approval.
Click ![]() to process the supplier selection.
to process the supplier selection.
The requisition can be cancelled completely by clicking on the ![]() button.
button.
Service Requisition Screen:
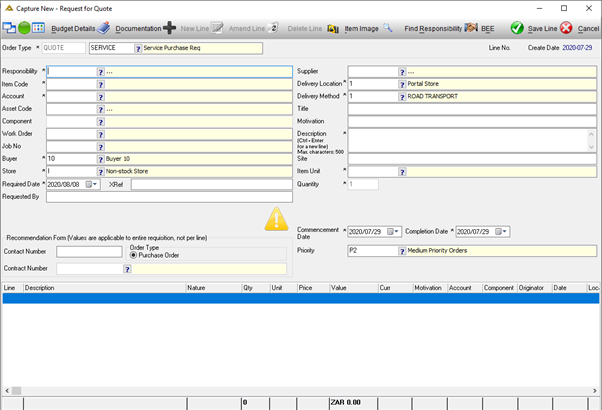
Stores Issue Requisition Capture Screen:
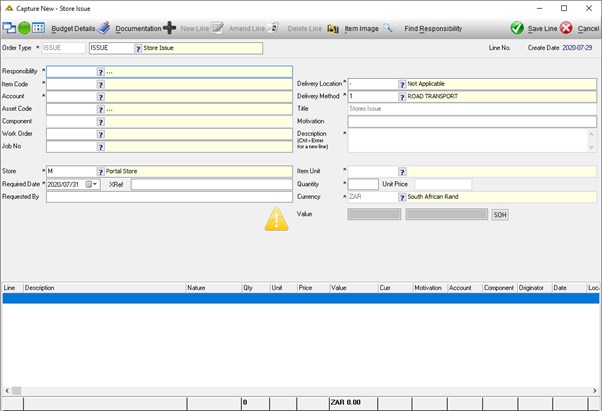
Client set up and requirements will determine if one or more issue type will be available in the Order Type picker.
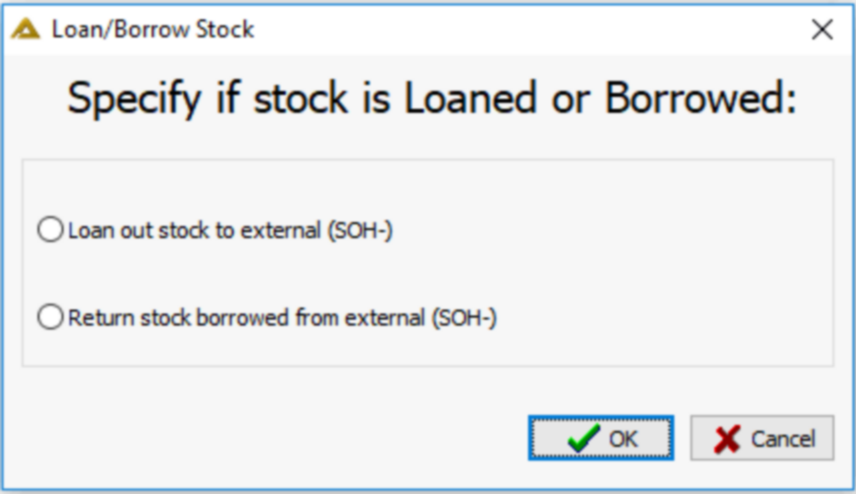
The Stores Issue option has transaction types for items loaned out and in from one company to another. If you select this transaction type the following screen will be displayed:
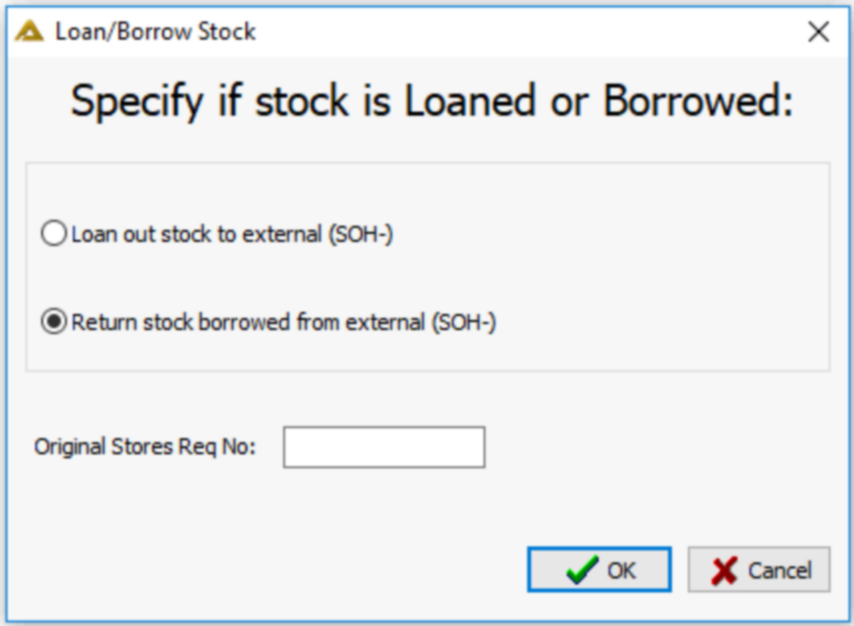
If you select the Return stock borrowed from external option, you will have to supply the Original Stores Requisition Number from when the items were taken into stock:
Continue to capture the requisition as normal.
Amend, Add Line or Delete:
On the Pending Requisitions tab, click on the top left options ![]() button in the header of the grid to activate search / filter options.
button in the header of the grid to activate search / filter options.
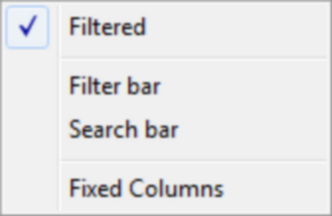
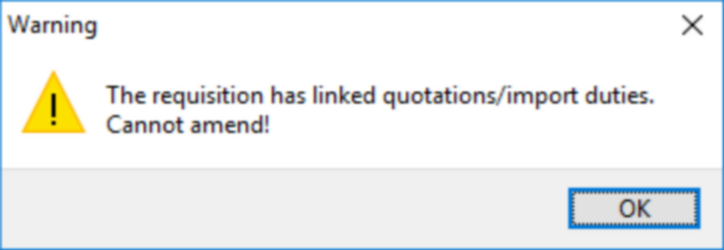
Select the requisition you wish to amend and click on the ![]() button. Only certain requisitions will be editable. Requisitions with linked quotations/import duties will not be available for amendment.
button. Only certain requisitions will be editable. Requisitions with linked quotations/import duties will not be available for amendment.
The data of the first / only line will be populated automatically.
Should you wish to add a new line, you can click on the ![]() button and enter the information as required. Click on the
button and enter the information as required. Click on the ![]() button to save the changes.
button to save the changes.
If you wish to amend a line, select the line from the grid and click on the ![]() button. Change the data as required and click on the
button. Change the data as required and click on the ![]() icon to continue.
icon to continue.
If you want to delete a line, select the line from the grid and click on the ![]() button.
button.
Once the required changes have been made, click on the ![]() button to send for approval.
button to send for approval.
Cancel:
To cancel an existing requisition, select the line item from the Pending Requisitions tab:
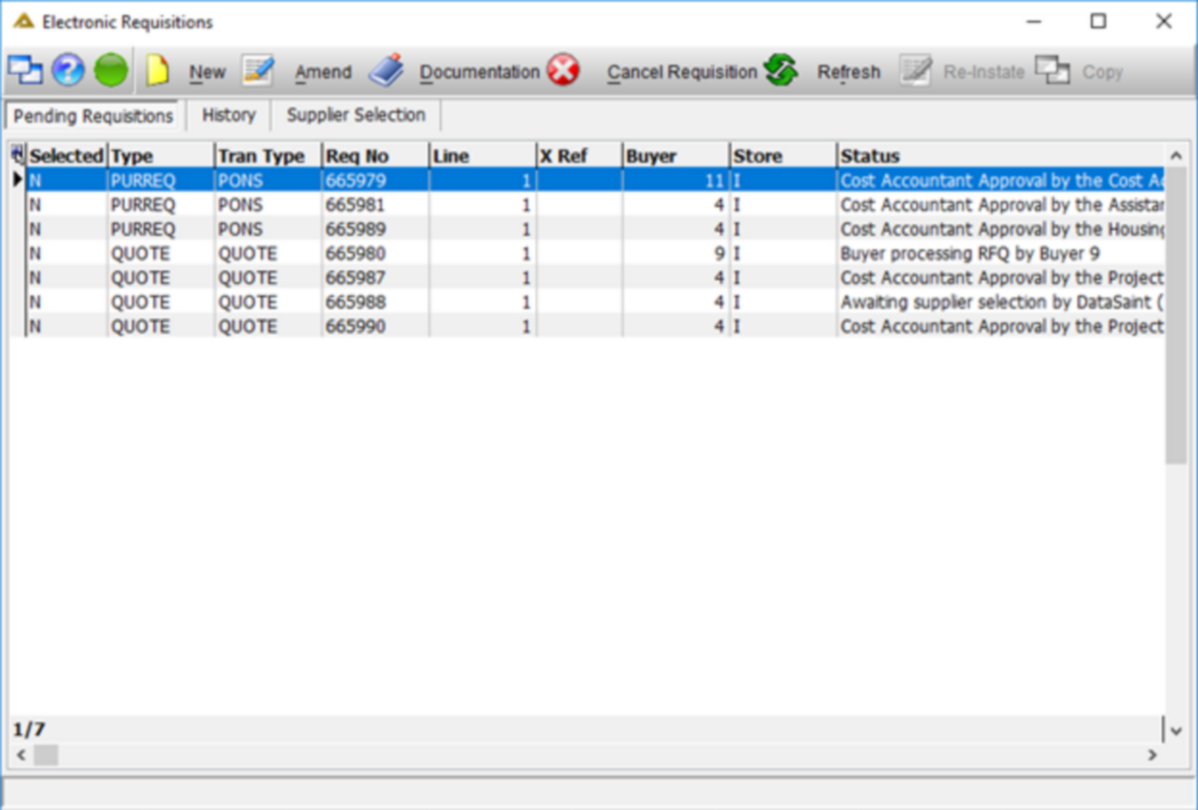
Click on the ![]() button.
button.
Reinstate:
To Reinstate a previously cancelled or rejected requisition, go to the History tab and select the line you wish to reinstate:
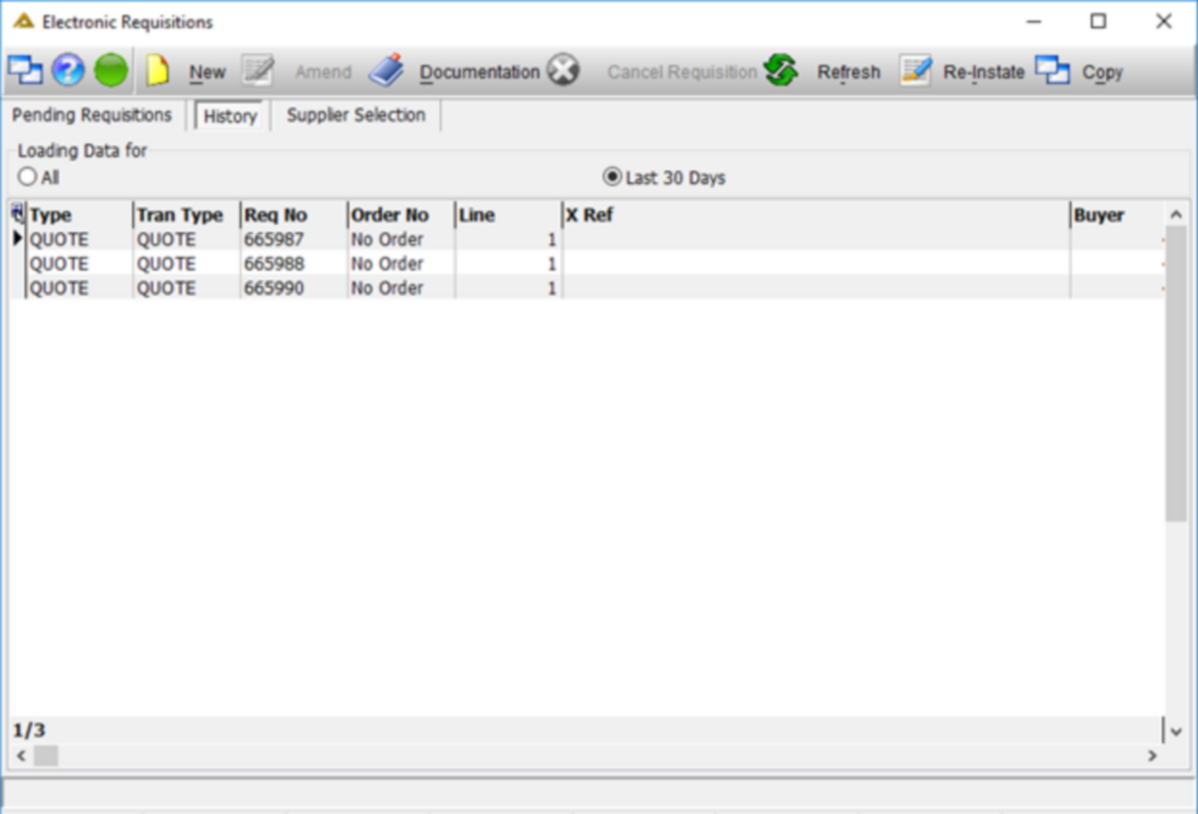
Click on the ![]() button and amend the information or attach additional documentation to be sent for approval. A new e-Req number is assigned to the re-instated requisition.
button and amend the information or attach additional documentation to be sent for approval. A new e-Req number is assigned to the re-instated requisition.
Copy:
To copy an existing requisition, go to the history tab and select the requisition you wish to copy:
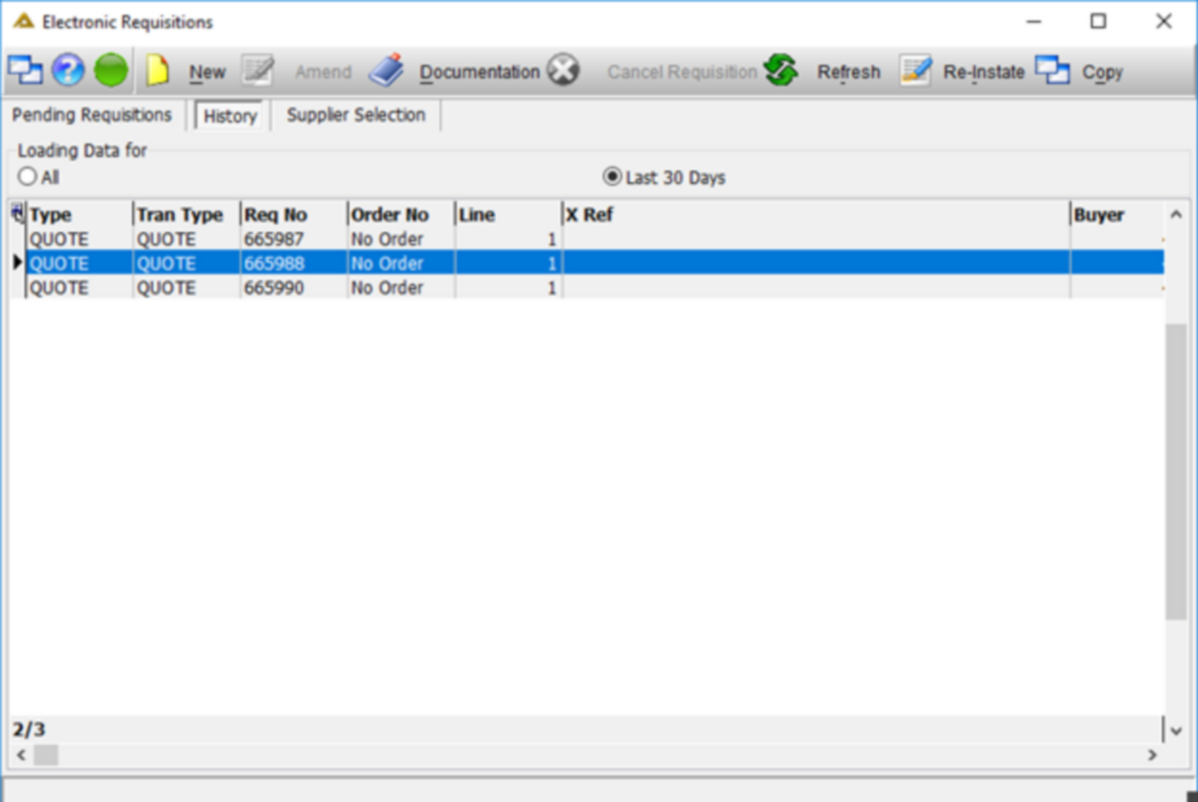
Click on the ![]() button and amend the information or attach additional documentation to be sent for approval. A new e-Req number is assigned to the re-instated requisition.
button and amend the information or attach additional documentation to be sent for approval. A new e-Req number is assigned to the re-instated requisition.
e-Requisition Types
Requisition Type |
Order Type |
Description |
PURREQ |
BREAKDOWN |
Breakdown |
|
PONC |
Purchase Order Non-Stock Contract |
|
PONR |
Repair Non-Stock with Serial Number |
|
PONS |
Normal Purchase Requisition |
|
PONX |
Repair Non-Stock with no Serial Number |
|
PROJ |
Project Orders |
|
PROJSERV |
Project Service Orders |
|
REPAIR |
On Site Repair Requisitions |
|
SERVICE |
Service Request |
QUOTE |
QUOTE |
Request for quote |
|
SERVICE |
Service Purchase Requisition |
SERVICE |
SERVICE |
Service Purchase Requisition |
ISSUE |
CLOAN |
Credit Stock Loaned Out |
|
ISSUE |
Store Issue |
|
LOAN |
Stock Loaned Out |
EPR |
Q001 |
General Electric Payment Request |
|
Q002 |
Travel Advances |
|
Q003 |
Supplier Advance Payments |